
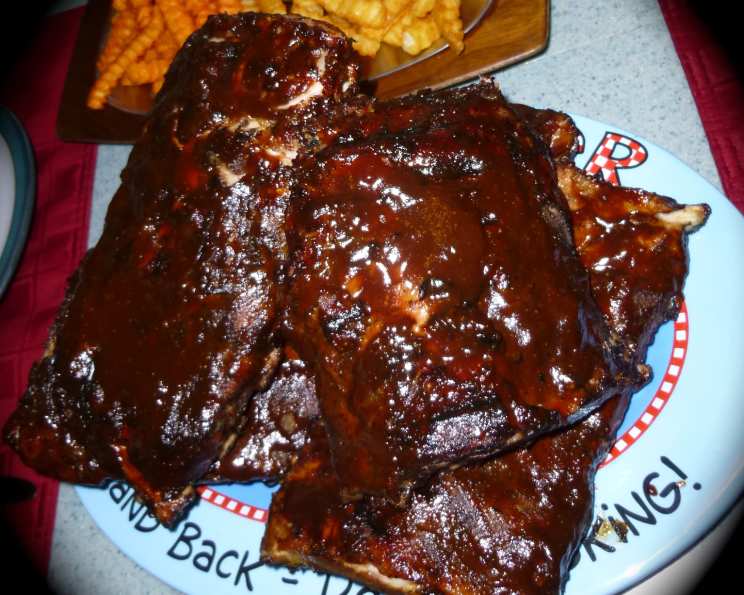
Fabulous Tender Pork Ribs – Sous Vide Style
I’ll never forget the first time I tasted truly fall-off-the-bone ribs. It was at a small, unassuming barbecue joint in Austin, Texas. The aroma of smoky wood and sweet barbecue sauce hung heavy in the air, and the anticipation was almost unbearable. The ribs arrived, glistening and impossibly tender. One bite, and I was hooked. The meat practically melted in my mouth, a symphony of smoky, savory, and sweet flavors. It was a revelation, and it ignited a lifelong quest to recreate that perfect rib experience in my own kitchen. Now, with the sous vide method, achieving that level of tenderness and flavor is within everyone’s reach.
Recipe Overview
- Prep Time: 30 minutes
- Cook Time: 24-48 hours
- Total Time: 24 hours 30 minutes – 48 hours 30 minutes
- Servings: 4-6
- Yield: 2 racks of ribs
- Dietary Type: Varies based on BBQ Sauce (typically Gluten-Free, Dairy-Free)
Ingredients
- 2 pork rib racks, trimmed and cut into sections
- 1/3 cup seasoning rub (see recipe below)
- 2 cups barbecue sauce, use your favorite
Rib Rub Seasoning (Courtesy of SarasotaCook):
- 1 tablespoon paprika
- 1 tablespoon cumin
- 1 tablespoon chili powder
- 1 tablespoon dried oregano
- 1 tablespoon fresh ground black pepper
- 1 tablespoon kosher salt
- 1 tablespoon garlic powder
- 1 tablespoon onion powder
Equipment Needed
- Sous Vide System
- Vacuum Sealer
- Large pot or container for water bath
- Grill (gas or charcoal)
Instructions
-
Preheat your Sous Vide Supreme (or other sous vide immersion circulator) to 138°F (57°C). You can start this step a little early, as the temperature will drop slightly when you add the ribs, but it will quickly recover.
-
Prepare the Rib Rub: Combine all the dry spice ingredients listed under “Rib Rub Seasoning” in a small bowl. Mix well to ensure the spices are evenly distributed. This recipe makes more rub than you’ll need for the ribs, so feel free to quadruple the recipe and store the extra in an airtight container for future use.
-
Cut the Ribs: Cut each rack of ribs into sections, typically containing 3-4 bones per section. This makes them easier to handle and ensures even cooking.
-
Season the Ribs: Generously season both sides of each rib section with the prepared rub mixture. There’s no need to overdo it – a light to moderate dusting is sufficient, as the sous vide method intensifies the flavors. Using your hands, pat the spices into the ribs to help them adhere.
-
Vacuum Seal the Ribs: Place each section of ribs into an individual vacuum seal bag. Remove all the air from the bag using your vacuum sealer and seal tightly. Ensure there are no wrinkles or folds in the bag that could compromise the seal. If you need to, you can arrange rib sections side-by-side in larger bags; just make sure not to stack the rib sections, as this will prevent even cooking.
Important Note: It’s crucial to remove all the air from the bags to ensure they are fully submerged during cooking. Proper submersion is essential for even and safe cooking.
-
Sous Vide Cooking: Once the sous vide water bath has reached 138°F (57°C), carefully place the vacuum-sealed bags of ribs into the water bath. If you have a rack designed for your sous vide container, use it to keep the bags separated. Otherwise, ensure the bags are not nesting or overlapping, allowing water to circulate freely between each bag.
-
Cook for 24-48 Hours: Submerge the pouch(es) completely in the water oven and cook for a minimum of 24 hours and up to a maximum of 48 hours. Don’t worry about overcooking them after 24 hours – the consistent temperature of the sous vide prevents that!
-
Cool (Optional): At this point, the ribs are fully cooked. You have two options: you can either proceed to finish them immediately, or you can cool and refrigerate them for several days, or even freeze them for longer storage. If refrigerating, bring them to room temperature before grilling. Be aware that warming the ribs on the grill will take a bit longer if they are cold from the refrigerator.
-
Prepare the Grill: Fire up your grill! Whether you’re using a gas or charcoal grill, preheat it to medium-high heat.
-
Remove from Pouches: Remove the pouches of ribs from the water bath. Carefully cut open the bags and discard the cooking liquid.
-
Sear the Ribs: Place the ribs on the preheated grill and sear the surface for about 1-2 minutes per side, creating a nice crust and adding some smoky flavor. Alternatively, you can sear them under the broiler in your oven.
-
Sauce and Caramelize: Generously slather your favorite barbecue sauce over the ribs. Continue grilling, turning and basting with sauce, until the sauce is caramelized and sticky. This usually takes another few minutes per side.
-
Serve and Enjoy: Remove the ribs from the grill and serve immediately. Enjoy the fall-off-the-bone tenderness and incredible flavor!
Expert Tips & Tricks
- Don’t overcrowd the bags: When vacuum sealing, ensure the ribs are arranged in a single layer to promote even cooking.
- Experiment with the rub: Feel free to adjust the spices in the rub to suit your personal taste. Add a pinch of cayenne pepper for heat, or a touch of brown sugar for extra sweetness.
- Consider a cold water bath: To rapidly cool the ribs for later use, submerge the sealed bags in an ice bath for about an hour. This will safely bring down the temperature and prevent bacterial growth.
- Smoke them! For even more smoky flavor, place the sous vide ribs on a smoker for the last hour of cooking. This adds a wonderful depth of flavor that complements the tenderness achieved through sous vide.
Serving & Storage Suggestions
Serve these fabulous sous vide ribs hot off the grill with your favorite barbecue sides, such as coleslaw, baked beans, and cornbread. Leftover ribs can be stored in an airtight container in the refrigerator for up to 3-4 days. For longer storage, freeze them for up to 2-3 months. To reheat, thaw completely in the refrigerator, then warm in a low oven (250°F/120°C) until heated through, or grill them briefly, basting with barbecue sauce.
Nutritional Information
| Nutrient | Amount per Serving | % Daily Value |
|---|---|---|
| Calories | 223.8 kcal | N/A |
| Calories from Fat | 11 g | 5% |
| Total Fat | 1.3 g | 2% |
| Saturated Fat | 0.1 g | 0% |
| Cholesterol | 0 mg | 0% |
| Sodium | 2842.6 mg | 118% |
| Total Carbohydrate | 52.6 g | 17% |
| Dietary Fiber | 3.4 g | 13% |
| Sugars | 33.1 g | 132% |
| Protein | 1.6 g | 3% |
Note: Nutritional information is an estimate and may vary based on specific ingredients and portion sizes.
Variations & Substitutions
- Spicy Ribs: Add a pinch of cayenne pepper or a dash of hot sauce to the rub for a spicy kick.
- Honey Garlic Ribs: Substitute the barbecue sauce with a mixture of honey, garlic, soy sauce, and ginger for an Asian-inspired flavor.
- Dry Rub Only: Skip the barbecue sauce altogether and serve the ribs with just the dry rub for a more intense spice flavor.
- Different cuts of pork: While this recipe focuses on ribs, you can apply the same sous vide method to other cuts of pork, such as pork shoulder or pork belly, adjusting the cooking time accordingly.
- Alternative Sweeteners: Instead of traditional BBQ sauce which is often high in sugar, experiment with sugar-free alternatives using natural sweeteners like stevia or monk fruit.
FAQs (Frequently Asked Questions)
Q: Can I use frozen ribs for this recipe?
A: Yes, you can use frozen ribs. Just ensure they are fully thawed before seasoning and vacuum sealing. You may need to add a bit more cooking time to the sous vide process.
Q: Is it safe to cook ribs for 48 hours in a sous vide?
A: Yes, it is perfectly safe. The consistent temperature of 138°F (57°C) ensures that the ribs are cooked safely and evenly throughout the entire cooking process.
Q: What if my vacuum seal bag leaks during cooking?
A: If you notice a leak, immediately remove the ribs from the water bath, re-seal them in a new bag, and return them to the water bath to continue cooking.
Q: Can I use a regular pot instead of a sous vide container?
A: While a dedicated sous vide container is ideal, you can use a regular pot as long as it is large enough to fully submerge the ribs and you can maintain a consistent temperature using your sous vide immersion circulator.
Q: What’s the best way to get a good sear on the ribs after sous vide?
A: Ensure your grill is very hot before searing. Pat the ribs dry with paper towels to remove excess moisture, and use a high-heat oil or cooking spray to prevent sticking. A quick sear on each side is all you need.
Final Thoughts
These fabulous sous vide pork ribs are a game-changer. The technique guarantees unbelievably tender, flavorful ribs every time. Don’t be intimidated by the long cooking time; the hands-on effort is minimal, and the results are well worth it. So, fire up your sous vide, gather your ingredients, and prepare to experience rib perfection. I encourage you to try this recipe and share your feedback. Consider pairing these ribs with a crisp, dry coleslaw and a refreshing craft beer for a truly unforgettable meal. Happy cooking!