
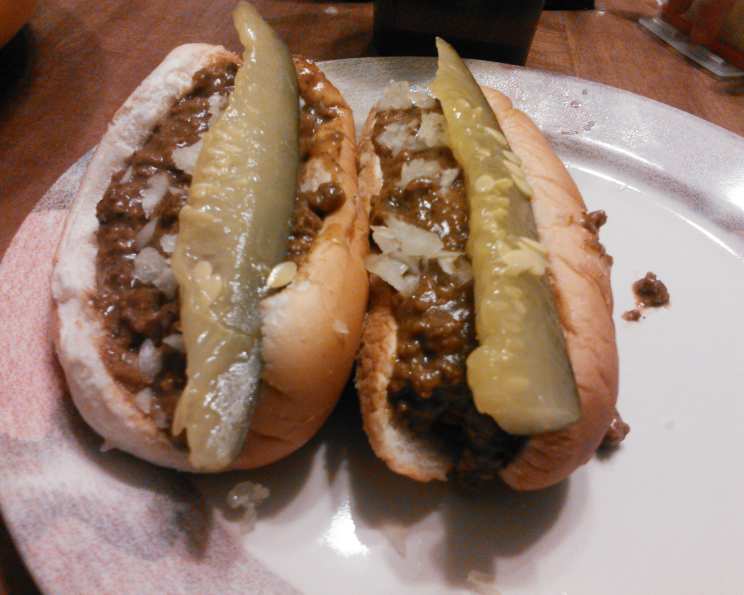
Recreating a Legend: The Famous Butler Hot Dog Shoppe Chili Sauce
I still remember the first time I tasted it. I was a kid, barely tall enough to see over the counter at the Butler Hot Dog Shoppe, and the aroma alone was intoxicating. The slightly sweet, savory, and subtly spicy scent of that chili sauce clung to everything, from the steamed buns to the paper wrappers. That first bite, a simple hot dog topped with their signature chili, onion, and pickle, was a revelation. It wasn’t just lunch; it was an experience, a taste of local history, and a culinary memory that has stayed with me ever since. Today, I’m excited to share my take on recreating that iconic flavor in your own kitchen.
Recipe Overview
- Prep Time: 20 minutes
- Cook Time: 2 hours 30 minutes
- Total Time: 2 hours 50 minutes
- Yields: Approximately 1 gallon
- Serves: Approximately 128 (as a hot dog topping)
- Dietary Type: Not specified (can be modified)
Ingredients
- 3 lbs ground beef
- 1 1/2 cups diced onions
- 1/8 teaspoon salt
- 1 tablespoon chili powder
- 1 1/2 tablespoons paprika
- 1/2 tablespoon ground cloves
- 1 tablespoon nutmeg
- 1 tablespoon black pepper
- 1 tablespoon sugar
- 14 ounces ketchup
- 6 cups water
- 1 cup water (for slurry)
- 1 cup flour (for slurry), mixed well so it’s not lumpy
Ingredient Notes:
- Ground Beef: Using a leaner ground beef will reduce the amount of fat you need to drain off. An 85/15 blend works well.
- Ketchup: The quality of the ketchup will affect the final flavor. Use your favorite brand.
- Flour: All-purpose flour is recommended. For a gluten-free version, use a gluten-free all-purpose flour blend.
Equipment Needed
- 4-quart saucepan (or larger)
- Mixing spoon or spatula
- Blender (optional, but recommended)
Instructions
-
Brown the ground beef: In your 4-quart saucepan, brown the ground beef over medium-high heat. As it cooks, use a spoon or spatula to chop the beef into smaller pieces.
-
Drain Excess Grease: Once the ground beef is fully browned, carefully drain off any excess grease from the pan. This step is crucial to preventing a greasy final product.
-
Incorporate the Onions and Salt: Add the diced onions and salt to the browned beef. Continue to cook until the onions are translucent, approximately 5-7 minutes.
-
Add Spices: Here’s where the magic happens. Add each of the following spices one at a time, stirring well after each addition to ensure they are evenly distributed and bloom in the heat: chili powder, paprika, ground cloves, nutmeg, black pepper, and sugar. After all the spices are incorporated, the mixture should have a pasty consistency. This blooming process is essential for maximizing the flavor of the spices.
-
Stir in Ketchup: Add the ketchup to the spiced beef mixture, stirring until well combined.
-
Add Water and Simmer: Pour in the 6 cups of water, stirring thoroughly to incorporate all the ingredients.
-
Bring to a Boil, then Simmer: Bring the mixture to a boil over medium-high heat, stirring constantly to prevent sticking. Once boiling, reduce the heat to low and simmer for 2 hours, stirring occasionally to prevent burning.
-
Prepare Flour Slurry: While the sauce simmers, prepare the flour slurry. In a separate bowl (or better yet, a blender), combine the remaining 1 cup of water and 1 cup of flour. Mix very well until there are no lumps. A blender ensures a perfectly smooth slurry, which is vital for a smooth final sauce.
-
Incorporate Flour Slurry: After the sauce has simmered for 2 hours, slowly pour in the flour and water mixture. Stir constantly as you add it to prevent clumping. If you prepared the slurry in a blender, this step will be much easier.
-
Simmer and Thicken: Continue to simmer the chili sauce for another 30 minutes, stirring frequently, until it has thickened to your desired consistency. The sauce will thicken further as it cools.
-
Cool and Serve: Remove the chili sauce from the heat and let it cool slightly before serving.
Expert Tips & Tricks
- Spice Adjustment: Feel free to adjust the spices to your liking. If you prefer a spicier chili, add a pinch of cayenne pepper or a dash of hot sauce.
- Beef Browning: Ensure the beef browns well initially, as this step contributes significantly to the flavor depth of the chili. Don’t overcrowd the pan; work in batches if necessary.
- Smooth Slurry: A smooth flour slurry is essential to prevent lumps in the final product. Using a blender is the easiest way to achieve this. If you don’t have a blender, whisk vigorously in a bowl until completely smooth.
- Flavor Development: The long simmering time allows the flavors to meld together beautifully. Don’t rush this step! The longer it simmers, the richer the flavor will be.
- Make-Ahead Tip: The chili sauce can be made ahead of time and stored in the refrigerator for several days. The flavors will actually improve overnight.
Serving & Storage Suggestions
Serve the chili sauce hot on grilled hot dogs with your favorite toppings, such as diced onions and sweet pickle relish. It’s also delicious on french fries, nachos, or as a topping for baked potatoes.
To store leftovers, allow the chili sauce to cool completely before transferring it to an airtight container. It can be stored in the refrigerator for up to 5 days or in the freezer for up to 3 months. To reheat, thaw in the refrigerator overnight if frozen, then gently reheat on the stovetop over low heat, stirring occasionally, until heated through. You can also microwave it in short intervals, stirring in between, until heated through.
Nutritional Information
(Estimates based on using 85/15 ground beef and standard ketchup)
| Nutrient | Amount per Serving (approx. 1 tbsp) | % Daily Value* |
|---|---|---|
| Calories | 35 kcal | 2% |
| Total Fat | 2 g | 3% |
| Saturated Fat | 1 g | 5% |
| Cholesterol | 5 mg | 2% |
| Sodium | 60 mg | 3% |
| Total Carbohydrate | 3 g | 1% |
| Dietary Fiber | 0 g | 0% |
| Sugars | 2 g | |
| Protein | 1 g | 2% |
*Based on a 2,000 calorie diet.
Variations & Substitutions
- Vegetarian/Vegan Option: Substitute the ground beef with a plant-based ground meat alternative or cooked lentils. Ensure to adjust seasoning as needed.
- Spicier Version: Add a pinch of cayenne pepper, a dash of hot sauce, or finely chopped jalapeños to the mixture during the simmering process.
- Sweeter Version: Add an extra tablespoon of sugar or a drizzle of honey to enhance the sweetness.
- Smokier Version: Add a teaspoon of smoked paprika or a dash of liquid smoke for a smoky flavor.
- Different Meats: Experiment with using ground turkey or ground pork instead of ground beef.
FAQs (Frequently Asked Questions)
Q: Can I make this chili sauce in a slow cooker?
A: Yes, you can! Brown the ground beef and onions on the stovetop as directed, then transfer everything to a slow cooker. Cook on low for 6-8 hours or on high for 3-4 hours. Stir in the flour slurry during the last hour of cooking.
Q: What if my chili sauce is too thick?
A: If your chili sauce becomes too thick, simply add a little more water until it reaches your desired consistency.
Q: Can I freeze the chili sauce?
A: Absolutely! Allow the chili sauce to cool completely before transferring it to an airtight, freezer-safe container. It can be frozen for up to 3 months.
Q: What’s the best way to reheat the chili sauce?
A: Thaw it in the refrigerator overnight, then gently reheat on the stovetop over low heat, stirring occasionally. You can also microwave it in short intervals, stirring in between.
Q: Can I use canned onions instead of fresh ones?
A: While fresh onions provide the best flavor, you can use canned onions in a pinch. Be sure to drain them well before adding them to the recipe. You might consider sautéing them briefly before adding them to the beef, to bring out their flavor.
Final Thoughts
I hope this recipe helps you recreate the nostalgic flavors of the famous Butler Hot Dog Shoppe Chili Sauce. Whether you’re a longtime fan or just discovering this delicious condiment, I encourage you to give it a try. Feel free to experiment with the spices and adjust them to your personal preference. Don’t hesitate to pair it with your favorite hot dog toppings – some diced onion and sweet pickle relish never hurt! Most importantly, have fun in the kitchen and enjoy the delicious results. Let me know what you think!