
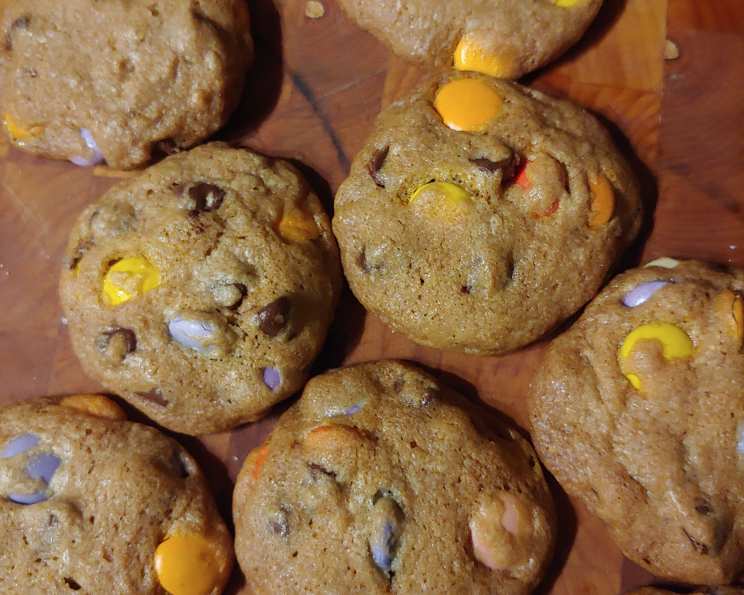
Famous Smartie Cookies: A Childhood Classic, Elevated
The scent of baking cookies has always been synonymous with comfort and home for me. I vividly remember being knee-high to a kitchen counter, perched on a stool, carefully unwrapping Smarties candies to press into cookie dough. The vibrant colours transformed ordinary cookies into miniature works of art, and the sweet, slightly tangy flavour of the Smarties created a delightful counterpoint to the rich, buttery dough. These weren’t just cookies; they were edible rainbows of pure, unadulterated joy, and the memory of sharing them with family still warms my heart today.
Recipe Overview
- Prep Time: 35 minutes
- Cook Time: 18-24 minutes
- Total Time: 53-59 minutes
- Yields: 12 big cookies
- Serves: 6-12
- Dietary Type: Vegetarian
Ingredients
- ½ cup (1 stick) butter or ½ cup Crisco
- ¾ cup brown sugar
- 1 free-range egg
- 1 teaspoon vanilla extract
- 1 cup all-purpose flour
- ½ teaspoon baking soda
- 1 pinch salt (optional)
- 1 cup milk chocolate chips
- 1 cup Smarties candies (optional, or just use 2 cups milk chocolate chips) or 1 cup M&M’s plain chocolate candy (optional, or just use 2 cups milk chocolate chips)
Equipment Needed
- Mixing bowl
- Electric mixer (handheld or stand)
- Measuring cups and spoons
- Cookie sheet
- Parchment paper or silicone baking mat (optional, for easy cleanup)
- Wire cooling rack
Instructions
-
Preheat your oven to 325 degrees Fahrenheit (160 degrees Celsius). Ensure your oven rack is positioned in the center for even baking.
-
In a separate bowl, whisk together the dry ingredients: flour, baking soda, and salt. The salt is optional, but a pinch will enhance the sweetness and chocolate notes. Whisking ensures the baking soda is evenly distributed, which is crucial for a good rise.
-
In a mixing bowl, using an electric mixer, beat the butter (or Crisco) and brown sugar together. The key here is to cream the butter and sugar until light and fluffy. This process incorporates air into the mixture, resulting in a tender cookie. Beat until the mixture is well creamed, meaning you should no longer see any yellow bits of butter; the mixture should appear pale and fluffy. This usually takes 3-5 minutes on medium speed.
-
Once the butter and sugar are creamed, mix in the egg and vanilla extract. Beat the wet ingredients together until fully incorporated. Avoid overmixing at this stage; just combine until smooth.
-
Gradually add the dry ingredients to the wet ingredients. Add the flour mixture in 2-3 additions, mixing on low speed after each addition. Mix until just combined; do not overmix, as this will develop the gluten in the flour and result in tough cookies.
-
When the dough is well combined, gently fold in the chocolate chips and Smarties (or M&Ms). Distribute them evenly throughout the dough. If you’re omitting the Smarties or M&Ms, simply use 2 cups of milk chocolate chips instead.
-
Cover the bowl with plastic wrap and let the dough chill in the refrigerator for a minimum of 30 minutes. Chilling the dough prevents the cookies from spreading too thin during baking and allows the flavors to meld together. You can chill the dough for longer, even overnight.
-
Once chilled, use your hands to form balls of dough. The size of the balls will determine the size of your finished cookies. I recommend using about 2 tablespoons of dough per cookie for a nice, large cookie. Place the dough balls on a cookie sheet lined with parchment paper or a silicone baking mat. The parchment paper helps prevent sticking and makes cleanup easier. Leave about 2 inches between each cookie to allow for spreading.
-
Bake at 325 degrees Fahrenheit (160 degrees Celsius) for approximately 18-24 minutes, depending on the size of the cookies. Keep a close eye on them; the cookies are done when the edges are golden brown and the centers are still slightly soft. Baking time can vary depending on your oven, so start checking for doneness around 18 minutes.
-
When done, remove the cookie sheet from the oven and let the cookies sit on the cookie sheet for 5 minutes. This allows them to firm up slightly before transferring them.
-
Transfer the cookies to a wire cooling rack to cool completely.
-
Enjoy your Famous Smartie Cookies! They are best enjoyed slightly warm, with a glass of cold milk.
Expert Tips & Tricks
- For extra chewy cookies, substitute melted butter for softened butter.
- If your cookies are spreading too thin, try chilling the dough for a longer period. You can also add a tablespoon or two of flour to the dough.
- To prevent the Smarties from melting too much, press them into the cookies after they come out of the oven, while they are still warm and soft.
- Use a cookie scoop for uniformly sized cookies.
- For a richer flavor, use a combination of milk chocolate chips and dark chocolate chips.
- If you don’t have brown sugar on hand, you can make your own by combining 1 cup of granulated sugar with 1 tablespoon of molasses.
Serving & Storage Suggestions
These cookies are delicious served warm or at room temperature. They pair perfectly with a cold glass of milk, a scoop of vanilla ice cream, or a cup of hot coffee.
To store the cookies, place them in an airtight container at room temperature. They will stay fresh for up to a week, although they are usually devoured long before then! You can also freeze the cookies for longer storage. To freeze, place the cooled cookies in a freezer-safe container or bag and freeze for up to 3 months. Thaw the cookies at room temperature before serving. To reheat frozen cookies, bake in a preheated oven at 300 degrees Fahrenheit for 5-10 minutes.
Nutritional Information
| Nutrient | Amount per Serving | % Daily Value |
|---|---|---|
| Calories | 650 kcal | 33% |
| Total Fat | 32g | 49% |
| Saturated Fat | 20g | 98% |
| Cholesterol | 83mg | 27% |
| Sodium | 303mg | 12% |
| Total Carbohydrate | 84g | 28% |
| Dietary Fiber | 3g | 9% |
| Sugars | 63g | 253% |
| Protein | 7g | 14% |
Note: Nutritional information is an estimate and may vary based on specific ingredients and portion sizes.
Variations & Substitutions
- Gluten-Free: Substitute a gluten-free all-purpose flour blend for the regular flour.
- Vegan: Replace the butter with vegan butter, the egg with an egg replacer (such as flax egg), and use vegan chocolate chips and Smarties (some brands are vegan, check the label).
- Peanut Butter: Add 1/2 cup of peanut butter to the wet ingredients for a peanut butter chocolate chip cookie.
- Different Candies: Experiment with different candies like crushed Oreos, chopped nuts, or dried fruit.
- Spice it up: Add 1/2 teaspoon of cinnamon or nutmeg to the dry ingredients for a warm, spiced cookie.
FAQs (Frequently Asked Questions)
Q: Why do I need to chill the dough?
A: Chilling the dough helps prevent the cookies from spreading too thin during baking and allows the flavors to meld together. It also makes the dough easier to handle.
Q: Can I use granulated sugar instead of brown sugar?
A: Brown sugar adds moisture and a slightly caramel-like flavor to the cookies. If you only have granulated sugar, you can use it, but the cookies will be slightly drier and less chewy.
Q: How do I know when the cookies are done?
A: The cookies are done when the edges are golden brown and the centers are still slightly soft. They will continue to firm up as they cool.
Q: Can I freeze the cookie dough?
A: Yes, you can freeze the cookie dough. Form the dough into balls and place them on a baking sheet lined with parchment paper. Freeze for 1-2 hours, then transfer the frozen dough balls to a freezer-safe container or bag. Bake from frozen, adding a few minutes to the baking time.
Q: My cookies are too flat. What did I do wrong?
A: There are several reasons why your cookies might be too flat. Make sure you are using the correct amount of flour, and that your baking soda is fresh. Also, avoid using melted butter, and be sure to chill the dough before baking.
Final Thoughts
These Famous Smartie Cookies are more than just a sweet treat; they are a nostalgic journey back to simpler times. I encourage you to give this recipe a try and create your own memories with it. Don’t be afraid to experiment with different variations and substitutions to make them your own. And most importantly, share them with the people you love. These cookies are best enjoyed with good company and lots of laughter. Happy baking!