
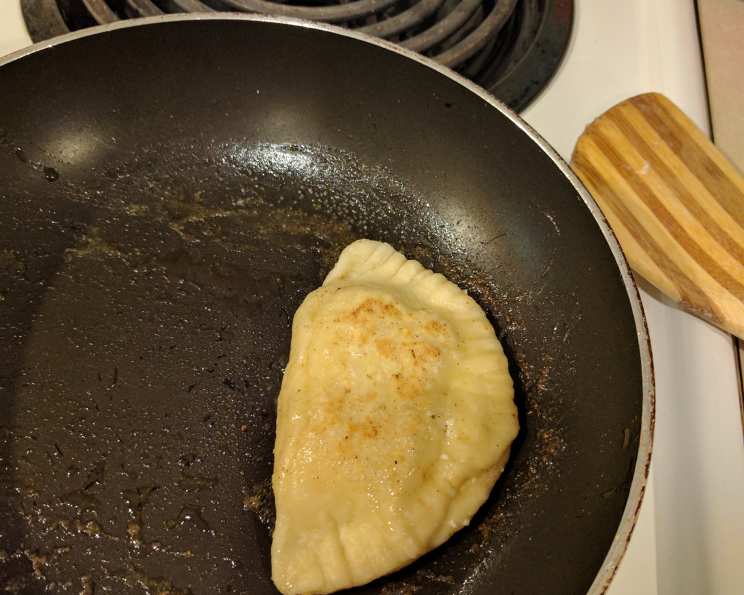
Farmers Cheese Pierogi: The Real Deal Here!!!
The scent of simmering dough and sweet cheese still transports me back to Babcia’s kitchen. Her nimble fingers would work magic, transforming simple ingredients into plump, comforting pierogi. We’d stand side-by-side, flour dusting our aprons as we carefully sealed each one, a silent promise of the deliciousness to come. Those pierogi weren’t just food; they were a taste of home, a tangible connection to family, and a lesson in love passed down through generations.
Recipe Overview
- Prep Time: 30 minutes
- Cook Time: 15 minutes
- Total Time: 45 minutes
- Servings: 4
- Yields: 1 dozen
- Dietary Type: Vegetarian
Ingredients
For the Pierogi Dough:
- 2 cups flour
- 1 egg, plus 1 egg yolk
- ½ teaspoon salt
- 1 teaspoon melted butter, no exceptions
- 2 tablespoons sour cream
For the Cheese Filling:
- 1 lb farmer cheese
- 1 egg, beaten
- 1 egg yolk
- ¼ cup powdered sugar
Equipment Needed
- Large pot
- Slotted spoon or strainer
- Mixing bowls
- Rolling pin
- Circle cutter (or a glass)
- Floured surface
Instructions
-
Prepare the Cheese Filling: In a mixing bowl, combine the farmer cheese, beaten egg, egg yolk, and powdered sugar. Mix thoroughly until well combined and smooth. Cover the bowl with plastic wrap and chill in the refrigerator while you prepare the dough. This allows the flavors to meld and the filling to firm up, making it easier to work with.
-
Make the Pierogi Dough: In a separate large mixing bowl, combine the flour, egg, egg yolk, and salt.
-
Add the melted butter (and I mean melted; this is important for dough consistency) and sour cream to the dry ingredients.
-
Mix all the dough ingredients together, first with a spoon or spatula, and then with your hands, until a shaggy dough forms.
-
Knead the dough on a lightly floured surface for about 5-7 minutes, until it becomes pliable and smooth. It should be elastic and easy to work with.
-
Let the dough rest for about 10 minutes. This allows the gluten to relax, making the dough easier to roll out. Cover the dough with a WARM bowl (I often warm a bowl under hot water and dry it well) to prevent it from drying out.
-
Divide the dough in half. Place one half back under the warm bowl while you work with the other. This prevents the dough from drying out while you’re working.
-
On a lightly floured surface, roll out one half of the dough until it’s thin, about 1/8 inch thick. The thinner the dough, the more delicate the pierogi will be.
-
Use a circle cutter (or a glass with a diameter of about 3 inches) to cut out circles from the rolled-out dough.
-
Place a spoonful of the cheese mixture (about 1-2 teaspoons) onto one side of each dough circle. Don’t overfill the pierogi, or they may burst during cooking.
-
Moisten the edges of each circle with water. This helps the dough to seal properly and prevents the filling from leaking out.
-
Fold the dough over to form a half-moon shape and press firmly to seal the edges. You can also crimp the edges with a fork for a decorative touch and to ensure a tight seal.
-
Repeat steps 8-12 with the remaining dough and filling.
-
Bring a large pot of water to a rolling boil.
-
Gently drop the pierogi into the boiling water, a few at a time, being careful not to overcrowd the pot.
-
Cook the pierogi for about 5 minutes, or until they float to the top and are cooked through. They should rise to the surface indicating that the dough is cooked.
-
Remove the pierogi from the water with a slotted spoon or strainer and drain well.
-
At this point, you can eat them as is, or pan-fry them in butter for a golden-brown crust.
-
To pan-fry, melt a generous amount of butter in a skillet over medium heat. Add the cooked pierogi and cook for about 2-3 minutes per side, until golden brown and slightly crispy.
-
Serve hot with a side of sour cream or applesauce.
Expert Tips & Tricks
- Dough Consistency is Key: If the dough is too dry, add a teaspoon of water at a time until it comes together. If it’s too sticky, add a little more flour.
- Preventing Bursting: Ensure the edges are sealed tightly to prevent the filling from leaking out during cooking. Don’t overfill!
- Freezing Pierogi: Cooked or uncooked pierogi can be frozen. Freeze them in a single layer on a baking sheet before transferring them to a freezer bag to prevent sticking.
- Flavor Boost: A pinch of vanilla extract or lemon zest in the cheese filling adds a delightful depth of flavor.
- Butter Browning: For an extra nutty flavor when pan-frying, let the butter brown slightly before adding the pierogi. Keep a close watch so it doesn’t burn!
Serving & Storage Suggestions
Serve the farmers cheese pierogi hot, either boiled or pan-fried. They are traditionally enjoyed with a dollop of sour cream, but applesauce or caramelized onions also make excellent accompaniments. Leftover pierogi can be stored in an airtight container in the refrigerator for up to 3 days. To reheat, pan-fry them in butter or microwave them until heated through. Frozen pierogi can be cooked directly from frozen, adding a few extra minutes to the cooking time.
Nutritional Information
| Nutrient | Amount per Serving | % Daily Value |
|---|---|---|
| Calories | 418.4 kcal | N/A |
| Calories from Fat | N/A | 16% |
| Total Fat | 7.5 g | 11% |
| Saturated Fat | 3.1 g | 15% |
| Cholesterol | 189.6 mg | 63% |
| Sodium | 717.3 mg | 29% |
| Total Carbohydrate | 63.3 g | 21% |
| Dietary Fiber | 1.7 g | 6% |
| Sugars | 9.9 g | N/A |
| Protein | 22.6 g | 45% |
Note: Percent Daily Values are based on a 2000 calorie diet. N/A means data not available for % Daily Value calculation in the original data.
Variations & Substitutions
- Potato and Cheese Pierogi: Substitute the farmer cheese filling with mashed potatoes and cheddar cheese for a savory variation. Sautéed onions can be added for extra flavor.
- Sweet Plum Pierogi: Fill the pierogi with pitted and chopped plums, a sprinkle of sugar, and a pinch of cinnamon for a delicious dessert.
- Gluten-Free Pierogi: Use a gluten-free flour blend to make the dough. Be sure to add a binder like xanthan gum to help with the elasticity.
- Savory Herb Dough: Add finely chopped fresh herbs, such as dill or chives, to the dough for a more complex flavor.
- Vegan Pierogi: Use a vegan sour cream alternative and substitute the egg with a flax egg (1 tablespoon flaxseed meal mixed with 3 tablespoons water, let sit for 5 minutes). Also, use vegan butter. For the filling, use a vegan farmer cheese alternative or a mixture of silken tofu and nutritional yeast for a cheesy flavor.
FAQs (Frequently Asked Questions)
Q: Why is it important to use melted butter in the dough?
A: Melted butter helps to create a more tender and pliable dough, making it easier to roll out and shape the pierogi.
Q: Can I freeze the pierogi before cooking them?
A: Yes, you can! Place the uncooked pierogi on a baking sheet in a single layer and freeze until solid. Then, transfer them to a freezer bag. Cook them directly from frozen, adding a few extra minutes to the boiling time.
Q: How do I prevent the pierogi from sticking together when boiling?
A: Make sure the water is at a rolling boil before adding the pierogi, and don’t overcrowd the pot. Gently stir them occasionally during cooking.
Q: What if my dough is too sticky to work with?
A: Add a little more flour, one tablespoon at a time, until the dough becomes easier to handle. Be careful not to add too much flour, as this can make the dough tough.
Q: Can I use a stand mixer to make the dough?
A: Yes, you can! Use the dough hook attachment and mix until the dough comes together into a smooth ball.
Final Thoughts
These farmers cheese pierogi are more than just a meal; they’re a taste of tradition, a symbol of comfort, and a labor of love. Gather your ingredients, dust off your apron, and embark on this culinary journey. Don’t be afraid to experiment with different fillings and toppings to create your own family favorites. And most importantly, share your pierogi with loved ones and savor the joy of creating something delicious together. Smacznego!