
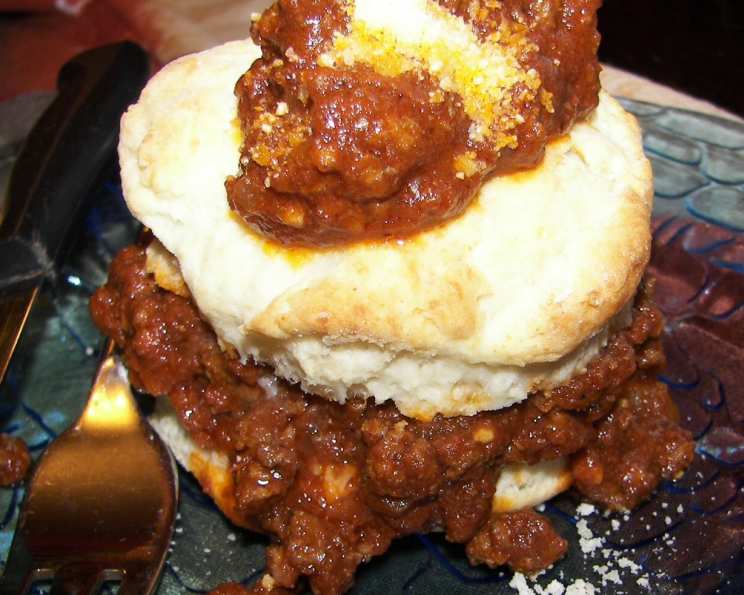
Farmhouse Buttermilk Biscuits: A Taste of Home
The aroma of freshly baked biscuits, straight from the oven, always transports me back to my grandmother’s farmhouse kitchen. I can almost feel the warmth of the wood-burning stove on my face and hear her gentle humming as she expertly kneaded the dough. These weren’t just biscuits; they were edible love letters, crisp on the outside and fluffy on the inside, a symbol of comfort and togetherness that I cherish to this day. Every bite was, and still is, a reminder of simple joys and the enduring power of a good home-cooked meal.
Recipe Overview
- Prep Time: 10 minutes
- Cook Time: 10-12 minutes
- Total Time: 20-22 minutes
- Yields: 10-15 biscuits
- Dietary Type: Vegetarian
Ingredients
- 3 1⁄2 cups all-purpose flour
- 4 teaspoons baking powder
- 3⁄4 teaspoon salt
- 1 teaspoon cream of tartar
- 3 tablespoons sugar
- 3⁄4 cup real butter (margarine will work, too, but the taste and texture will be different)
- 1 1⁄4 cups buttermilk
Equipment Needed
- Mixing Bowl
- Fork
- Floured Surface
- Rolling Pin
- Biscuit Cutter or Round Cookie Cutter
- Cookie Sheet
Instructions
-
Preheat your oven to 450 degrees Fahrenheit. This high temperature is key to achieving that beautiful rise and golden-brown crust.
-
In a large mixing bowl, whisk together the dry ingredients: flour, baking powder, salt, cream of tartar, and sugar. Make sure everything is evenly distributed for consistent results.
-
Now, for the crucial step: incorporating the butter. Cut the butter into small pieces. Then, using a pastry blender or your fingertips, cut the butter into the flour mixture. The goal is to create a coarse, crumbly texture with pea-sized pieces of butter remaining. These pieces of butter will melt during baking, creating steam and pockets of air that contribute to the biscuits’ flakiness. If using your fingers, work quickly to prevent the butter from melting too much.
-
Once the mixture resembles coarse crumbs, create a well in the center of the bowl. Pour in the buttermilk.
-
Using a fork, gently stir the buttermilk into the dry ingredients. Start from the outside of the bowl and gradually blend inward. Be careful not to overmix; the dough should be just combined and slightly shaggy. A few streaks of flour are perfectly fine. Overmixing will develop the gluten in the flour, resulting in tough biscuits.
-
Turn the dough out onto a lightly floured surface. Gently knead the dough a few times, just until it comes together and holds its shape. Again, avoid overworking the dough.
-
Using a rolling pin, roll the dough out to about 1/2 inch thick. This thickness will give you perfectly sized biscuits.
-
Cut out the biscuits using a biscuit cutter or a round cookie cutter. When cutting, press straight down without twisting the cutter. Twisting can seal the edges and prevent the biscuits from rising properly.
-
Lightly grease a cookie sheet with Crisco or another shortening. Place the biscuits on the prepared cookie sheet, leaving about 1-2 inches of space between each biscuit. This allows for proper air circulation and even baking.
-
Bake in the preheated 450-degree Fahrenheit oven for 10-12 minutes, or until the biscuits are golden brown on top. Keep a close eye on them towards the end of the baking time to prevent burning. The internal temperature should reach around 200-205°F.
Expert Tips & Tricks
- Cold Ingredients are Key: The colder your butter and buttermilk, the better the biscuits will be. Consider chilling the flour as well for optimal results.
- Don’t Overmix: Overmixing develops gluten, leading to tough biscuits. Handle the dough gently and mix only until just combined.
- Laminating the Dough: For extra flaky biscuits, try folding the dough in half a few times after the initial kneading. This creates layers of dough and butter that separate during baking.
- Baking Sheet Placement: Position your baking sheet in the center rack of the oven for even heat distribution.
- Egg Wash (Optional): For an extra golden and glossy top, brush the biscuits with a mixture of egg yolk and milk before baking.
- Make-Ahead Tip: Cut out the biscuits and place them on a baking sheet. Cover tightly with plastic wrap and refrigerate for up to 24 hours. Bake as directed when ready. You may need to add a minute or two to the baking time.
Serving & Storage Suggestions
These farmhouse buttermilk biscuits are best served warm, straight from the oven. They are delicious on their own, or with a pat of butter, a drizzle of honey, or a dollop of your favorite jam. They also make a wonderful addition to a hearty breakfast, alongside eggs, bacon, and sausage.
To store leftover biscuits, let them cool completely and then place them in an airtight container at room temperature. They will stay fresh for 1-2 days. For longer storage, you can freeze the biscuits. Wrap them individually in plastic wrap and then place them in a freezer bag. Frozen biscuits can be stored for up to 2-3 months.
To reheat, thaw frozen biscuits in the refrigerator overnight or at room temperature for a few hours. You can then warm them in a preheated oven at 350 degrees Fahrenheit for 5-10 minutes, or until heated through. Alternatively, you can microwave them for a few seconds, but be careful not to overcook them.
Nutritional Information
| Nutrient | Amount per Serving | % Daily Value |
|---|---|---|
| Calories | 309.9 kcal | N/A |
| Calories from Fat | N/A | N/A |
| Total Fat | 14.5 g | 22% |
| Saturated Fat | 9 g | 44% |
| Cholesterol | 37.8 mg | 12% |
| Sodium | 450.9 mg | 18% |
| Total Carbohydrate | 39.3 g | 13% |
| Dietary Fiber | 1.2 g | 4% |
| Sugars | 5.4 g | N/A |
| Protein | 5.7 g | 11% |
Note: Nutritional information is an estimate and can vary based on specific ingredients and portion sizes.
Variations & Substitutions
- Sweet Biscuits: For a sweeter biscuit, increase the amount of sugar to 1/4 cup.
- Savory Biscuits: Add chopped herbs such as rosemary, thyme, or chives to the dough for a savory twist. You can also add grated cheese, such as cheddar or Parmesan.
- Gluten-Free Biscuits: Substitute the all-purpose flour with a gluten-free flour blend. Be sure to use a blend that is specifically designed for baking. You may also need to add a binder such as xanthan gum to help hold the biscuits together.
- Dairy-Free Biscuits: Use a dairy-free butter substitute and a dairy-free buttermilk substitute. You can make your own dairy-free buttermilk by adding 1 tablespoon of lemon juice or white vinegar to 1 1/4 cups of plant-based milk.
- Drop Biscuits: For a rustic, quicker version, skip the rolling and cutting. Drop spoonfuls of the dough onto the baking sheet and bake as directed.
FAQs (Frequently Asked Questions)
Q: Why are my biscuits flat and dense?
A: This is likely due to overmixing the dough or using old baking powder. Make sure your baking powder is fresh, and handle the dough gently.
Q: Can I use self-rising flour instead of all-purpose flour and baking powder?
A: Yes, you can. Omit the baking powder, salt, and cream of tartar from the recipe.
Q: How do I get my biscuits to rise higher?
A: Ensure your ingredients are cold, and don’t twist the biscuit cutter when cutting out the biscuits. This allows them to rise straight up.
Q: Can I freeze the biscuit dough before baking?
A: Yes, you can. Cut out the biscuits and freeze them on a baking sheet until solid. Then, transfer them to a freezer bag and store for up to 2-3 months. Bake directly from frozen, adding a few extra minutes to the baking time.
Q: What can I serve with these biscuits?
A: These biscuits are incredibly versatile. They are delicious with butter and jam, alongside eggs and bacon, or as a side to soup or stew.
Final Thoughts
These farmhouse buttermilk biscuits are more than just a recipe; they’re an invitation to slow down, savor simple pleasures, and connect with the traditions of home cooking. Don’t be intimidated by the process – with a little practice and these helpful tips, you’ll be baking up warm, flaky biscuits in no time. I encourage you to give this recipe a try and share the joy of homemade biscuits with your loved ones. Perhaps serve them alongside a steaming bowl of chicken noodle soup on a chilly evening, or as a base for a delicious sausage gravy. Enjoy the process, embrace the imperfections, and most importantly, enjoy the taste of home.