
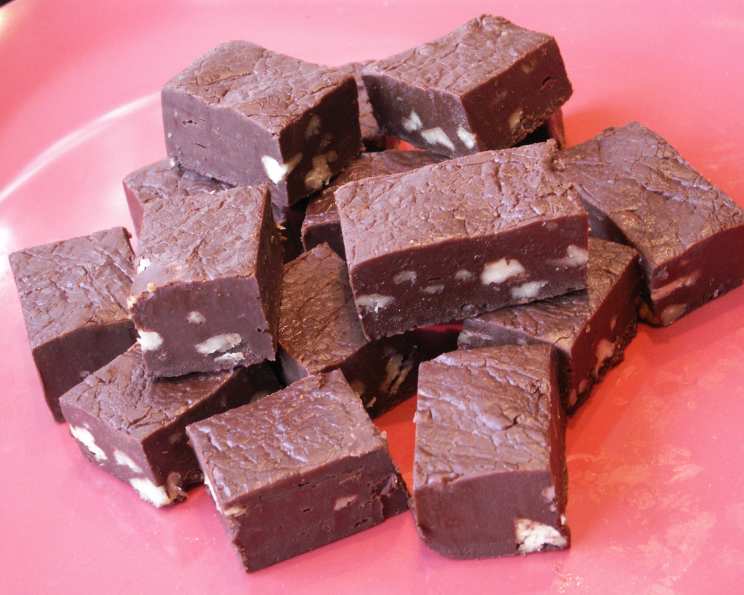
Fast Microwave Fudge (Nut-Free!)
The memory of holiday baking always floods me with warmth, but none is more distinct than the year I nearly set the kitchen on fire trying to temper chocolate for traditional fudge. It was a sticky, stressful mess, and I swore I needed a simpler solution that still delivered the creamy, decadent taste everyone craves. That’s when I stumbled upon this microwave fudge recipe – a true game-changer that brought the joy back to fudge-making, without any of the kitchen drama.
Recipe Overview
- Prep Time: 5 minutes
- Cook Time: 1.5 minutes
- Total Time: 2 hours 5 minutes (includes chilling)
- Yields: Approximately 2 pounds
- Dietary Type: Nut-Free
Ingredients
- 18 ounces (3 cups) milk chocolate chips (or any flavor chips you prefer)
- 14 ounces sweetened condensed milk (fat-free is perfectly acceptable)
- 2 tablespoons coffee, any flavor, at room temperature
- 1 teaspoon ground cinnamon
- 1/8 teaspoon salt
- 1 teaspoon vanilla extract (or any extract flavor of your choosing)
Equipment Needed
- 8×8 inch baking pan
- Aluminum foil
- Microwave-safe glass dish
- Microwave
- Butter or cooking spray
- Spatula
Instructions
- Begin by lining an 8×8 inch baking pan with aluminum foil, ensuring that the foil extends slightly over the edges of the pan. This will make removing the fudge much easier later on.
- Thoroughly butter the foil-lined pan. This prevents the fudge from sticking and ensures a clean release. Alternatively, you can use cooking spray.
- In a microwave-safe glass dish, combine all ingredients except the vanilla extract. This includes the chocolate chips, sweetened condensed milk, coffee, cinnamon, and salt.
- Microwave the mixture on high power for 1 minute and 30 seconds (1.5 minutes). Be sure to keep a close watch on the mixture as it cooks, as microwave power can vary.
- Remove the dish from the microwave and stir the mixture vigorously until it is completely smooth and the chocolate chips are fully melted and incorporated. If any small bits of chocolate remain unmelted, return the dish to the microwave for very short bursts (5-10 seconds) and stir again until smooth. Avoid overheating.
- Stir in the vanilla extract (or your chosen flavor extract) until it is evenly distributed throughout the fudge mixture.
- Pour the smooth fudge mixture into the prepared foil-lined pan. Use a spatula to spread it evenly, ensuring it reaches all corners of the pan.
- Cover the pan tightly with plastic wrap or another sheet of foil.
- Refrigerate the fudge for at least 2 hours, or until it is firm and completely set. This chilling time is crucial for achieving the proper fudge consistency.
- Once the fudge is firm, remove it from the refrigerator. Use the overhanging foil to carefully lift the fudge slab out of the pan.
- Place the fudge slab on a cutting board. Using a sharp knife, cut the fudge into squares or any other desired shape.
- Store the cut fudge at room temperature in an airtight container to maintain its freshness and prevent it from drying out.
Expert Tips & Tricks
- Chocolate Chip Selection: While milk chocolate is classic, experiment with different chocolate chips! Dark chocolate, semi-sweet, white chocolate, peanut butter chips (if nuts are okay!), or even butterscotch chips can all create delicious variations.
- Coffee Enhancement: The coffee enhances the chocolate flavor, but don’t worry if you’re not a coffee drinker! The flavor is subtle. You can even experiment with different coffee flavors like hazelnut or vanilla for added depth.
- Smoothness is Key: Ensure that the chocolate chips are completely melted and the mixture is perfectly smooth before adding the vanilla. Any remaining lumps will affect the final texture of the fudge.
- Microwave Power Variation: Microwaves vary in power, so keep a close eye on the fudge while it’s cooking. If it starts to bubble excessively, reduce the power level or shorten the cooking time.
- Doneness Check: The fudge is ready when the chocolate chips are fully melted and the mixture is smooth and glossy. Avoid overcooking, which can make the fudge grainy.
- Preventing Graininess: Overheating the chocolate can cause it to seize and become grainy. If this happens, try adding a tiny bit more sweetened condensed milk and stirring vigorously to re-emulsify the mixture.
- Flavor Infusions: Consider adding a pinch of sea salt on top for a salty-sweet contrast, or sprinkle with dried fruit (cranberries, cherries) before chilling.
Serving & Storage Suggestions
This microwave fudge is a delightful treat to enjoy on its own, or as part of a dessert platter. It can be served at room temperature, slightly chilled, or even straight from the refrigerator, depending on your preference. To elevate the presentation, consider arranging the fudge squares on a decorative plate and garnishing with a dusting of cocoa powder or a drizzle of melted chocolate.
Proper storage is crucial to maintaining the fudge’s quality. Store the fudge in an airtight container at room temperature for up to a week. For longer storage, you can refrigerate it for up to two weeks, or freeze it for up to two months. If freezing, wrap the fudge tightly in plastic wrap and then in a freezer-safe bag to prevent freezer burn. To thaw, transfer the fudge to the refrigerator overnight.
Nutritional Information
Here is an estimated nutritional breakdown:
| Nutrient | Amount per Serving | % Daily Value |
|---|---|---|
| Calories | 233 kcal | 12% |
| Total Fat | 11g | 17% |
| Saturated Fat | 7g | 35% |
| Cholesterol | 5mg | 2% |
| Sodium | 50mg | 2% |
| Total Carbohydrate | 32g | 11% |
| Dietary Fiber | 0g | 0% |
| Sugars | 28g | N/A |
| Protein | 2g | 4% |
Note: Nutritional information is an estimate and can vary based on specific ingredients and serving sizes.
Variations & Substitutions
- Different Extracts: Experiment with almond extract, peppermint extract (especially festive for the holidays!), or even a citrus extract like orange or lemon.
- Spice it Up: In addition to cinnamon, try adding a pinch of nutmeg, cardamom, or even a tiny bit of cayenne pepper for a subtle kick.
- Chocolate Swirl: Melt white chocolate separately and swirl it into the milk chocolate fudge before chilling for a beautiful marbled effect.
- Add-Ins: While this recipe is nut-free, you can add other mix-ins like chopped dried cranberries, mini marshmallows, toffee bits (ensure they are nut-free if needed), or even crushed pretzels for a salty-sweet combination.
- Vegan Fudge: To make this recipe vegan, use vegan chocolate chips and sweetened condensed coconut milk.
FAQs (Frequently Asked Questions)
Q: Can I use unsweetened chocolate in this recipe?
A: It’s not recommended. Sweetened chocolate chips are essential for both flavor and the right consistency. Using unsweetened chocolate will result in a bitter and potentially dry fudge.
Q: What if my fudge is too soft after refrigerating?
A: The most likely cause is not chilling it long enough or using a slightly higher fat content chocolate. Return it to the refrigerator for a longer period (at least another hour).
Q: Can I use a different size pan?
A: Yes, but the thickness of the fudge will change. A smaller pan will result in thicker fudge, while a larger pan will create thinner fudge. Adjust the chilling time accordingly.
Q: Why did my chocolate seize up when I microwaved it?
A: Overheating or the presence of even a tiny bit of water can cause chocolate to seize. Microwave in shorter bursts and ensure all utensils are completely dry. If it seizes, try stirring in a tablespoon of shortening to smooth it out, but it may not fully recover.
Q: Can I double this recipe?
A: Yes, you can double the recipe, but you may need to increase the microwave cooking time slightly. Be sure to stir the mixture frequently to ensure even melting.
Final Thoughts
This fast microwave fudge recipe is a testament to the fact that deliciousness doesn’t always require hours in the kitchen. It’s perfect for busy weeknights, last-minute gatherings, or when you simply need a chocolate fix. So go ahead, give it a try! I’m confident you’ll be amazed by how easily you can create a batch of creamy, decadent fudge that everyone will love. And don’t be afraid to experiment with different flavors and add-ins to create your own signature fudge masterpiece. Share your creations with friends and family, and let the sweet memories begin!