
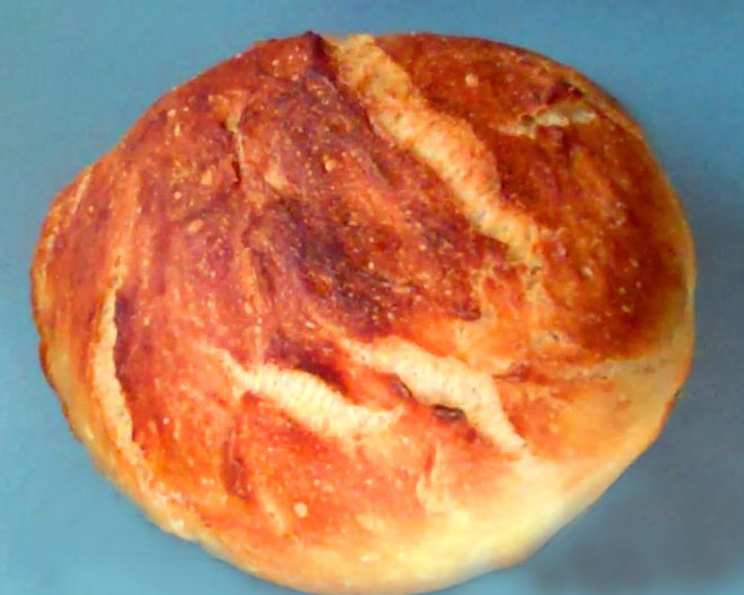
Fast No-Knead Bread With Easy Cleanup
The smell of freshly baked bread has always transported me back to my grandmother’s kitchen. She wasn’t a fancy baker, but her simple loaves, crusty on the outside and soft within, were pure comfort. I remember watching her, mesmerized, as she’d punch down the dough, a floury cloud puffing into the air. While I cherish those memories, I don’t always have the time (or frankly, the patience) for traditional kneading. That’s why I fell in love with no-knead bread. It delivers that same soul-satisfying flavor with a fraction of the effort, and this particular recipe, with its clever use of parchment paper, makes cleanup a breeze.
Recipe Overview
- Prep Time: 15 minutes
- Cook Time: 42-45 minutes
- Total Time: 5 hours
- Servings: 10-12
- Yield: 1 loaf
- Dietary Type: Vegetarian
Ingredients
- 3 cups bread flour
- 1/4 teaspoon instant yeast
- 1/4 teaspoon red wine vinegar
- 2 – 3 teaspoons salt (adjust to your taste)
- 1 1/2 cups warm water (not hot, just comfortably warm to the touch)
Equipment Needed
- Large bowl
- 6- to 8-quart heavy covered pot (cast iron, Dutch oven, Pyrex, or ceramic)
- Parchment paper
- Cooling rack
Instructions
- In a large bowl, thoroughly combine the bread flour and salt.
- In a separate measuring cup, add the instant yeast and red wine vinegar to the warm water. Stir briefly to dissolve.
- Pour the wet ingredients into the dry ingredients. Using a spatula or your hands, combine the wet and dry ingredients until all the flour is absorbed and a shaggy dough forms. Don’t worry about kneading; just ensure there are no dry pockets of flour.
- Cover the bowl tightly with plastic wrap or a lid. Allow the dough to rest at room temperature for 4 hours. This long fermentation period is what develops the bread’s flavor and texture.
- After 4 hours, uncover the bowl. The dough will be bubbly and have more than doubled in size. Gently fold the dough over on itself a couple of times within the bowl. This helps to redistribute the gases and strengthen the gluten structure.
- Place a large sheet of parchment paper on a work surface. Lightly oil the parchment paper with cooking spray or olive oil. This prevents the dough from sticking.
- Gently transfer the dough onto the oiled parchment paper, placing it in the center.
- Rinse the large bowl with water (no need to wash it with soap at this point). This will help prevent the dough from sticking to the bowl during the second rise.
- Carefully lift the parchment paper with the dough on top and place it back into the rinsed bowl. Cover the bowl again and let the dough rest for one hour.
- Preheat your oven to 450 degrees Fahrenheit (232 degrees Celsius). Place your 6- to 8-quart heavy covered pot (cast iron, Dutch oven, Pyrex, or ceramic) inside the oven as it preheats. It’s crucial that the pot is very hot when you add the dough; this creates a steamy environment that helps the bread rise beautifully and develop a crisp crust.
- Once the oven is preheated and the pot is scorching hot, carefully remove the pot from the oven using oven mitts. Be extremely cautious, as the pot will be very hot.
- Lift the parchment paper with the dough on top and gently lower it into the heated pot. Don’t worry if the dough isn’t perfectly shaped; it will even out during baking.
- Cut away any excess parchment paper around the edges of the dough. This prevents the paper from burning during baking.
- Cover the pot with its lid and bake for 30 minutes.
- After 30 minutes, carefully remove the lid and continue baking for another 12 to 15 minutes, or until the loaf is deeply browned and the crust is firm.
- Remove the pot from the oven and carefully lift the bread out using the parchment paper as a sling. Place the loaf on a cooling rack to cool completely before slicing. This is important because the bread continues to cook internally as it cools, and slicing it too soon can result in a gummy texture.
- Discard the used parchment paper.
- Enjoy your freshly baked, no-knead bread!
Expert Tips & Tricks
- Temperature is Key: Make sure your water is warm, not hot. Hot water can kill the yeast. The pot must be thoroughly heated before adding the dough for the best crust.
- Flour Power: Bread flour is preferred for its higher gluten content, which results in a chewier texture. However, you can use all-purpose flour if that’s what you have on hand. The texture will be slightly different, but the bread will still be delicious.
- Salt Sensations: Adjust the amount of salt to your preference. Some people prefer a slightly saltier bread, while others prefer less.
- Overnight Proofing: For an even more complex flavor, you can let the dough rest in the refrigerator overnight (or up to 24 hours) after the initial 4-hour rise. Just be sure to bring it back to room temperature for about an hour before proceeding with the recipe.
- Doneness Check: If you’re unsure if the bread is done, you can use an instant-read thermometer. The internal temperature should be around 200-210 degrees Fahrenheit (93-99 degrees Celsius).
- Dealing with a Sticky Dough: This dough is naturally sticky. Don’t be tempted to add more flour. Just embrace the stickiness and use oiled hands or a spatula to handle the dough.
Serving & Storage Suggestions
This no-knead bread is incredibly versatile. Serve it warm with a pat of butter, alongside a hearty soup or stew, or use it to make sandwiches. It’s also delicious toasted and topped with avocado, ricotta cheese, or your favorite spread.
To store, let the bread cool completely before wrapping it tightly in plastic wrap or placing it in an airtight container. It will last for 2-3 days at room temperature. For longer storage, you can freeze the bread for up to 2 months. To freeze, slice the bread before wrapping it tightly in plastic wrap and placing it in a freezer bag. To reheat, thaw the bread completely and then toast it or warm it in the oven.
Nutritional Information
| Nutrient | Amount per Serving | % Daily Value |
|---|---|---|
| Calories | 137 kcal | 7% |
| Total Fat | 0.4 g | 1% |
| Saturated Fat | 0.1 g | 1% |
| Cholesterol | 0 mg | 0% |
| Sodium | 467 mg | 20% |
| Total Carbohydrate | 28.7 g | 10% |
| Dietary Fiber | 1.0 g | 4% |
| Sugars | 0.1 g | 0% |
| Protein | 3.9 g | 8% |
Note: Nutritional information is an estimate and may vary based on specific ingredients and portion sizes.
Variations & Substitutions
- Whole Wheat Variation: Substitute up to half of the bread flour with whole wheat flour for a nuttier flavor and denser texture.
- Herbaceous Delight: Add 1-2 tablespoons of chopped fresh herbs, such as rosemary, thyme, or oregano, to the dough along with the salt.
- Seeded Sensation: Sprinkle the top of the dough with sesame seeds, poppy seeds, or sunflower seeds before baking for added flavor and texture.
- Garlic Infusion: Add 1-2 cloves of minced garlic to the dough along with the salt for a savory twist.
- Cheese, Please!: Incorporate 1/2 cup of shredded cheese, such as cheddar, Parmesan, or Gruyere, into the dough for a cheesy, flavorful loaf.
FAQs (Frequently Asked Questions)
Q: Why do I need to preheat the pot in the oven?
A: Preheating the pot creates a steamy environment inside, which helps the bread rise higher and develop a crispier crust.
Q: Can I use a different type of pot besides a Dutch oven?
A: Yes, you can use any heavy, oven-safe pot with a lid, such as a Pyrex or ceramic pot.
Q: My bread is too dense. What could I have done wrong?
A: Make sure your yeast is fresh and active. Also, avoid adding too much flour, as this can make the dough dense.
Q: Can I make this recipe without parchment paper?
A: Yes, but the cleanup will be more difficult. You’ll need to grease and flour the pot thoroughly before adding the dough.
Q: How do I prevent the bottom of the bread from burning?
A: Ensure that the pot is placed in the center of the oven and that your oven temperature is accurate. If you still experience burning, you can place a baking sheet on the rack below the pot to deflect some of the heat.
Final Thoughts
This Fast No-Knead Bread is more than just a recipe; it’s an invitation to experience the simple joy of baking. Don’t be intimidated by the long rise time; the hands-on work is minimal, and the results are well worth the wait. Whether you’re a seasoned baker or a complete novice, I encourage you to give this recipe a try. Experiment with different variations, share your creations with loved ones, and most importantly, savor the deliciousness of homemade bread. And if you try out the recipe or have any questions, please let me know in the comments below! I’d love to hear how it goes. Perhaps pair it with a simple roasted tomato soup for the ultimate comfort meal. Happy baking!