
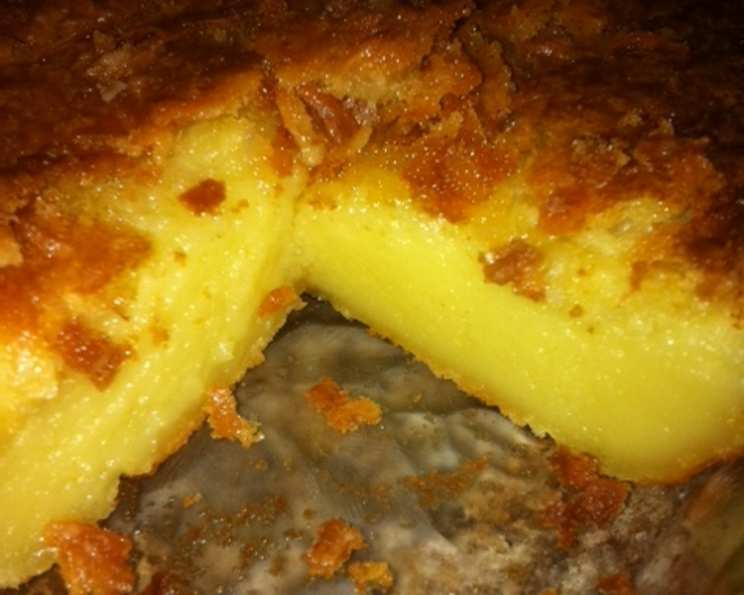
Favorite Custard Mochi
The first time I tasted custard mochi, I was at a potluck in Honolulu, a humid tropical breeze carrying the scent of plumeria through the air. I spotted a pan of unassuming squares, golden brown and dusted with coconut, and took a piece. That first bite was pure magic – a chewy, subtly sweet texture that melted in my mouth, followed by the comforting warmth of vanilla and a hint of coconut. It was unlike anything I’d ever tasted, a perfect blend of textures and flavors that instantly transported me to a place of pure bliss. Ever since, I’ve been on a quest to recreate that feeling, and this recipe is as close as I’ve come – a taste of aloha in every bite.
Recipe Overview
- Prep Time: 15 minutes
- Cook Time: 75-80 minutes
- Total Time: 2 hours
- Servings: 24 pieces
- Yields: 24 pieces
- Dietary Type: Not Gluten-Free (contains mochiko sweet rice flour, which is gluten-free, but always check the label to be sure of no cross-contamination)
Ingredients
- ½ cup butter, softened
- 1 ½ cups sugar
- 1 teaspoon vanilla extract
- ½ teaspoon coconut extract
- 4 eggs
- 4 cups milk
- 1 (16 ounce) box mochiko sweet rice flour (about 2 cups)
- 2 teaspoons baking powder
- ½ cup shredded coconut flakes
Equipment Needed
- 9×13-inch baking pan
- Large bowl
- Mixer (handheld or stand mixer)
- Measuring cups and spoons
- Spatula
Instructions
- Begin by preheating your oven to 350 degrees Fahrenheit (175 degrees Celsius).
- Thoroughly grease a 9×13-inch baking pan. This is important to prevent the mochi from sticking and to ensure easy removal after baking. Set the prepared pan aside.
- In a large bowl, cream together the softened butter and sugar until the mixture is light and fluffy. This process incorporates air into the batter, contributing to a tender final product. A stand mixer or handheld mixer works best for this step, but you can also use a sturdy whisk and some elbow grease.
- Add the eggs one at a time to the creamed butter and sugar, beating well after each addition. This ensures that each egg is fully incorporated into the batter, creating a smooth and emulsified mixture.
- Next, add the vanilla extract and coconut extract to the bowl. These extracts provide the signature flavor of this custard mochi.
- Gradually add the milk to the mixture, mixing until just combined. Be careful not to overmix at this stage, as overmixing can develop the gluten in the mochiko flour and result in a tougher mochi.
- In the same bowl, add the entire box (16 ounces, about 2 cups) of mochiko sweet rice flour and the baking powder. Mix until all ingredients are well blended. Ensure that there are no lumps of flour remaining in the batter. The batter will be quite liquidy; this is normal.
- Pour the batter into the prepared 9×13-inch baking pan, spreading it evenly.
- Sprinkle the shredded coconut flakes evenly over the top of the batter. This adds a lovely toasted coconut flavor and a slightly crisp texture to the top of the mochi.
- Bake in the preheated oven for 1 hour and 15 to 20 minutes. The mochi is done when it is golden brown on top and a toothpick inserted into the center comes out clean. The baking time may vary depending on your oven, so keep a close eye on it.
- Once baked, remove the mochi from the oven and let it cool completely in the pan.
- After it is cooled completely, chill the mochi in the refrigerator until ready to serve. Chilling firms up the mochi, making it easier to slice and gives it a delightful cool sensation.
- Before serving, slice the mochi into equal squares.
Expert Tips & Tricks
- Softening the Butter: Ensure the butter is softened but not melted. Room temperature butter will cream much more easily with the sugar. If you forgot to take the butter out ahead of time, you can microwave it for a few seconds at a time, being very careful not to melt it.
- Don’t Overmix: Overmixing the batter after adding the mochiko flour can result in a tough mochi. Mix just until the ingredients are combined.
- Adjust Baking Time: Ovens can vary in temperature, so check the mochi for doneness starting at 1 hour and 15 minutes. If the top is browning too quickly, you can tent it loosely with foil.
- Even Coconut Distribution: To ensure the coconut flakes are evenly distributed, lightly press them into the surface of the batter before baking.
- Clean Cuts: For clean, even slices, use a sharp knife dipped in warm water. Wipe the knife clean between each cut.
- Baking Pan Alternative: If you don’t have a 9×13-inch pan, two 8×8-inch pans can also be used, just divide the batter evenly between the two.
- Customize Flavors: A small amount of lemon or orange zest can add a bright, citrusy note.
Serving & Storage Suggestions
Serve the custard mochi chilled, cut into neat squares. It’s delicious on its own or with a scoop of vanilla ice cream. Garnish with extra shredded coconut or fresh berries for an elegant presentation.
Store leftover mochi in an airtight container in the refrigerator for up to 3-4 days. While it can be left at room temperature for a few hours, it’s best to keep it chilled for optimal texture and to prevent spoilage. It can also be frozen for longer storage (up to 1 month), but the texture may change slightly upon thawing. To reheat, simply let it come to room temperature or microwave it for a few seconds until slightly softened.
Nutritional Information
Here’s an approximate nutritional breakdown per serving:
| Nutrient | Amount per Serving | % Daily Value |
|---|---|---|
| Calories | 198.4 kcal | N/A |
| Calories from Fat | 61 g | 31% |
| Total Fat | 6.9 g | 10% |
| Saturated Fat | 4.2 g | 20% |
| Cholesterol | 46.9 mg | 15% |
| Sodium | 101 mg | 4% |
| Total Carbohydrate | 30.6 g | 10% |
| Dietary Fiber | 0.6 g | 2% |
| Sugars | 13.2 g | 52% |
| Protein | 3.6 g | 7% |
Note: Nutritional information is an estimate and may vary based on specific ingredients and portion sizes.
Variations & Substitutions
- Dairy-Free: Substitute the milk with coconut milk or another plant-based milk alternative. Use a dairy-free butter substitute.
- Less Sweet: Reduce the amount of sugar by ¼ to ½ cup for a less sweet mochi.
- Flavor Variations: Add a tablespoon of matcha powder for a green tea flavor, or a teaspoon of almond extract in place of coconut extract.
- Nutty Delight: Incorporate chopped macadamia nuts or other nuts into the batter for added texture and flavor.
- Chocolate Mochi: Add 1/4 cup of unsweetened cocoa powder to the dry ingredients.
FAQs (Frequently Asked Questions)
Q: Can I use regular rice flour instead of mochiko sweet rice flour?
A: No, mochiko sweet rice flour is essential for the chewy texture of mochi. Regular rice flour will not produce the same results.
Q: My mochi is too sticky. What did I do wrong?
A: Mochiko mochi is inherently sticky but let it cool and refrigerate thoroughly. If it is still too sticky, you may have underbaked it.
Q: How do I prevent the coconut flakes from burning?
A: If the coconut flakes are browning too quickly, tent the pan loosely with aluminum foil during the last part of baking.
Q: Can I make this ahead of time?
A: Yes, custard mochi is perfect for making ahead of time! It can be stored in the refrigerator for up to 3-4 days and tastes even better after chilling.
Q: The batter seems very liquid. Is that normal?
A: Yes, the batter for custard mochi is quite thin and liquidy. This is normal and helps create the characteristic chewy texture.
Final Thoughts
This custard mochi recipe is more than just a dessert; it’s a taste of warmth, comfort, and shared moments. Whether you’re looking to recreate a beloved childhood memory or simply want to try something new and delicious, I encourage you to give this recipe a try. The combination of chewy texture, subtle sweetness, and comforting flavors is sure to delight your taste buds. Don’t hesitate to experiment with variations and make it your own. And please, share your creations and feedback – I’d love to hear how it turns out for you! Consider pairing it with a cup of green tea for a truly authentic experience.