
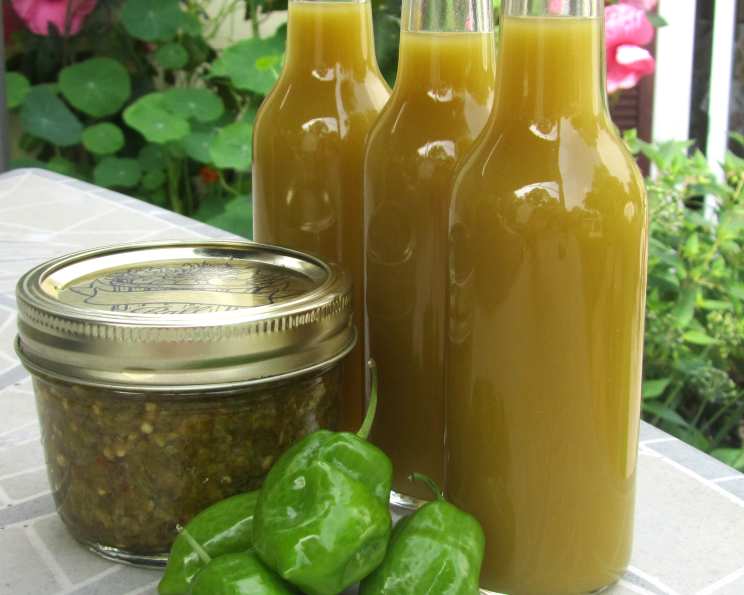
Fermented Hot Chili Sauce: A Fiery Elixir from Your Kitchen
My grandmother, a formidable woman with hands perpetually stained red from garden chilies, always kept a jar of her homemade hot sauce tucked away in the back of her pantry. It wasn’t just a condiment; it was a secret weapon, a dab of sunshine on a cloudy day, a little piece of her fiery spirit bottled up for the world. The tangy, complex heat, alive with the whispers of fermentation, was unlike anything I’ve ever found in a store. This recipe is an homage to her, a journey into the vibrant world of fermented flavors.
Recipe Overview
- Prep Time: 20 minutes
- Fermentation Time: 5-7 days
- Total Time: 5-7 days, 20 minutes
- Yield: Approximately 1 quart
- Dietary Type: Vegan, Gluten-Free, Dairy-Free
Ingredients
- 3 lbs fresh chili peppers (a mix of Ghost, Scotch Bonnets, Jalapeños, Serranos, or any combination you prefer)
- 4-6 garlic cloves, peeled and minced
- 2 tablespoons unrefined, unbleached cane sugar (optional)
- 2 teaspoons unrefined sea salt
- ¼ cup fresh whey (or use a vegetable starter culture dissolved in ¼ cup water)
Equipment Needed
- Food processor or knife and cutting board
- Glass mason jar
- Fine-mesh sieve
- Mixing bowl
- Wooden spoon
- Bottles or jars for storage
Instructions
- Begin by preparing your chili peppers. Snip the stems from each chili, but leave their green tops intact. This helps to release the flavorful oils during fermentation and adds a visual appeal.
- Combine all the ingredients—the prepared chili peppers, minced garlic, unrefined sugar (if using), sea salt, and whey or vegetable starter—in a food processor. If you don’t have a food processor, you can mince the ingredients finely by hand using a sharp knife and a sturdy cutting board.
- Process or mince the ingredients until you achieve a fine, pasty texture. The finer the texture, the better the fermentation process and the smoother the final sauce.
- Spoon the chili paste into a clean glass mason jar, leaving about an inch of headspace at the top. This space is important to allow for expansion during fermentation.
- Cover the jar loosely, allowing air to escape while preventing contaminants from entering. A coffee filter or cheesecloth secured with a rubber band works well.
- Allow the chili paste to ferment at room temperature, away from direct sunlight, for five to seven days. During this time, you should observe bubbling and other signs of fermentation. Taste the sauce daily after the third day; the fermentation process is complete when it reaches your desired level of tanginess and heat.
- After the chili paste has fermented for the desired duration, set a fine-mesh sieve over a mixing bowl.
- Spoon the fermented chili paste into the sieve.
- Using a wooden spoon, press the chili paste against the sides of the sieve, extracting the sauce. This process separates the solids from the liquid, resulting in a smooth, vibrant sauce.
- Once you’ve pressed and pushed all the chili sauce through the sieve, carefully pour the sauce from the bowl into sterilized jars or bottles for storage.
- Store the fermented hot chili sauce in the refrigerator. Properly stored, it will keep for several months.
- Don’t discard any remaining chili paste left in the sieve! This concentrated flavor bomb can be used to season stir-fries, eggs, Bloody Marys, or any dish that needs a kick.
Expert Tips & Tricks
- Spice Level Control: Experiment with different types of chili peppers to control the heat level of your sauce. For a milder sauce, use mostly jalapeños. For intense heat, incorporate ghost peppers or Scotch bonnets.
- Brining: If you find the fermentation is moving slowly, try adding a small amount of brine from another vegetable ferment (like sauerkraut or pickles) to jump-start the process.
- Preventing Mold: To prevent mold growth during fermentation, ensure that the chili paste is submerged in its own juices. If needed, weigh it down with a small glass weight or a clean plastic bag filled with water.
- Flavor Enhancement: For an extra layer of flavor, consider adding other aromatics like ginger, lemongrass, or lime zest during the fermentation process.
- Paste Consistency: If you prefer a thicker sauce, you can reduce it further by simmering it gently in a saucepan after fermentation.
Serving & Storage Suggestions
This fermented hot chili sauce is incredibly versatile. Drizzle it over tacos, eggs, noodles, or grilled meats. Add a dash to soups, stews, or dips for a fiery kick. It also makes a fantastic addition to marinades and dressings.
Store the sauce in the refrigerator in an airtight container. It will keep for several months, and the flavor may even improve over time as it continues to develop. It is not recommended to store at room temperature, as this can lead to spoilage. Freezing is also not recommended, as it can alter the texture of the sauce.
Nutritional Information
Note: Nutritional information is an estimate and can vary based on the specific ingredients used.
| Nutrient | Amount per Serving | % Daily Value |
|---|---|---|
| Calories | 60 kcal | 3% |
| Total Fat | 1g | 1% |
| Saturated Fat | 0g | 0% |
| Cholesterol | 0mg | 0% |
| Sodium | 100mg | 4% |
| Total Carbohydrate | 10g | 4% |
| Dietary Fiber | 2g | 7% |
| Sugars | 3g | – |
| Protein | 1g | 2% |
Variations & Substitutions
- Sweet Heat: Add a tablespoon of honey or maple syrup to the chili paste for a touch of sweetness to balance the heat.
- Smoked Chili Sauce: Use smoked paprika or smoked chili powder in place of some of the fresh chilies for a smoky flavor.
- Tropical Twist: Incorporate tropical fruits like mango or pineapple into the chili paste for a sweet and tangy flavor.
- Herby Hot Sauce: Add fresh herbs like cilantro, parsley, or oregano to the chili paste for an herbaceous twist.
- Vegetarian Starter: If you don’t have whey on hand, you can use a vegetable starter culture dissolved in ¼ cup of water. This is a great option for vegans.
FAQs (Frequently Asked Questions)
Q: What does the fermentation process do to the hot sauce?
A: Fermentation not only adds a tangy, complex flavor but also introduces beneficial bacteria and enzymes that can aid in digestion.
Q: How do I know if my hot sauce is fermenting properly?
A: You should see bubbles forming in the jar within a few days, indicating that the beneficial bacteria are active. A slightly sour smell is also a good sign.
Q: What if mold grows on the surface of my fermenting chili paste?
A: If you see mold, discard the entire batch. It’s crucial to ensure that the chili paste is submerged in its own juices to prevent mold growth.
Q: Can I use dried chilies instead of fresh ones?
A: While fresh chilies are preferred for their vibrant flavor and moisture content, you can use dried chilies. Rehydrate them in hot water for about 30 minutes before using them in the recipe.
Q: How long will my fermented hot chili sauce last?
A: When stored properly in the refrigerator, your fermented hot chili sauce can last for several months. The flavor may even improve over time.
Final Thoughts
Crafting your own fermented hot chili sauce is a rewarding journey that allows you to explore a world of vibrant flavors and beneficial bacteria. Don’t be afraid to experiment with different chili peppers, herbs, and spices to create a sauce that perfectly suits your palate. So, gather your ingredients, roll up your sleeves, and embark on this culinary adventure. Share your creations, get feedback, and most importantly, enjoy the fruits (or chilies!) of your labor. Your taste buds (and your gut) will thank you for it!