
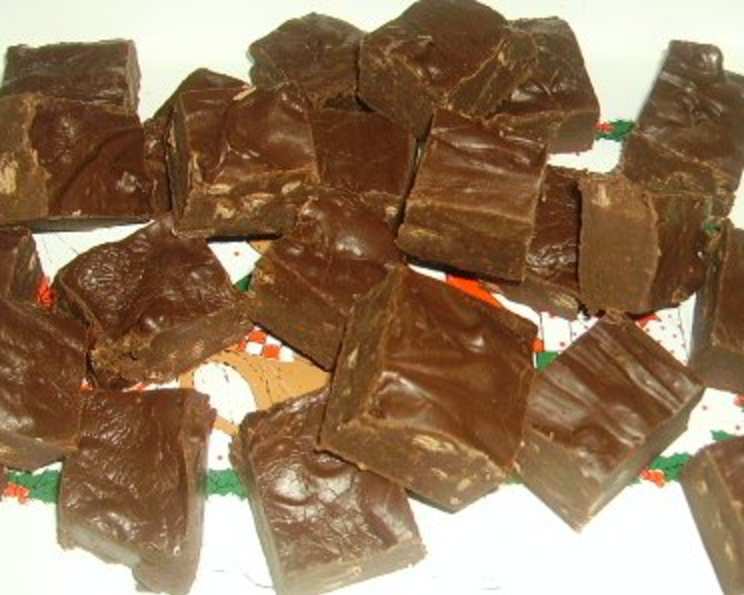
Festive Fudge: A Simple Sweet for Joyful Gatherings
My grandmother’s Christmas Eve parties were legendary, not for elaborate decorations or gourmet feasts, but for the genuine warmth and abundance of love that filled her tiny apartment. The centerpiece of her dessert table, year after year, was a humble pan of fudge. It wasn’t fancy, but it was always there, a sweet, chocolatey symbol of the simple joys of the season. Every bite takes me back to her crowded living room, the scent of pine needles and gingerbread filling the air, and the sound of laughter echoing through the night. This recipe, reminiscent of hers, is a perfect way to create similar memories in your own home.
Recipe Overview
- Prep Time: 10 minutes
- Cook Time: 5 minutes
- Total Time: 15 minutes (plus refrigeration)
- Servings: Varies
- Yield: Approximately 2 pounds
- Dietary Type: Vegetarian (Can be adapted to gluten-free and nut-free)
Ingredients
- 18 ounces (3 cups) semi-sweet chocolate chips or milk chocolate chips
- 1 (14 ounce) can sweetened condensed milk
- 1 dash salt
- 1 ½ teaspoons vanilla extract
- ½ – 1 cup nuts, chopped (optional)
Equipment Needed
- Medium-sized saucepan
- 8×8 inch baking pan
- Wax paper or parchment paper
- Mixing spoon or spatula
Instructions
-
Begin by gently melting the chocolate chips. You can do this in a medium-sized saucepan over low heat, stirring constantly to prevent burning. Alternatively, microwave in 30-second intervals, stirring between each interval, until melted and smooth. Be careful not to overheat the chocolate; it should be glossy and fluid.
-
Once the chocolate is melted, remove it from the heat. Immediately add the sweetened condensed milk, salt, and vanilla extract. Stir everything together thoroughly until it is uniformly combined and silky smooth. The mixture will become quite thick at this stage.
-
If desired, add the chopped nuts to the chocolate mixture. Gently fold them in until they are evenly distributed throughout. The nuts add a delightful crunch and textural contrast to the creamy fudge, but they are entirely optional if you prefer a smoother consistency or have nut allergies to consider.
-
Prepare an 8×8 inch baking pan by lining it with wax paper or parchment paper. This is a crucial step, as it will prevent the fudge from sticking to the pan and make it easy to remove later. Ensure the paper extends slightly over the edges of the pan for easy lifting.
-
Pour the chocolate mixture into the prepared pan. Use a spatula to spread it evenly, ensuring that it fills all the corners and creates a level surface.
-
Refrigerate the fudge for at least 2 hours, or preferably longer, until it is completely set and firm to the touch. The chilling process allows the fudge to solidify and develop its characteristic texture.
-
Once the fudge is firm, remove it from the refrigerator. Carefully lift the fudge out of the pan using the overhanging wax paper or parchment paper.
-
Peel off the wax paper or parchment paper. Place the fudge on a cutting board and, using a sharp knife, cut it into squares or desired shapes. The size of the squares is entirely up to you; consider making smaller squares for easy snacking or larger pieces for a more indulgent treat.
-
Serve and enjoy!
Expert Tips & Tricks
- For a richer flavor: Use high-quality chocolate chips, such as Ghirardelli or Guittard.
- To prevent burning the chocolate: Use a double boiler or a heatproof bowl set over a simmering pot of water. This method provides gentle, indirect heat, reducing the risk of scorching.
- Achieving the perfect consistency: Ensure that the chocolate is fully melted and smooth before adding the other ingredients. If the mixture seems too thick, add a tablespoon of milk or cream to thin it out slightly.
- Adding Flavor: Experiment with different extracts, such as peppermint or almond, to create unique flavor profiles.
- Make Ahead: This fudge can be made several days in advance and stored in the refrigerator. This makes it a perfect dessert for holiday gatherings and parties.
- Prevent Crystallization: Avoid stirring the sugar that may have formed on the sides of the saucepan back into the melted chocolate. This can cause the fudge to become grainy.
Serving & Storage Suggestions
Serve the festive fudge chilled or at room temperature. It’s a delightful treat on its own, or you can pair it with a cup of hot cocoa or coffee. For an elegant presentation, arrange the fudge squares on a platter and garnish with a dusting of powdered sugar or a sprinkle of sea salt.
To store leftover fudge, keep it in an airtight container in the refrigerator for up to 2 weeks. For longer storage, you can freeze the fudge for up to 2 months. Wrap it tightly in plastic wrap and then place it in a freezer-safe bag or container. Thaw the fudge in the refrigerator before serving.
Nutritional Information
Please note that these are estimates. Actual values may vary based on specific ingredients and serving sizes.
| Nutrient | Amount per Serving | % Daily Value |
|---|---|---|
| Calories | 250 kcal | 13% |
| Total Fat | 15g | 23% |
| Saturated Fat | 9g | 45% |
| Cholesterol | 5mg | 2% |
| Sodium | 50mg | 2% |
| Total Carbohydrate | 30g | 10% |
| Dietary Fiber | 1g | 4% |
| Sugars | 25g | N/A |
| Protein | 3g | 6% |
Variations & Substitutions
- Peanut Butter Fudge: Swirl in a half cup of peanut butter to the melted chocolate for a creamy, nutty variation.
- Mint Chocolate Fudge: Add 1/2 teaspoon of peppermint extract and crushed candy canes for a festive mint chocolate fudge.
- White Chocolate Fudge: Substitute white chocolate chips for semi-sweet or milk chocolate chips. Consider adding dried cranberries and pistachios for a beautiful holiday treat.
- Dairy-Free Fudge: While challenging, you could try using dairy-free chocolate chips and coconut condensed milk, though the texture and taste will be significantly different.
- Salted Caramel Fudge: Drizzle caramel sauce over the fudge before it sets and sprinkle with sea salt.
- Espresso Fudge: Add a teaspoon of instant espresso powder to the melted chocolate for a coffee-infused flavor.
- Nut-Free Fudge: Simply omit the nuts or substitute with toasted coconut flakes or chopped dried fruit.
FAQs (Frequently Asked Questions)
Q: Can I use unsweetened chocolate chips?
A: While possible, unsweetened chocolate chips will result in a significantly less sweet fudge. You may need to add extra sugar to compensate, but the texture and overall result might differ.
Q: How do I prevent the fudge from being grainy?
A: Avoid overheating the chocolate and stirring in any sugar crystals that may form on the sides of the pan. Gentle, consistent stirring is key.
Q: Can I freeze the fudge?
A: Yes, you can freeze the fudge for up to 2 months. Wrap it tightly in plastic wrap and then place it in a freezer-safe bag or container. Thaw it in the refrigerator before serving.
Q: What if my fudge is too soft?
A: This usually means it hasn’t chilled long enough. Put it back in the refrigerator for a longer period. If it’s still too soft, you may have used too much liquid or not enough chocolate.
Q: How can I make the fudge more visually appealing?
A: Sprinkle the top with chopped nuts, sprinkles, or a dusting of cocoa powder before it sets. You can also drizzle melted chocolate of a different color over the top for a decorative effect.
Final Thoughts
This Festive Fudge recipe is a testament to the fact that sometimes, the simplest things are the most cherished. It’s a recipe that’s easy to make, perfect for sharing, and guaranteed to bring a smile to everyone’s face. I encourage you to try this recipe and create your own sweet memories this holiday season. Don’t be afraid to experiment with different flavors and add-ins to personalize it to your liking. And most importantly, share it with the people you love. I’d love to hear about your experiences, any variations you try, and the memories you create with this simple yet heartwarming treat. Happy baking!