
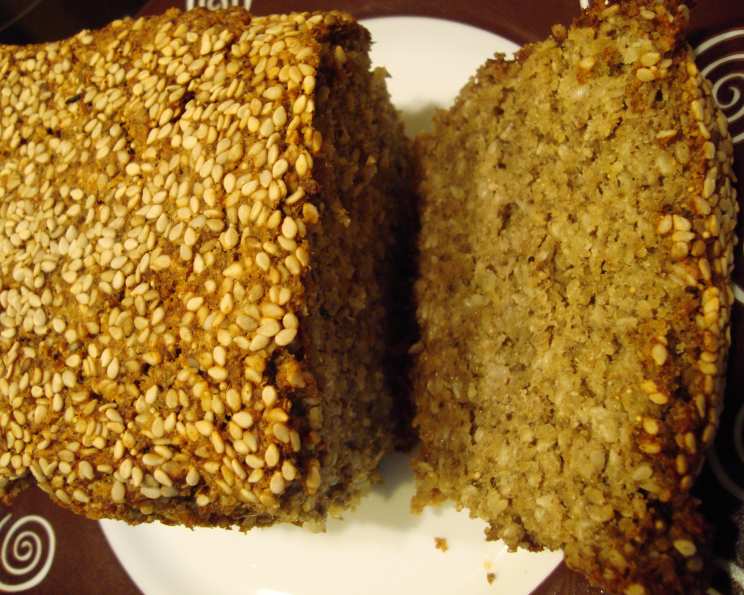
Finally! Delicious Sprouted Gluten Free Egg Free Bread!
My journey to find the perfect gluten-free, egg-free bread felt like searching for a culinary unicorn. Store-bought options were often dry, crumbly, and utterly disappointing. Then, after countless attempts in my own kitchen, I stumbled upon this recipe. The first bite was a revelation – a slice of bread that was actually moist, held together beautifully, and tasted incredible! Now, I can finally enjoy a sandwich without the frustration of it falling apart in my hands. This bread is a game-changer, and I’m thrilled to share it with you.
Recipe Overview
- Prep Time: 24-48 hours (soaking) + 20 minutes (active)
- Cook Time: 60 minutes
- Total Time: 25-50 hours
- Yields: 1 loaf
- Dietary Type: Gluten-Free, Egg-Free, Dairy-Free (if using almond milk), Vegan
Ingredients
- 1/3 cup quinoa (soaked 24-48 hours)
- 1/3 cup amaranth (soaked 24-48 hours)
- 1/3 cup millet (soaked 24-48 hours)
- 1/2 cup sesame seeds (soaked 24-48 hours)
- 1/2 cup coconut flour
- 1/2 cup rice flour
- 2 tablespoons flax seed meal
- 1 1/4 cups almond milk (or other non-dairy milk)
- 1/4 cup water
- 2 tablespoons coconut oil, melted
- 2-3 teaspoons agave nectar (or maple syrup, to taste)
- 1 teaspoon sea salt
- 3 teaspoons baking powder
- 1 teaspoon baking soda
Equipment Needed
- High-speed blender
- Medium loaf pan
- Parchment paper
- Measuring cups and spoons
- Oven
Instructions
- Begin by soaking the quinoa, amaranth, millet, and sesame seeds for 24-48 hours. Place each grain and seed in a separate bowl, cover with water, and let them sit at room temperature. This process activates enzymes and makes the nutrients more bioavailable.
- After soaking, drain and rinse the soaked grains and seeds thoroughly under running water. This removes any phytic acid released during soaking, which can inhibit nutrient absorption.
- Preheat your oven to 350ºF (175°C).
- Combine all ingredients – the drained quinoa, amaranth, millet, sesame seeds, coconut flour, rice flour, flax seed meal, almond milk, water, melted coconut oil, agave nectar, sea salt, baking powder, and baking soda – in a high-speed blender.
- Puree the mixture until it’s completely smooth. You may need to stop the blender occasionally and scrape down the sides to ensure everything is incorporated. The batter should be relatively thick but pourable.
- Line a medium loaf pan with parchment paper. This will prevent the bread from sticking and make it easier to remove after baking. Make sure the parchment paper extends over the sides of the pan for easy lifting.
- Pour the batter into the prepared loaf pan. If desired, sprinkle the top with additional sesame seeds or any other seeds or nuts of your choice for added texture and flavor.
- Bake for one hour. Check the bread after about 45 minutes. If the top begins to get too brown, cover it loosely with foil to prevent burning.
- To check for doneness, insert a toothpick into the center of the bread. If it comes out clean or with just a few moist crumbs attached, the bread is done. If the toothpick comes out with wet batter, continue baking for another 5-10 minutes.
- Once baked, remove the loaf pan from the oven and let the bread cool in the pan for 20-30 minutes before attempting to slice it. Cooling allows the bread to firm up and makes it easier to slice cleanly.
- Lift the bread out of the loaf pan using the overhanging parchment paper.
- Slice and enjoy! This bread is delicious with almond butter, agave nectar, honey, or even savory toppings like pesto sauce.
Expert Tips & Tricks
- Soaking is key: Don’t skip the soaking step! It significantly improves the texture and digestibility of the bread. Aim for the full 48 hours for optimal results.
- Blender power: A high-speed blender is essential for achieving a smooth batter. If you don’t have one, you may need to blend in batches or add a little extra liquid to help the ingredients combine.
- Texture tweaks: If you prefer a slightly sweeter bread, add an extra teaspoon of agave nectar or maple syrup. For a nuttier flavor, try adding a tablespoon of almond flour to the batter.
- Even baking: To ensure even baking, rotate the loaf pan halfway through the baking time. This will help prevent one side from browning too quickly.
- Cooling is crucial: Resist the urge to slice the bread while it’s still hot. Cooling allows the bread to firm up and prevents it from crumbling.
Serving & Storage Suggestions
This sprouted gluten-free egg-free bread is incredibly versatile. Serve it toasted with your favorite toppings for breakfast, use it to make delicious sandwiches for lunch, or enjoy it as a side with soups and salads.
- Room Temperature: Store the bread in an airtight container at room temperature for up to 2 days.
- Refrigerator: For longer storage, keep the bread in an airtight container in the refrigerator for up to 5 days.
- Freezer: To freeze, slice the bread and wrap each slice individually in plastic wrap. Place the wrapped slices in a freezer bag and freeze for up to 2 months. Thaw the slices at room temperature or in the toaster before serving.
- Reheating: To reheat, toast slices in a toaster or toaster oven until warmed through and slightly crispy. You can also warm slices in a conventional oven at 350°F (175°C) for a few minutes.
Nutritional Information
Please note that these values are estimates and may vary based on specific ingredients and portion sizes.
| Nutrient | Amount per Serving | % Daily Value |
|---|---|---|
| Calories | 143 | 7% |
| Total Fat | 8.1g | 10% |
| Saturated Fat | 3.4g | 17% |
| Cholesterol | 0mg | 0% |
| Sodium | 521mg | 22% |
| Total Carbohydrate | 23.8g | 9% |
| Dietary Fiber | 3.1g | 11% |
| Sugars | 0.2g | 1% |
| Protein | 4.9g | 10% |
Variations & Substitutions
- Seed variations: Experiment with different seed combinations. Try adding chia seeds, sunflower seeds, or pumpkin seeds for added nutrients and flavor.
- Flour swaps: If you don’t have coconut flour, you can substitute it with almond flour or another gluten-free flour blend. Just keep in mind that the texture may be slightly different.
- Sweetener options: Feel free to use maple syrup, honey, or another natural sweetener in place of agave nectar. Adjust the amount to your liking.
- Spice it up: Add a pinch of cinnamon, nutmeg, or cardamom to the batter for a warm and comforting flavor. You can also add dried herbs like rosemary or thyme for a savory twist.
- Nut-free: Ensure the almond milk is not processed in a facility that also processes nuts, or use oat milk.
FAQs (Frequently Asked Questions)
Q: Why do I need to soak the grains and seeds?
A: Soaking helps to break down phytic acid, which is a compound that can inhibit nutrient absorption. It also makes the grains and seeds easier to digest and improves the overall texture of the bread.
Q: Can I use a different type of flour?
A: Yes, you can experiment with other gluten-free flours, such as almond flour, oat flour, or a gluten-free blend. Just be aware that the texture may vary depending on the flour you use.
Q: My bread is too dense. What did I do wrong?
A: Make sure you are using fresh baking powder and baking soda. Also, avoid overmixing the batter, as this can develop the gluten (even in gluten-free flours) and make the bread tough.
Q: Can I make this bread without a blender?
A: While a blender is highly recommended for achieving a smooth batter, you could try using a food processor. However, the texture may not be as fine, and the bread may be slightly coarser.
Q: How can I prevent the top of the bread from burning?
A: If the top of the bread starts to brown too quickly, cover it loosely with foil during the last 15-20 minutes of baking.
Final Thoughts
This sprouted gluten-free, egg-free bread is more than just a recipe; it’s a solution to a common dietary challenge. The joy of biting into a perfectly sliceable, flavorful loaf, knowing it’s made with wholesome ingredients, is truly rewarding. I encourage you to give this recipe a try and experience the satisfaction of creating your own delicious and healthy bread. Share your creations and variations – I can’t wait to see what you come up with! Pair a slice with a hearty vegetable soup or a vibrant avocado toast for a truly satisfying meal.