
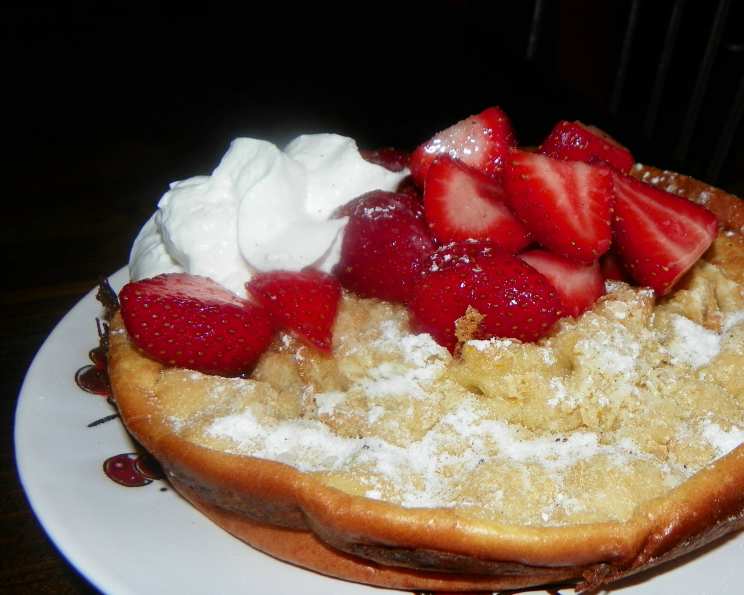
Finnish Oven Pancake (Pannukakku): A Taste of Nostalgia
The scent of baking butter and sweet vanilla always takes me back to my grandmother’s cozy kitchen. Growing up, weekends meant waking up to the irresistible aroma of pannukakku wafting through the house. Her version was legendary – a golden-brown, custardy marvel that puffed up dramatically in the oven and then gently deflated, creating a landscape of delicious nooks and crannies perfect for holding a dollop of freshly whipped cream and a scattering of juicy berries. Every bite was a comforting blend of warmth, sweetness, and pure love. This Finnish oven pancake is more than just a recipe; it’s a cherished memory baked into a delightful dish.
Recipe Overview
- Prep Time: 35 minutes (includes resting time)
- Cook Time: 15 minutes
- Total Time: 50 minutes
- Servings: 4-6
- Yield: 1 pancake
- Dietary Type: Not specified
Ingredients
- 6 eggs
- 1 1/2 cups milk
- 1/4 cup sugar (optional, adjust to taste)
- 1 teaspoon vanilla extract
- 1/4 teaspoon lemon zest, grated
- 1 1/2 cups flour
- 1 teaspoon salt
- 1 teaspoon baking powder
- 1/3 cup butter
- 1 cup cream, whipped until stiff peaks form
- Fresh fruit, fruit compote, or sautéed apples for serving
Equipment Needed
- Whisk
- Measuring cups and spoons
- Grater
- Sifter (optional)
- Oven-proof frying pan (12-inch recommended)
- Pastry brush
- Mixing bowls
Instructions
-
In a large mixing bowl, whisk together the eggs, milk, sugar (if using), and vanilla extract until the mixture is smooth and creamy. Don’t over-whisk; just ensure everything is well combined.
-
Stir in the grated lemon zest. The lemon zest adds a subtle brightness that complements the richness of the pancake.
-
In a separate bowl, sift together the flour, salt, and baking powder. Sifting helps to ensure that there are no lumps in your batter, resulting in a smoother final product. If you don’t have a sifter, you can whisk the dry ingredients together vigorously.
-
Gradually add the dry ingredients to the wet ingredients, stirring until just combined. Be careful not to overmix the batter, as this can develop the gluten in the flour and make the pancake tough. A few lumps are okay.
-
Allow the batter to rest for 30 minutes at room temperature. This resting period allows the gluten to relax, resulting in a more tender pancake. Don’t skip this step!
-
Preheat your oven to 450°F (232°C). It is crucial that the oven is fully preheated to ensure the pancake puffs up properly.
-
While the oven is preheating, place the butter in a 12-inch oven-proof frying pan (or as close to that size as you have).
-
Once the oven is preheated, place the pan with the butter in the oven. Allow the butter to melt completely, but be careful not to let it brown or burn.
-
Once the butter has melted, remove the pan from the oven and use a pastry brush to coat the entire surface and sides of the pan evenly with the melted butter. This step is essential to prevent the pancake from sticking and to create a beautiful golden-brown crust.
-
Pour the pancake batter into the hot, buttered pan and return it to the oven.
-
Bake for 15 minutes, or until the pancake is puffed up, golden brown, and set. The pancake should rise dramatically in the oven and have a slightly jiggly center when it’s done. If the top is browning too quickly, you can loosely tent it with foil.
-
Remove the pancake from the oven and let it cool slightly before slicing and serving. It will deflate a bit as it cools, which is perfectly normal.
-
Serve warm with whipped cream and your choice of fresh fruit, fruit compote, or lightly sautéed apples.
Expert Tips & Tricks
- Don’t overmix the batter: Overmixing develops the gluten in the flour, resulting in a tough pancake. Mix just until the ingredients are combined.
- Rest the batter: Resting the batter allows the gluten to relax, resulting in a more tender pancake.
- Hot pan is key: Make sure the pan and butter are hot before pouring in the batter. This is what helps the pancake puff up properly.
- Adjust sugar to your liking: The amount of sugar in this recipe is optional and can be adjusted to your personal taste preferences. If you prefer a less sweet pancake, you can omit the sugar altogether.
- Add a pinch of cardamom: For a more authentic Finnish flavor, add a pinch of ground cardamom to the batter.
- Use a cast-iron skillet: A cast-iron skillet is ideal for making this pancake because it heats evenly and retains heat well.
Serving & Storage Suggestions
Serve the Finnish oven pancake immediately while it’s still warm and puffy. It’s best enjoyed with a generous dollop of whipped cream and your favorite fresh fruit, such as berries, sliced bananas, or peaches. Fruit compotes or lightly sautéed apples are also delicious toppings.
Leftovers can be stored in an airtight container in the refrigerator for up to 2 days. To reheat, you can warm it in a low oven or microwave until heated through. However, be aware that the texture will change slightly upon reheating, and it won’t be as puffy as when it’s freshly baked.
Nutritional Information
Note: Nutritional information is an estimate and may vary based on specific ingredients and serving sizes.
| Nutrient | Amount per Serving | % Daily Value |
|---|---|---|
| Calories | 350 kcal | 18% |
| Total Fat | 20g | 31% |
| Saturated Fat | 12g | 60% |
| Cholesterol | 200mg | 67% |
| Sodium | 300mg | 13% |
| Total Carbohydrate | 30g | 10% |
| Dietary Fiber | 1g | 4% |
| Sugars | 10g | – |
| Protein | 12g | 24% |
Variations & Substitutions
- Gluten-Free: Substitute the all-purpose flour with a gluten-free blend. Be sure to use a blend that contains xanthan gum to help bind the ingredients together.
- Dairy-Free: Use a non-dairy milk alternative, such as almond milk, soy milk, or oat milk. You can also substitute the butter with a dairy-free butter alternative or coconut oil. Use a non-dairy whipped topping.
- Different extracts: Experiment with different extracts, such as almond extract or lemon extract, in place of the vanilla extract.
- Seasonal fruits: Use whatever fresh fruit is in season for topping the pancake. In the fall, try apples and pears sautéed with cinnamon and brown sugar. In the summer, berries and stone fruits are delicious.
- Savory version: Omit the sugar and vanilla extract and add herbs, such as dill or chives, to the batter for a savory pancake. Serve with smoked salmon or cream cheese.
FAQs (Frequently Asked Questions)
Q: Why is my pannukakku not puffing up in the oven?
A: Make sure your oven is fully preheated to 450°F (232°C) and that the pan and butter are hot before pouring in the batter. Also, avoid opening the oven door frequently during baking, as this can cause the pancake to deflate.
Q: Can I make the batter ahead of time?
A: While you can make the batter ahead of time, it’s best to bake the pancake immediately after the batter has rested. If you do make it ahead, store it in the refrigerator and bring it to room temperature before baking.
Q: Can I use a different size pan?
A: A 12-inch oven-proof frying pan is recommended, but you can use a smaller or larger pan if needed. Keep in mind that the baking time may need to be adjusted depending on the size of the pan.
Q: What can I use instead of lemon zest?
A: If you don’t have lemon zest, you can omit it or substitute it with orange zest. You can also add a few drops of lemon juice to the batter for a similar flavor.
Q: Can I freeze the baked pannukakku?
A: Yes, you can freeze the baked pannukakku. Wrap it tightly in plastic wrap and then in foil and freeze for up to 2 months. Thaw in the refrigerator overnight before reheating.
Final Thoughts
This Finnish oven pancake is a simple yet incredibly satisfying dish that’s perfect for breakfast, brunch, or dessert. Its custardy texture, golden-brown crust, and endless topping possibilities make it a crowd-pleaser every time. I encourage you to try this recipe and experience the comforting flavors of Scandinavia in your own kitchen. Don’t be afraid to experiment with different variations and toppings to create your own signature pannukakku. And please, share your creations and feedback – I’d love to hear how it turns out! Perhaps serve it alongside a strong cup of Finnish coffee for an authentic experience. Happy baking!