
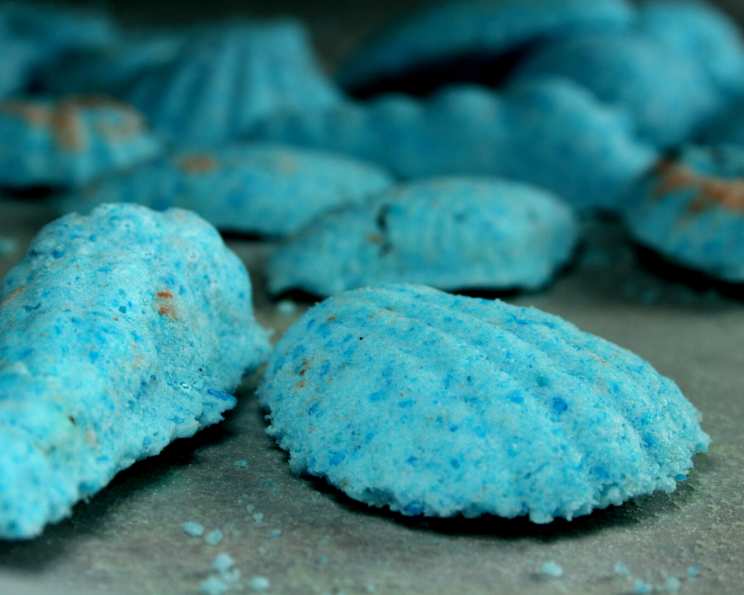
Fizzy Bath Bombs: A DIY Guide to Relaxation
My earliest memory of bath bombs involves a particularly stressful week in culinary school. Burnt sauces, failed soufflés, and looming exams had me practically living in the library. Then, my roommate surprised me with a vibrant, lavender-scented bath bomb. The moment it hit the water, the fizzing action seemed to melt away my stress. The fragrant steam filled the room, turning my tiny dorm bathroom into a personal spa. From then on, bath bombs became my go-to for self-care, and I’ve been experimenting with different scents and colors ever since. Now, I’m excited to share my bath bomb recipe with you!
Recipe Overview
- Prep Time: 20 minutes
- Total Time: 24-36 hours
- Yields: 7 medium sized bath bombs
- Dietary Type: Vegan
Ingredients
- 1 1/2 cups bicarbonate of soda (baking soda)
- 1/2 cup citric acid, powder
- 2 teaspoons sweet almond oil
- Essential oil (or fragrance)
- Food coloring
Equipment Needed
- Large dry bowl
- Small bowl
- Moulds (heart-shaped, friand cake tins, round Christmas baubles, etc.)
Instructions
-
Begin by preparing the base mix. In a large, dry bowl, sift together the bicarbonate of soda and citric acid. Sifting ensures there are no lumps, which will give you a smoother bath bomb. The bowl must be dry, as any moisture will start the fizzing reaction prematurely!
-
Transfer 1/2 cup of the base mix at a time to another dry bowl. This is where you’ll add the fun stuff! To this smaller portion, add any dried flowers, such as dried rose petals or lavender, fine glitter, or any other dry inclusions you like. Set this bowl aside. Working in smaller batches helps prevent premature activation.
-
In a separate small bowl, mix together 1/2 teaspoon at a time of sweet almond oil, 6-8 drops of your chosen essential oil (or fragrance), and 6 drops of food coloring. Remember, less is more with food coloring. You can always add more, but you can’t take it away. Consider using gel food coloring as it’s more concentrated and less likely to introduce excess moisture.
-
Now, the crucial step: Pour the oil mixture into the 1/2 cup of base mix and mix QUICKLY before it starts to fizz! Use your fingertips to combine the ingredients until the color is evenly distributed. The mixture should feel like damp sand. If it’s too wet, it will start to fizz. If it’s too dry, it won’t hold its shape.
-
Wipe a little sweet almond oil inside your moulds. This will help the bath bombs release easily once they’ve set. You can use a cotton swab or your finger to apply a thin, even coating.
-
Fill the moulds with the mixture, packing it in firmly. This is important to create a solid bath bomb. Overfill slightly, then use a flat object like a spatula to scrape off any excess and create a smooth, even surface.
-
Repeat this process with 1/2 a cup of the base mix at a time, using different fragrance/color blends if you wish. This is where you can get creative and make a variety of bath bombs with different properties. Think of the essential oils you’re using as functional ingredients. Lavender for relaxation, eucalyptus for decongestion, citrus for invigoration.
-
Leave the bath bombs to set for 24-36 hours. This is a crucial step. Do not be tempted to remove them too soon, or they will crumble. The bath bombs need time for the ingredients to fully bind together.
-
When set, lightly tap the mould and ease the bath bomb out gently. If it’s still sticking, you can try placing the mould in the freezer for a few minutes. The cold temperature will cause the bath bomb to contract slightly, making it easier to remove.
-
Hot water activates the fizzy bath bombs a lot better than cold water!
Expert Tips & Tricks
-
Controlling Fizzing: The key to success is controlling the moisture. Work in a cool, dry environment. If your mixture starts to fizz prematurely, add a bit more bicarbonate of soda and citric acid in equal parts.
-
Achieving Vibrant Colors: For intense, saturated colors, use micas or bath bomb dyes specifically designed for this purpose. They won’t affect the chemistry of your bath bombs and provide beautiful results.
-
Layering Effects: Create layered bath bombs by adding different colored and scented mixtures in stages. Pack each layer firmly before adding the next.
-
Preventing Cracking: To avoid cracking, ensure your mixture is evenly compacted in the moulds. Also, avoid placing the bath bombs in direct sunlight or humid environments while they are setting.
Serving & Storage Suggestions
To use your bath bombs, simply drop one into a tub of warm water and enjoy the fizzing action and fragrant aroma.
Store your bath bombs in an airtight container in a cool, dry place. Exposure to moisture will activate the fizzing reaction and shorten their lifespan. When stored properly, they can last for several months. These make wonderful gifts, so consider wrapping them individually in cellophane or placing them in decorative boxes.
Nutritional Information
Since these are for external use, nutritional information is not applicable.
Variations & Substitutions
- Epsom Salt Addition: Add 1/4 cup of Epsom salts to the dry mix for extra muscle relaxation benefits.
- Oatmeal Bath Bomb: Incorporate finely ground oatmeal for a soothing and moisturizing bath experience.
- Honey Bath Bomb: Add a teaspoon of honey to the oil mixture for its humectant properties (attracts moisture to the skin).
- Coloring Substitutions: Use natural colorants like beet root powder for pink or spirulina for green.
- Essential Oil Blends: Experiment with different essential oil combinations to create unique aromatherapy experiences. For example, try a blend of lavender, chamomile, and sandalwood for relaxation, or peppermint and eucalyptus for an invigorating effect.
FAQs (Frequently Asked Questions)
Q: Why are my bath bombs cracking?
A: Cracking usually occurs when the mixture is too dry or not packed firmly enough into the moulds. Try adding a bit more almond oil or spritzing with a tiny amount of witch hazel to bind the ingredients, and make sure to pack tightly.
Q: How do I prevent the bath bombs from fizzing prematurely?
A: The key is to keep the mixture dry. Work in a cool, dry environment and avoid adding too much liquid. If it starts to fizz, add more bicarbonate of soda and citric acid in equal parts.
Q: Can I use different types of oil instead of sweet almond oil?
A: Yes, you can use other carrier oils such as coconut oil (melted), grapeseed oil, or even olive oil. Just be mindful of the scent of the oil and how it will complement your essential oils.
Q: How do I add dried flowers or herbs?
A: Add them to the dry mix, after you have divided the base mix into smaller portions. Make sure the flowers are completely dried to prevent premature fizzing.
Q: Can I use these bath bombs for children?
A: It’s generally safe to use bath bombs on children, but use caution with essential oils. Some essential oils are not suitable for young children or pregnant women. Consider using gentler options like chamomile or lavender, and always use a diluted concentration.
Final Thoughts
Creating your own fizzy bath bombs is a wonderfully rewarding experience. It’s a chance to unleash your creativity, experiment with different scents and colors, and craft a truly personalized spa treatment in the comfort of your own home. Don’t be afraid to try new things, and most importantly, have fun with it! I encourage you to share your creations and feedback. What are your favorite scent combinations? What innovative additions have you tried? The world of DIY bath bombs is vast and exciting, and I can’t wait to see what you come up with. Happy fizzing!