
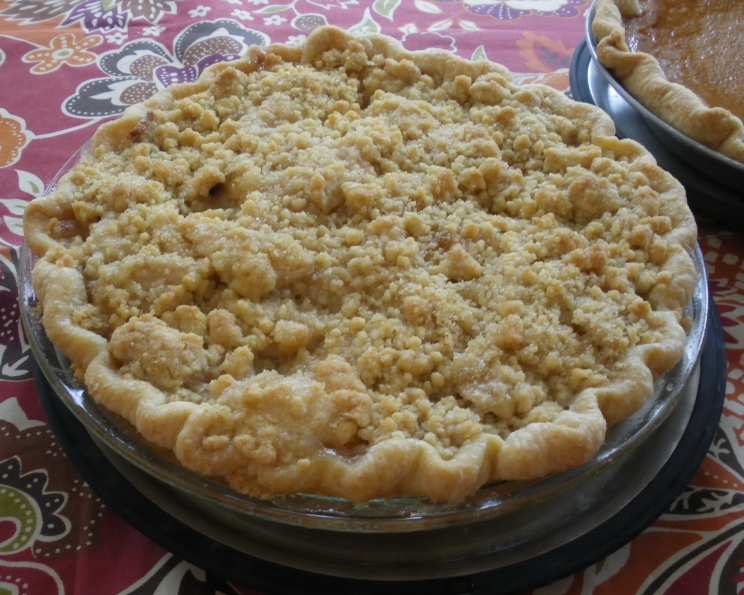
The Only Butter Pie Crust Recipe You’ll Ever Need
The first time I truly appreciated a homemade pie crust was during a baking competition with my grandmother. Grandma, a true pie aficionado, always insisted store-bought crusts were an abomination. I, a naive teenager, scoffed. But as I watched her meticulously cut cold butter into flour, her experienced hands moving with practiced grace, I began to understand. The aroma of butter baking in the oven, the shattering crispness of that first bite – it was a revelation. From then on, I understood the magic of homemade pie crust. And this recipe? This is the one that reminds me of Grandma every time I bake.
Recipe Overview
- Prep Time: 45 minutes
- Cook Time: 20-30 minutes
- Total Time: 1 hour 15 minutes
- Yields: 3 pie crusts
- Dietary Type: Not specified
Ingredients
- 1/2 teaspoon salt
- 1/3 cup cold water
- 1/2 lb (2 sticks) cold unsalted butter, cut into 1/2 inch cubes
- 11 ounces (about 2 cups) all-purpose flour
Equipment Needed
- Food Processor (or Mixer)
- Measuring cups and spoons
- 9-inch pie pan(s)
- Parchment paper
- Pie weights (rice or dry beans)
- Rolling pin
Instructions
-
Begin by dissolving salt in the cold water. Ensure the salt is fully dissolved and then place the salted water in the refrigerator to keep it chilled.
-
In the bowl of a food processor (or stand mixer), place the flour and the cubed cold unsalted butter. It is crucial that everything is very cold to prevent the butter from melting into the flour, which would result in a tough crust.
-
Chill the food processor bowl (or mixer bowl), the ingredients (flour and butter), and the blade of the food processor (or the paddle attachment of the mixer) in the freezer for at least 30 minutes prior to starting. This step is critical for achieving that coveted flaky crust.
-
After chilling, place the bowl with the flour and butter into the food processor or mixer. Using the pulse function on the food processor (or the paddle attachment on slow speed in the mixer), cut the butter into the flour until the mixture resembles coarse crumbs or flakes of oatmeal. Avoid over-processing; you want to see small pieces of butter still visible.
-
With the machine running on low speed, slowly pour the cold salted water into the flour-butter mixture. Mix just until the dough begins to come together and form a ball. Be careful not to over-mix; this will develop the gluten in the flour and result in a tough crust.
-
Remove the dough from the food processor (or mixer) and divide it into three equal portions. Gently shape each portion into a disk that’s roughly 6 inches in diameter.
-
Wrap each disk individually in plastic wrap and refrigerate for at least 30 minutes. This allows the gluten to relax, making the dough easier to roll out. Chilling also helps the butter firm up, which contributes to flakiness. You can chill it for even longer — up to 24 hours.
-
When ready to use, remove one disk from the refrigerator. On a lightly floured surface, roll out the disk into an 11-inch circle. The dough should be thin enough to easily fit into your 9-inch pie pan.
-
Carefully transfer the rolled-out dough to the 9-inch pie pan. Gently press the dough into the bottom and up the sides of the pan. Trim any excess dough from around the edges of the pan.
-
You can crimp the edges of the crust using a fork or your fingers for a decorative touch.
-
Once the crust is shaped in the pan, return the pan to the refrigerator to chill until you are ready to bake or fill it. This will help prevent the crust from shrinking during baking.
-
Blind Baking Instructions: If you are pre-baking the crust (blind baking) before adding a filling, line the crust with a piece of parchment paper. Fill the parchment-lined crust with pie weights, dry rice, or dry beans, spreading them evenly over the bottom to weigh down the crust and prevent it from puffing up during baking.
-
Make sure the crust is thoroughly chilled when it goes into the preheated oven. Preheat your oven to 375°F (190°C).
-
Bake the crust with the parchment paper and pie weights for about 20 minutes, or until the edges are lightly browned.
-
Remove the crust from the oven and carefully remove the parchment paper and pie weights (or rice/beans).
-
Prick the bottom of the crust several times with a fork. This will prevent it from puffing up further.
-
Return the crust to the oven and bake for an additional 5-10 minutes, or until the bottom of the crust is golden brown. Keep a close eye on it to prevent burning.
-
Remove the baked crust from the oven and let it cool completely before filling.
Expert Tips & Tricks
- Keep everything cold! This is the golden rule for a flaky pie crust. Work quickly to prevent the butter from melting.
- If the dough becomes too warm or sticky while you are rolling it out, return it to the refrigerator for a few minutes to chill before continuing.
- When blind baking, using granulated sugar instead of pie weights can add a hint of sweetness and caramelization to the crust.
- For an extra golden crust, brush the edges with an egg wash (1 egg beaten with 1 tablespoon of water) before baking.
- If your pie crust is browning too quickly during baking, cover the edges with foil or a pie shield to prevent burning.
Serving & Storage Suggestions
Serve your pie immediately after filling with your favorite filling and allowing it to set properly, or allow to cool completely before covering and refrigerating. Baked pie crusts can be stored at room temperature for up to 2 days, or in the refrigerator for up to 4 days. For longer storage, you can freeze baked or unbaked pie crusts for up to 2 months. To freeze an unbaked crust, place it in the pie pan, wrap it tightly in plastic wrap, and then in foil. To freeze a baked crust, let it cool completely, then wrap it tightly in plastic wrap and then in foil. When ready to use, thaw the crust in the refrigerator overnight before filling or baking.
Nutritional Information
| Nutrient | Amount per Serving | % Daily Value |
|---|---|---|
| Calories | 923.9 kcal | N/A |
| Calories from Fat | 561 g | 61% |
| Total Fat | 62.4 g | 96% |
| Saturated Fat | 39 g | 195% |
| Cholesterol | 162.7 mg | 54% |
| Sodium | 398.5 mg | 16% |
| Total Carbohydrate | 80 g | 26% |
| Dietary Fiber | 2.8 g | 11% |
| Sugars | 0.3 g | 1% |
| Protein | 11.5 g | 22% |
Note: Nutritional information is an estimate and can vary based on specific ingredients and serving sizes.
Variations & Substitutions
- Gluten-Free Crust: Use a high-quality gluten-free all-purpose flour blend. You may need to add a binder like xanthan gum for better texture.
- Vegan Crust: Substitute the butter with a vegan butter alternative. Ensure it is very cold and has a high fat content for the best results. You could also experiment with shortening, but the flavor will be different.
- Flavor Infusions: Add a teaspoon of vanilla extract or lemon zest to the dough for a subtle flavor boost. You can also incorporate herbs like rosemary or thyme for savory pies.
- Nut Crust: Replace some of the flour with finely ground nuts (almonds, pecans, or walnuts) for a nutty flavor and texture.
FAQs (Frequently Asked Questions)
Q: Why is my pie crust tough?
A: Over-mixing the dough develops the gluten in the flour, resulting in a tough crust. Be careful not to overwork the dough. Keeping the ingredients cold also helps prevent a tough crust.
Q: How can I prevent my pie crust from shrinking during baking?
A: Chill the dough thoroughly before rolling it out and again after placing it in the pie pan. Blind baking with pie weights also helps.
Q: What if my dough is too sticky to roll out?
A: Add a little extra flour to your work surface and the rolling pin. If the dough is still too sticky, wrap it in plastic wrap and chill it in the refrigerator for another 15-20 minutes.
Q: Can I freeze the pie dough?
A: Yes, you can freeze the pie dough for up to 2 months. Wrap it tightly in plastic wrap and then in foil. Thaw it in the refrigerator overnight before using.
Q: How do I know when my pie crust is fully baked?
A: The crust should be golden brown and feel dry to the touch. If you are blind baking, the bottom of the crust should also be lightly browned.
Final Thoughts
There’s something truly special about a homemade pie, and it all starts with the crust. This flaky butter crust recipe is a classic for a reason: it delivers consistent, delicious results every time. Don’t be intimidated – with a few simple steps and a little patience, you can create a pie crust that will impress your friends and family. So go ahead, give it a try! And when you do, don’t forget to share your creations with me. Happy baking!