
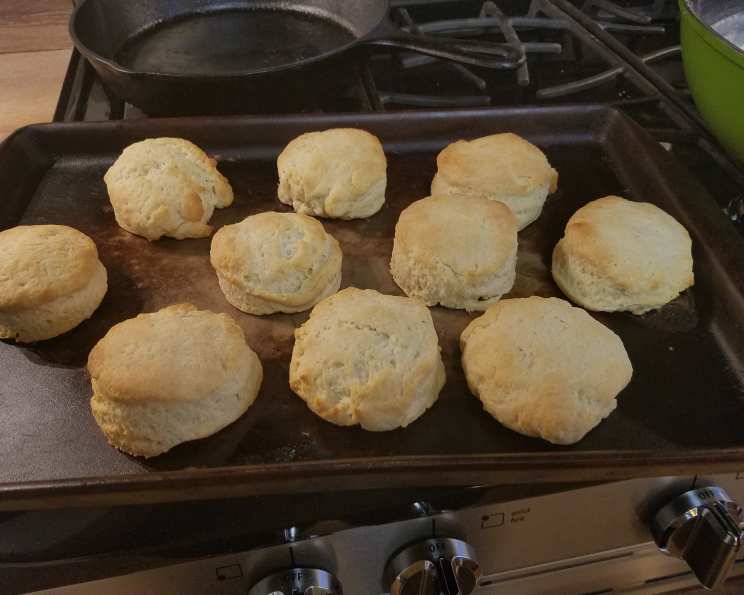
The Soul-Satisfying Simplicity of Flaky Layer Biscuits
There’s something almost primal about the scent of baking biscuits wafting through a kitchen. I remember being knee-high to my grandmother, standing on a rickety stool, watching her hands, gnarled with age and experience, effortlessly transform flour and butter into golden, cloud-like perfection. The rhythmic clatter of her rolling pin, the soft thud of biscuit cutter against the counter – these are the sounds of comfort and home, etched forever in my memory. She never measured anything, just went by feel, a pinch of this, a handful of that. While I’ve attempted to codify her magic into a precise recipe, the underlying spirit remains: simple ingredients, careful technique, and a whole lot of love.
Recipe Overview
- Prep Time: 15 minutes
- Cook Time: 15-18 minutes
- Total Time: 30-33 minutes
- Yields: 10 biscuits
- Serves: 4
- Dietary Type: Vegetarian
Ingredients
- 2 1⁄4 cups flour
- 1 tablespoon baking powder
- 1 teaspoon salt
- 1 teaspoon sugar
- 1⁄2 teaspoon cream of tartar
- 1⁄2 cup butter, grated
- 3⁄4 cup buttermilk
Equipment Needed
- Large bowl
- Grater
- Rolling pin
- Biscuit cutter (or knife)
- Baking tray
Instructions
-
Begin by preheating your oven to 400°F (200°C). Ensure the oven rack is positioned in the center for even baking.
-
In a large bowl, sift together the dry ingredients: flour, baking powder, salt, sugar, and cream of tartar. Sifting ensures that the ingredients are evenly distributed and helps to create a lighter, more tender biscuit.
-
Now comes the crucial step: incorporating the butter. Grate the cold butter into the dry ingredients. Working quickly and in 2 or 3 batches, gently combine the butter with the flour mixture using your fingertips or a pastry blender. The goal is to create small, pea-sized pieces of butter coated in flour. These little pockets of butter will melt during baking, creating the characteristic flaky layers.
-
Add the buttermilk to the mixture. Mix gently until the dough just comes together and resembles crumbles. Be careful not to overmix, as this will develop the gluten in the flour and result in tough biscuits.
-
Turn the dough out onto a lightly floured surface. Gently hand knead/fold the dough until all the remaining dry ingredients are incorporated into a single ball. Avoid overworking the dough; just bring it together enough to form a cohesive mass.
-
Roll the dough out into a rectangle approximately 1/2 inch thick. This is where the lamination begins.
-
Fold the rectangle into thirds, like folding a letter. Rotate the dough 1/4 turn and repeat the rolling and folding process 5-7 times. This creates numerous layers of dough and butter, which will expand during baking and result in those beautiful, flaky layers. The key here is to be gentle and keep the dough cold. If the butter starts to melt, wrap the dough in plastic wrap and refrigerate it for 15-20 minutes before continuing.
-
For the final time, roll the dough out to a 1/2-inch thickness. Use a biscuit cutter or a sharp knife to cut out the biscuits. Try not to twist the cutter as you press down, as this can seal the edges and prevent the biscuits from rising properly.
-
Place the biscuits on a baking tray, leaving a little space between them. For an extra golden brown top, you can optionally brush the top of the biscuits with melted butter.
-
Bake in the preheated oven for 15-18 minutes, or until the biscuits are golden brown on top. Keep a close eye on them, as baking times can vary depending on your oven.
Expert Tips & Tricks
- Keep everything cold! Cold butter is essential for creating flaky layers. You can even chill the flour and buttermilk before starting.
- Don’t overmix the dough. Overmixing develops the gluten and results in tough biscuits. Mix just until the ingredients are combined.
- Lamination is key. The more times you roll and fold the dough, the more layers you’ll have. Aim for 5-7 folds.
- Rest the dough. If the butter gets too soft, wrap the dough in plastic wrap and refrigerate it for 15-20 minutes before continuing.
- For a taller biscuit: Place the cut biscuits close together on the baking sheet; they will support each other as they rise.
- Make-ahead tip: Cut the biscuits and freeze them on a baking sheet. Once frozen, transfer them to a freezer bag. Bake directly from frozen, adding a few minutes to the baking time.
Serving & Storage Suggestions
Serve these flaky layer biscuits warm, straight from the oven, with a pat of butter, a dollop of jam, or a drizzle of honey. They are also delicious served alongside savory dishes like soup, stew, or fried chicken.
Leftover biscuits can be stored at room temperature in an airtight container for 1-2 days. For longer storage, refrigerate them for up to 3 days or freeze them for up to 2 months. To reheat, wrap the biscuits in foil and bake them in a preheated oven at 350°F (175°C) for 5-10 minutes, or until heated through. You can also microwave them for a quick reheat, but they may lose some of their crispness.
Nutritional Information
| Nutrient | Amount per Serving | % Daily Value |
|---|---|---|
| Calories | 484.6 kcal | N/A |
| Calories from Fat | 216 g | 45 % |
| Total Fat | 24.1 g | 37 % |
| Saturated Fat | 14.9 g | 74 % |
| Cholesterol | 62.8 mg | 20 % |
| Sodium | 1106.1 mg | 46 % |
| Total Carbohydrate | 58 g | 19 % |
| Dietary Fiber | 1.9 g | 7 % |
| Sugars | 3.5 g | 13 % |
| Protein | 9 g | 18 % |
Note: Nutritional information is an estimate and may vary depending on specific ingredients and preparation methods.
Variations & Substitutions
- Buttermilk Substitute: If you don’t have buttermilk, you can make a quick substitute by adding 1 tablespoon of lemon juice or white vinegar to a measuring cup and filling the rest with milk. Let it sit for 5 minutes to curdle slightly before using.
- Sweet Biscuits: Add 2-3 tablespoons of sugar to the dry ingredients for a sweeter biscuit, perfect with jam or fruit.
- Savory Biscuits: Add 1/2 cup of shredded cheddar cheese, chopped herbs (such as chives, rosemary, or thyme), or crumbled bacon to the dry ingredients for a savory twist.
- Vegan Biscuits: Substitute the butter with a high-quality vegan butter or shortening. Use almond milk or soy milk mixed with apple cider vinegar instead of buttermilk.
- Gluten-Free Biscuits: Use a gluten-free flour blend designed for baking. You may need to adjust the amount of liquid to achieve the right consistency.
FAQs (Frequently Asked Questions)
Q: Why are my biscuits flat and dense?
A: This is likely due to overmixing the dough or using warm butter. Remember to keep everything cold and mix just until the ingredients are combined.
Q: Can I use self-rising flour instead of all-purpose flour and baking powder?
A: Yes, but you’ll need to omit the baking powder and salt from the recipe. However, using all-purpose flour and baking powder gives you more control over the rise and texture of the biscuits.
Q: How do I get a golden-brown top on my biscuits?
A: Brushing the tops of the biscuits with melted butter or milk before baking will help them brown nicely.
Q: Can I freeze the biscuit dough?
A: Yes, you can freeze the dough after cutting out the biscuits. Place the cut biscuits on a baking sheet and freeze them until solid. Then, transfer them to a freezer bag for longer storage. Bake directly from frozen, adding a few minutes to the baking time.
Q: What is cream of tartar and why is it used?
A: Cream of tartar is a dry, acidic powder that helps to stabilize the leavening in the baking powder and contributes to a lighter, more tender texture. While it can be omitted, it is recommended for the best results.
Final Thoughts
These flaky layer biscuits are more than just a recipe; they’re a connection to simpler times, a reminder of the comforting power of home-baked goodness. Don’t be intimidated by the lamination process – it’s easier than it looks, and the reward of a perfectly layered biscuit is well worth the effort. I encourage you to try this recipe, experiment with different variations, and share your creations with loved ones. There’s nothing quite like the satisfaction of pulling a batch of warm, golden biscuits from the oven, ready to be slathered with butter and enjoyed. So, gather your ingredients, preheat your oven, and let the magic of baking begin!