
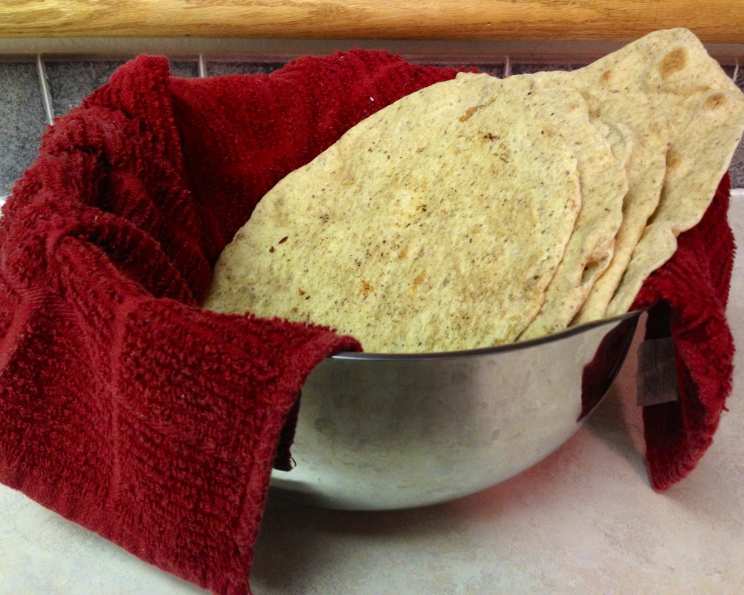
Flat (Out) Delicious: Homemade Griddle Bread
The smell of yeasty dough cooking on a hot griddle… it instantly transports me back to my grandmother’s kitchen. She wasn’t a fancy baker, but she had a knack for simple, comforting foods. I remember standing on a stool, watching her expertly flip these rustic flatbreads, the edges blistering and puffing up in all the right places. We’d slather them with butter and jam, or use them to scoop up her hearty stews. That simple pleasure, the taste of warm, homemade bread, is something I’ve always tried to recreate.
Recipe Overview
- Prep Time: 30 minutes
- Cook Time: 10 minutes
- Total Time: 2 hours 40 minutes (includes rising time)
- Servings: 8
- Yield: 8 flatbreads
- Dietary Type: Vegetarian (easily adaptable to vegan)
Ingredients
- 2 teaspoons dry active yeast
- 1 1/4 cups warm water
- 2 cups bread flour, plus more for work surface
- 1 cup whole wheat flour
- 1 tablespoon sugar
- 1 teaspoon salt
- 2 tablespoons olive oil, plus more for bowl and griddle
Equipment Needed
- Large bowl
- Plastic wrap
- Clean towel
- Griddle
- Kitchen Aid mixer (optional)
Instructions
-
In a large bowl, mix together the yeast and 3/4 cup of warm water. Let this mixture stand for 5 minutes, allowing the yeast to activate. You should see some bubbling or foaming on the surface. This step is crucial to ensure your flatbreads rise properly. If nothing happens, your yeast might be old, and you’ll need to start with fresh yeast.
-
Add the remaining 1/2 cup of warm water, the bread flour, whole wheat flour, sugar, salt, and olive oil to the yeast mixture. Mix everything together until a dough forms. It should be slightly sticky but come together in a cohesive mass.
-
Turn the dough out onto a lightly floured work surface. Knead the dough until it becomes firm and smooth, about 5 minutes. Alternatively, you can use a KitchenAid mixer fitted with a dough hook to knead the dough. This step develops the gluten, which gives the flatbread its structure and chewiness. If the dough sticks excessively, add a little more bread flour, a tablespoon at a time, until it’s manageable.
-
Lightly oil a large bowl with olive oil. Place the kneaded dough in the bowl and turn it to coat it lightly with the oil. This will prevent the dough from drying out during the rising process.
-
Cover the bowl with plastic wrap and place it in a warm place. Let the dough rise until it has doubled in size, about 2 hours. The rising time may vary depending on the temperature of your kitchen. A warm environment encourages the yeast to work its magic.
-
Once the dough has doubled, gently punch it down to release the air. Divide the dough into 8 equal pieces, each weighing approximately 2 oz.
-
Roll each piece of dough out to an 1/8-inch-thick oblong circle. Aim for a relatively even thickness to ensure the flatbreads cook evenly. Cover the rolled-out dough with a clean towel to prevent them from drying out while you work on the remaining pieces.
-
Heat a griddle over high heat. Lightly coat the griddle with olive oil. The griddle should be hot enough so a droplet of water immediately sizzles and evaporates. Be cautious when working with high heat and hot oil!
-
Working with one piece of dough at a time, uncover it and carefully place it on the hot griddle. Cook the flatbread until it starts to bubble and brown on the bottom, about 40 seconds to 1 minute. Then, turn it over and continue cooking for another 20 seconds, or until the other side is also browned.
-
Remove the cooked flatbread from the heat and place it on a plate or cooling rack. Wipe the griddle clean with a clean towel before cooking the next piece. This prevents any burnt bits from transferring to the next flatbread.
-
Repeat the process with the remaining pieces of dough until all the flatbreads are cooked.
Expert Tips & Tricks
- For a softer flatbread, use a little less whole wheat flour and a bit more bread flour.
- To add flavor, incorporate fresh herbs like rosemary, thyme, or oregano into the dough during the kneading process.
- If you don’t have a griddle, you can use a large cast-iron skillet or even a regular frying pan.
- If the flatbreads are browning too quickly, reduce the heat slightly.
- For a vegan version, ensure the sugar you use is vegan (some granulated sugar is processed using bone char).
- If your dough is too sticky to work with, add a little more flour, one tablespoon at a time, until it becomes manageable. Be careful not to add too much flour, as this can make the flatbreads tough.
Serving & Storage Suggestions
Serve the flatbreads warm, either on their own or as an accompaniment to soups, stews, or dips. They are also excellent for making wraps, pizzas, or sandwiches.
Store leftover flatbreads in an airtight container at room temperature for up to 2 days, or in the refrigerator for up to 5 days. You can also freeze them for longer storage. To reheat, simply warm them in a skillet, oven, or microwave. For best results, sprinkle a little water on them before reheating to prevent them from drying out.
Nutritional Information
(Estimated per serving – varies depending on exact measurements)
| Nutrient | Amount per Serving | % Daily Value |
|---|---|---|
| Calories | 210 kcal | 10% |
| Total Fat | 4g | 5% |
| Saturated Fat | 0.5g | 3% |
| Cholesterol | 0mg | 0% |
| Sodium | 250mg | 11% |
| Total Carbohydrate | 37g | 13% |
| Dietary Fiber | 3g | 11% |
| Sugars | 2g | N/A |
| Protein | 6g | 12% |
Variations & Substitutions
- Gluten-Free: Substitute the bread flour and whole wheat flour with a gluten-free flour blend. You may need to adjust the amount of water to achieve the right consistency.
- Spiced Flatbread: Add a pinch of chili flakes, cumin, or coriander to the dough for a spicy kick.
- Sweet Flatbread: Omit the salt and add a tablespoon of honey or maple syrup to the dough for a sweet treat. Sprinkle with cinnamon sugar after cooking.
- Herb & Garlic: Mince garlic and mix with chopped fresh herbs (such as rosemary, thyme, or parsley) and add to the dough. Brush with garlic-infused olive oil after cooking.
- Sun-Dried Tomato & Olive: Finely chop sun-dried tomatoes and Kalamata olives and incorporate them into the dough.
FAQs (Frequently Asked Questions)
Q: Why isn’t my dough rising?
A: Several factors can affect rising. Make sure your yeast is fresh, the water is warm (not hot), and the room is warm. Also, check the expiration date on your yeast; old yeast is inactive.
Q: My flatbreads are tough. What did I do wrong?
A: Over-kneading or adding too much flour can make the flatbreads tough. Be careful not to overwork the dough, and add flour gradually until it forms a smooth, elastic ball.
Q: Can I make the dough ahead of time?
A: Yes, you can make the dough ahead of time and store it in the refrigerator for up to 24 hours. Just punch it down before rolling it out.
Q: How do I prevent the flatbreads from sticking to the griddle?
A: Make sure your griddle is hot enough and well-oiled. Use a non-stick griddle if you have one.
Q: Can I bake these in the oven instead of using a griddle?
A: Yes, you can bake them on a baking sheet at 450°F (232°C) for about 5-7 minutes, or until golden brown. However, the texture will be slightly different – less crispy and more like pita bread.
Final Thoughts
There’s a certain magic in transforming simple ingredients into something so satisfying. These flatbreads are more than just a recipe; they’re a blank canvas for your culinary creativity. So, get in the kitchen, experiment with different flavors, and create your own family memories around this versatile bread. Don’t hesitate to share your creations and feedback – I’d love to hear how you make this recipe your own! Enjoy!