
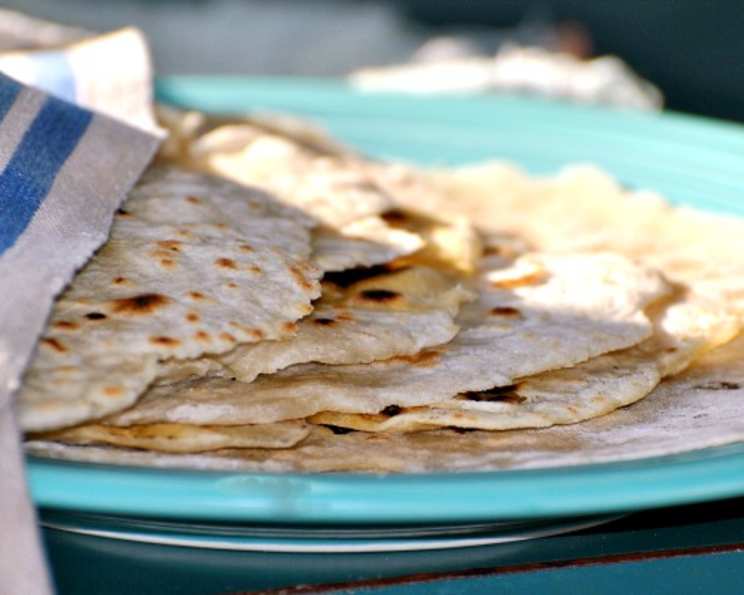
Homemade Flour Tortillas: A Culinary Adventure
The first time I tasted a truly exceptional flour tortilla was at a small family-run taqueria in San Antonio. The aroma alone, a delicate blend of toasted wheat and melted butter, was intoxicating. But the real magic happened when I took that first bite – a soft, pliable, slightly chewy texture that melted in my mouth. From that moment on, I was on a quest to recreate that experience in my own kitchen.
Recipe Overview
- Prep Time: 30 minutes
- Cook Time: 20 minutes
- Total Time: 50 minutes
- Servings: 12
- Yield: 12 tortillas
- Dietary Type: Vegetarian
Ingredients
- 3 cups all-purpose flour
- 5 tablespoons lard or vegetable shortening
- 1 teaspoon salt
- 1 cup very warm tap water
Equipment Needed
- Food Processor
- Rolling Pin
- Flat Cast Iron Griddle
- Plastic Wrap
- Heavy Towel
Instructions
-
Begin by combining 2 3/4 cups of the all-purpose flour in a food processor. Reserve the remaining flour for rolling out the dough later.
-
Add 5 tablespoons of lard or vegetable shortening to the food processor. Pulse the mixture several times until the fat is evenly distributed throughout the flour and no visible particles of fat remain. This step is crucial for creating a tender, flaky tortilla.
-
In a separate small bowl, dissolve 1 teaspoon of salt in 2/3 cup of the very warm tap water. Ensure the salt is fully dissolved before proceeding.
-
With the food processor running, slowly pour the salt water mixture through the feed tube in a steady stream. Stop the machine as soon as the dough comes together in a ball. Over-processing can lead to tough tortillas.
-
Feel the dough to check its consistency. It should be medium-stiff – not too firm, but also not as soft as most bread doughs. The ideal consistency is essential for easy rolling and proper cooking.
-
If the dough is too stiff, divide it into several pieces. Sprinkle with 1 or 2 tablespoons of the remaining warm water and process again until a ball forms. Add water gradually to avoid making the dough too sticky.
-
Divide the dough into 12 equal portions. Roll each portion into a ball and place them on a flat surface or plate. These will be your individual tortillas.
-
Cover the dough balls with plastic wrap and allow them to rest for at least 30 minutes. This resting period allows the gluten to relax, making the tortillas easier to roll out and preventing them from snapping back.
-
Prepare a lightly floured surface for rolling. Take one dough ball and flatten it slightly. Lightly flour both sides of the dough.
-
Using a rolling pin, roll the dough forward and backward. Then, turn the dough a sixth of a turn and roll forward and backward again.
-
Repeat the turning and rolling process until you form a 7-inch circle. Re-flour the work surface as necessary to prevent the dough from sticking. Aim for a consistent thickness throughout the tortilla.
-
Place the rolled-out tortilla on a plate and cover it with plastic wrap to prevent it from drying out.
-
Repeat the rolling out process for the remaining 11 dough balls. Stack the rolled-out tortillas between layers of plastic wrap to keep them from sticking together.
-
Heat a flat cast iron griddle over moderately high heat. The griddle should be hot enough to cook the tortillas quickly without burning them.
-
Carefully lay a tortilla on the hot griddle. Cook for 20 to 45 seconds, until the tortilla begins to bubble and lightly browns on the underside. Keep a close eye on the tortilla to prevent scorching.
-
Flip the tortilla and cook it for another 30 to 45 seconds. The tortilla should be lightly browned on both sides but still soft and flexible.
-
Transfer the cooked tortilla to a heavy towel and wrap it up immediately. This step is essential for keeping the tortillas warm and soft.
-
Cook the remaining tortillas in a similar manner and store them stacked in the towel to maintain their warmth and pliability.
-
If you’re not using the tortillas immediately, they can be stored in a sealable plastic bag and refrigerated.
-
To reheat the tortillas, tuck them in an “envelope” made out of aluminum foil and heat in a 325°F oven for 10 to 15 minutes. Alternatively, you can reheat them individually on a dry skillet or in the microwave.
Expert Tips & Tricks
- Fat is Key: The type of fat you use significantly impacts the tortilla’s texture and flavor. Lard provides a richer, more authentic flavor, while vegetable shortening results in a slightly lighter, more neutral taste. Experiment to find your preference.
- Don’t Overwork the Dough: Over-processing the dough develops too much gluten, resulting in tough tortillas. Mix only until the dough comes together.
- Resting is Essential: The resting period allows the gluten to relax, making the dough easier to roll out. Don’t skip this step!
- Hot Griddle is Crucial: A hot griddle ensures that the tortillas cook quickly and evenly, resulting in a soft and pliable texture.
- Keep Them Warm: Wrapping the cooked tortillas in a heavy towel traps steam and keeps them soft and warm.
Serving & Storage Suggestions
Serve your homemade flour tortillas warm with your favorite fillings. They are perfect for tacos, burritos, quesadillas, or simply enjoyed with butter and salt.
- Room Temperature: Cooked tortillas can be left at room temperature for up to 2 hours.
- Refrigerator: Store tortillas in a sealed plastic bag in the refrigerator for up to 5 days.
- Freezer: For longer storage, freeze tortillas in a sealed plastic bag for up to 2 months. Thaw them in the refrigerator or at room temperature before reheating.
Nutritional Information
| Nutrient | Amount per Serving | % Daily Value |
|---|---|---|
| Calories | 161.9 kcal | N/A |
| Calories from Fat | N/A | N/A |
| Total Fat | 5.6 g | 8% |
| Saturated Fat | 2.1 g | 10% |
| Cholesterol | 5.1 mg | 1% |
| Sodium | 195 mg | 8% |
| Total Carbohydrate | 23.9 g | 7% |
| Dietary Fiber | 0.8 g | 3% |
| Sugars | 0.1 g | 0% |
| Protein | 3.2 g | 6% |
Note: Nutritional information is an estimate and may vary based on specific ingredients and preparation methods.
Variations & Substitutions
- Whole Wheat Tortillas: Substitute up to half of the all-purpose flour with whole wheat flour for a nuttier flavor and added fiber.
- Gluten-Free Tortillas: Use a gluten-free flour blend designed for baking, but be aware that the texture may be slightly different.
- Flavored Tortillas: Add herbs, spices, or even finely grated cheese to the dough for a unique flavor profile. Try adding chili powder, cumin, or garlic powder for a Tex-Mex twist.
- Vegan Tortillas: Ensure you use vegetable shortening or a vegan-friendly lard substitute instead of traditional lard.
FAQs (Frequently Asked Questions)
Q: Why are my tortillas tough?
A: Over-mixing the dough develops too much gluten, resulting in tough tortillas. Also, make sure you allow the dough to rest for at least 30 minutes.
Q: How do I keep my tortillas from sticking together?
A: Stack the rolled-out tortillas between layers of plastic wrap to prevent them from sticking.
Q: Can I make the dough ahead of time?
A: Yes, you can make the dough ahead of time and store it in the refrigerator for up to 24 hours. Allow it to come to room temperature before rolling it out.
Q: What’s the best way to reheat tortillas?
A: The best way to reheat tortillas is to tuck them in an “envelope” made out of aluminum foil and heat in a 325°F oven for 10 to 15 minutes. You can also reheat them individually on a dry skillet or in the microwave.
Q: Can I freeze the cooked tortillas?
A: Yes, you can freeze cooked tortillas in a sealed plastic bag for up to 2 months. Thaw them in the refrigerator or at room temperature before reheating.
Final Thoughts
Making your own flour tortillas from scratch might seem intimidating, but it’s surprisingly easy and incredibly rewarding. The taste and texture of homemade tortillas are far superior to store-bought versions. So, gather your ingredients, put on some music, and embark on this culinary adventure. Your family and friends will thank you! Feel free to experiment with different flavors and fillings, and most importantly, have fun! Don’t hesitate to share your creations and feedback! I especially recommend pairing your tortillas with some slow cooked barbacoa and all the fixings!