
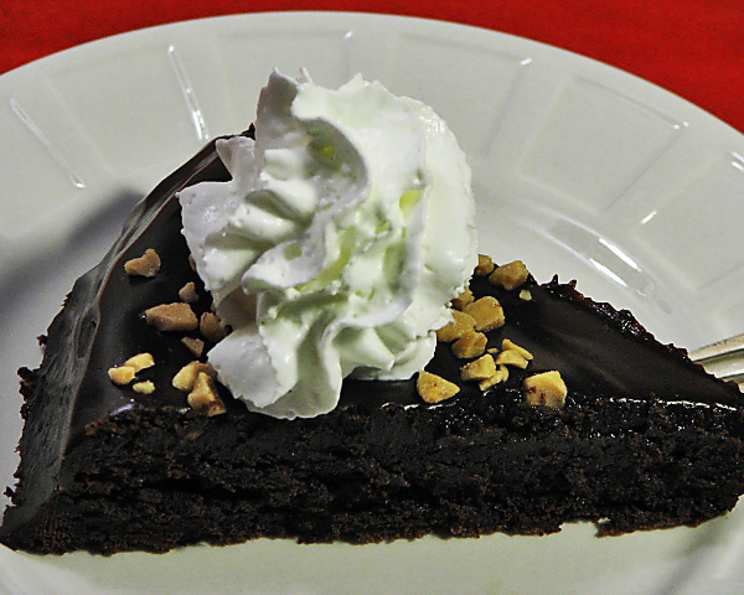
Flourless Chocolate Cake: A Decadent Delight
The first time I tasted flourless chocolate cake, it was at a small Parisian bistro. The waiter, with a flourish, presented a glistening, dark slice, the aroma of rich chocolate intoxicating. One bite, and I was transported. It was intense, fudgy, and deeply satisfying – a testament to the power of simple ingredients transformed into something truly special. From that day forward, I was determined to master the art of flourless chocolate cake, and this recipe from King Arthur Flour is, in my humble opinion, a perfect rendition.
Recipe Overview
- Prep Time: 15 minutes
- Cook Time: 25 minutes
- Total Time: 40 minutes
- Servings: 10
- Yield: 1 8-inch cake
- Dietary Type: Gluten-Free
Ingredients
- 1 cup semisweet chocolate, chopped (or use chips)
- ½ cup unsalted butter
- ¾ cup granulated sugar
- ⅛ teaspoon salt
- 2 teaspoons espresso powder (optional, but highly recommended)
- 3 large eggs
- ½ cup unsweetened cocoa powder
For the Glaze (optional):
- 1 cup semisweet chocolate (or chips)
- ½ cup heavy cream
- ¼ cup sliced almonds, toasted (optional)
Equipment Needed
- 8-inch round cake pan
- Parchment paper or waxed paper
- Microwave-safe bowl
- Mixer (hand or stand)
- Spatula
Instructions
- Preheat your oven to 375°F (190°C).
- Prepare your 8-inch round cake pan. Lightly grease the pan. Then, cut a piece of parchment or waxed paper to fit the bottom of the pan. Grease the paper and lay it in the bottom of the pan. For extra insurance against sticking, spray the whole pan with a baking spray that contains flour.
- In a microwave-safe bowl, combine the chopped chocolate and butter. Heat in the microwave in 30-second intervals, stirring after each interval, until the mixture is completely melted and smooth. Be careful not to overheat the chocolate; it should be melted and glossy, not burnt.
- Add the granulated sugar, salt, and espresso powder (if using) to the melted chocolate mixture. Stir until well combined. The espresso powder enhances the chocolate flavor beautifully, adding depth without making the cake taste like coffee.
- Add the eggs one at a time, beating briefly after each addition until the batter is smooth. Do not overbeat the eggs, as this can incorporate too much air and cause the cake to puff up and then collapse.
- Add the unsweetened cocoa powder and mix just until combined. Be careful not to overmix at this stage; just ensure that the cocoa powder is fully incorporated into the batter. Overmixing can develop the gluten (even though there’s no flour!), leading to a tougher cake.
- Spoon the batter into the prepared cake pan, spreading it evenly.
- Bake the cake for 25 minutes. The top of the cake should have formed a thin crust, and the center should be slightly set but still a little soft. A toothpick inserted into the center may come out with moist crumbs attached.
- Remove the cake from the oven and let it cool in the pan for 5 minutes. This allows the cake to set slightly before inverting it.
- Loosen the edges of the cake from the pan using a thin knife or spatula. Carefully invert the cake onto a serving plate.
- Allow the cake to cool completely before glazing. This is important because the glaze will melt if applied to a warm cake.
To make the Glaze (Optional):
- In a microwave-safe bowl, combine the chocolate and heavy cream. Heat in the microwave in 30-second intervals, stirring after each interval, until the chocolate is melted and the mixture is completely smooth.
- Spoon the glaze over the cooled cake, spreading it evenly and allowing it to drip over the sides a bit.
- Garnish with toasted sliced almonds, if desired.
- Allow the glaze to set for several hours before serving the cake. This will ensure that the glaze is firm and doesn’t become too messy.
Expert Tips & Tricks
- Microwave Melting Chocolate: When melting chocolate in the microwave, use short intervals (30 seconds or less) and stir frequently to prevent burning. Chocolate can scorch easily, even if it doesn’t look burnt, and it will ruin the flavor.
- Espresso Powder: Don’t skip the espresso powder! It enhances the chocolate flavor beautifully and doesn’t make the cake taste like coffee. If you don’t have espresso powder, you can substitute a strong brewed coffee, but reduce the liquid in the recipe slightly.
- Doneness: The cake is done when the top has formed a thin crust and the center is set but still slightly soft. It’s better to slightly underbake the cake than overbake it, as overbaking can result in a dry cake.
- Cooling: Allow the cake to cool completely before glazing. This prevents the glaze from melting and running off the cake.
- Make-Ahead: This cake can be made a day ahead of time. In fact, it tastes even better the next day! Store it covered in the refrigerator.
Serving & Storage Suggestions
Serve this flourless chocolate cake chilled or at room temperature. A dollop of whipped cream or a scoop of vanilla ice cream makes a delightful accompaniment. The cake is intensely rich, so small slices are usually sufficient.
Store leftover cake in an airtight container in the refrigerator for up to 5 days. The cake can also be frozen for up to 2 months. Wrap it tightly in plastic wrap and then foil before freezing. Thaw in the refrigerator overnight before serving.
Nutritional Information
| Nutrient | Amount per Serving | % Daily Value |
|---|---|---|
| Calories | 278 kcal | N/A |
| Total Fat | 22.5g | 34% |
| Saturated Fat | 13.7g | 68% |
| Cholesterol | 96.5mg | 32% |
| Sodium | 60.4mg | 2% |
| Total Carbohydrate | 21.9g | 7% |
| Dietary Fiber | 3.6g | 14% |
| Sugars | 15.2g | N/A |
| Protein | 4.8g | 9% |
Note: Nutritional information is an estimate and may vary based on specific ingredients and serving sizes.
Variations & Substitutions
- Dairy-Free: Substitute the butter with a plant-based butter alternative and the heavy cream in the glaze with coconut cream or another non-dairy cream.
- Different Chocolate: Experiment with different types of chocolate, such as dark chocolate or milk chocolate, depending on your preference.
- Flavorings: Add a teaspoon of vanilla extract or another flavoring extract to the batter for a different flavor profile. Orange extract or almond extract would be delicious.
- Nuts: Incorporate chopped nuts, such as walnuts or pecans, into the batter for added texture and flavor.
FAQs (Frequently Asked Questions)
Q: Can I use chocolate chips instead of chopped chocolate?
A: Yes, you can use chocolate chips in place of chopped chocolate. Just make sure to use good-quality chocolate chips for the best flavor.
Q: What if I don’t have espresso powder?
A: The espresso powder enhances the chocolate flavor, but it’s optional. You can leave it out or substitute with a teaspoon of strong brewed coffee.
Q: How do I know when the cake is done?
A: The cake is done when the top has formed a thin crust and the center is set but still slightly soft. A toothpick inserted into the center may come out with moist crumbs attached.
Q: Can I make this cake ahead of time?
A: Yes, this cake can be made a day ahead of time. In fact, it tastes even better the next day! Store it covered in the refrigerator.
Q: Can I freeze this cake?
A: Yes, this cake can be frozen for up to 2 months. Wrap it tightly in plastic wrap and then foil before freezing. Thaw in the refrigerator overnight before serving.
Final Thoughts
This flourless chocolate cake is a truly special dessert. It’s rich, decadent, and surprisingly easy to make. Whether you’re celebrating a special occasion or simply craving a chocolate fix, this cake is sure to satisfy. So, gather your ingredients, preheat your oven, and prepare to indulge in a slice of chocolate heaven. And don’t be shy about adding your own personal touch! Perhaps a sprinkle of sea salt on top, or a dusting of cocoa powder. However you choose to serve it, I hope this cake brings you as much joy as it has brought me over the years. Enjoy!