
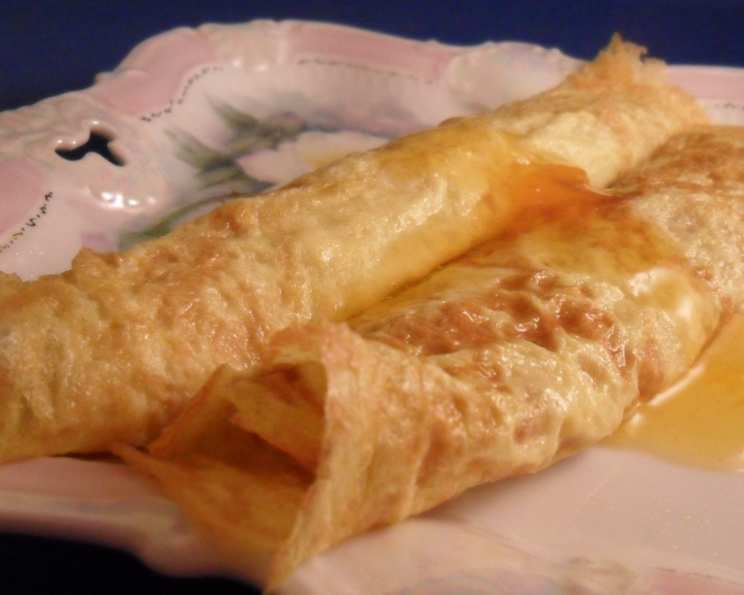
Flourless Crepes: A Guilt-Free Delight
The memory still makes me smile. It was a bright Sunday morning, the kind where the sun streams through the kitchen window, turning dust motes into dancing diamonds. My daughter, barely tall enough to see over the counter, was “helping” me make crepes – flourless ones, of course, because her grandmother was coming over, and gluten was off the menu. The batter splattered everywhere, mostly on her face, but the joy in her eyes as she flipped her very first crepe (with a little assistance, I’ll admit!) was absolutely priceless. Those simple, flourless crepes became a symbol of our family’s commitment to deliciousness, regardless of dietary restrictions.
Recipe Overview
- Prep Time: 5 minutes
- Cook Time: 5 minutes
- Total Time: 10 minutes
- Servings: 1-2
- Yields: 3 crepes
- Dietary Type: Gluten-Free, South Beach Diet Friendly
Ingredients
- 1 large egg
- 1 tablespoon nonfat milk (any kind of milk or even heavy cream can be used)
- 1 teaspoon olive oil
- ⅛ teaspoon Splenda sugar substitute
- ⅛ teaspoon vanilla
Equipment Needed
- Small non-stick skillet or crepe pan
- Whisk
- Cooking spray
- Plate
Instructions
-
In a small bowl, whisk together the egg, nonfat milk, olive oil, Splenda, and vanilla. Continue whisking vigorously until the mixture is frothy, about 15-20 strokes. This will help to create a light and airy crepe.
-
Lightly coat a small non-stick skillet or crepe pan with cooking spray. Place the pan over medium heat. Allow the pan to heat up fully before adding the batter; a hot pan is essential for preventing the crepe from sticking.
-
Once the pan is hot, pour approximately ⅓ of the batter (about ⅛ of a cup) into the center of the pan. Immediately swirl the pan in a circular motion to evenly coat the bottom with a thin layer of batter. If you notice any ‘holes’ in the batter, use a small amount of batter to fill them in. A thin, even coating is key to a delicate crepe.
-
Cook for approximately 1 minute, or until the crepe is nicely set and lightly browned on the bottom. The top of the crepe should appear cooked and no longer wet. Watch carefully to avoid burning.
-
Using a thin spatula, gently flip the crepe. Cook for another minute or so, until the second side is also lightly browned.
-
Carefully remove the cooked crepe from the pan and place it on a waiting plate.
-
Repeat steps 3-6 until all the batter has been used. This recipe should yield about 3 crepes.
-
Fill the crepes with your choice of toppings. Popular options include fresh fruit, ricotta cheese, yogurt, berries, chocolate spread, or savory fillings like ham and cheese. Get creative and experiment with different combinations!
Expert Tips & Tricks
- Achieving the Perfect Batter: The key to a perfect crepe is a smooth, lump-free batter. Whisk the ingredients vigorously until they are fully combined. If you still have lumps, you can strain the batter through a fine-mesh sieve for an extra-smooth consistency.
- Pan Temperature is Crucial: Ensure the pan is hot before adding the batter. A hot pan will create a slightly crisp edge and prevent sticking. However, avoid overheating the pan, as this can cause the crepes to burn quickly.
- Swirling Technique: Practice your swirling technique to ensure the batter coats the pan evenly. A thin, even coating will result in a delicate crepe.
- Make-Ahead Tip: You can make the batter ahead of time and store it in the refrigerator for up to 24 hours. This allows the flavors to meld together and makes for a quicker breakfast or brunch. Just give it a quick whisk before using.
- Savory Crepes: For a savory version, omit the Splenda and vanilla, and add a pinch of salt and some herbs like thyme or rosemary to the batter.
- Preventing Sticking: Even with a non-stick pan, sometimes the crepes can stick. Ensure the pan is well-seasoned and lightly coated with cooking spray before each crepe. You can also use a small amount of melted butter instead of cooking spray for added flavor and to prevent sticking.
Serving & Storage Suggestions
These flourless crepes are best served immediately, while they are still warm and slightly pliable. Arrange the filled crepes on a plate and garnish with a dusting of powdered sugar, fresh berries, or a drizzle of chocolate sauce for an elegant presentation.
Leftover crepes can be stored in the refrigerator for up to 2 days. To prevent them from sticking together, stack them with a piece of parchment paper between each crepe. Reheat the crepes in a skillet over low heat or in the microwave for a few seconds until warmed through. You can also freeze crepes. Allow them to cool completely, then stack with parchment paper and place in a freezer-safe bag or container. Frozen crepes can be stored for up to 2 months. Thaw them in the refrigerator overnight before reheating.
Nutritional Information
Please note that the following nutritional information is an estimate and can vary depending on the specific ingredients used and portion sizes.
| Nutrient | Amount per Serving | % Daily Value |
|---|---|---|
| Calories | 118 kcal | N/A |
| Fat | 9 g | 14% |
| Saturated Fat | 2 g | 10% |
| Cholesterol | 186 mg | 62% |
| Sodium | 77 mg | 3% |
| Carbohydrates | 1 g | 0% |
| Fiber | 0 g | 0% |
| Sugars | 1 g | N/A |
| Protein | 7 g | 13% |
Variations & Substitutions
- Dairy-Free Crepes: Substitute the nonfat milk with almond milk, soy milk, or coconut milk for a dairy-free version.
- Sweetener Options: Instead of Splenda, you can use other sugar substitutes like stevia or erythritol, or even a small amount of honey or maple syrup. Adjust the amount to your preferred sweetness level.
- Flavor Enhancements: Add a pinch of cinnamon, nutmeg, or lemon zest to the batter for extra flavor.
- Savory Herbs: Incorporate finely chopped herbs like chives, parsley, or dill for a savory twist.
- Chocolate Crepes: Add a tablespoon of unsweetened cocoa powder to the batter for a rich chocolate flavor.
FAQs (Frequently Asked Questions)
Q: Can I use a regular frying pan instead of a crepe pan?
A: Yes, you can. A crepe pan is ideal because of its shallow edges, but a regular non-stick frying pan will work just fine. Just make sure it’s well-seasoned and properly heated.
Q: My crepes are tearing when I try to flip them. What am I doing wrong?
A: This usually means the crepe hasn’t cooked enough on the first side. Let it cook a little longer until it’s set and lightly browned before attempting to flip it. Also, ensure your spatula is thin and flexible enough to gently lift the crepe.
Q: Can I make these crepes ahead of time?
A: Yes, you can make the crepes ahead of time and store them in the refrigerator or freezer. Just make sure to separate them with parchment paper to prevent sticking.
Q: Are these crepes suitable for someone with celiac disease?
A: Yes, these crepes are flourless and therefore gluten-free, making them a great option for someone with celiac disease. However, always double-check the labels of all your ingredients to ensure they are certified gluten-free.
Q: What are some good filling ideas for these crepes?
A: The possibilities are endless! For sweet crepes, try fresh fruit, whipped cream, Nutella, or jam. For savory crepes, try ham and cheese, sautéed vegetables, or a creamy mushroom sauce.
Final Thoughts
These flourless crepes are a testament to the fact that delicious food can be both healthy and inclusive. Whether you’re looking for a quick and easy breakfast, a gluten-free option for a loved one, or simply a guilt-free treat, this recipe is sure to please. So gather your ingredients, heat up your pan, and get ready to create some culinary magic! Don’t be afraid to experiment with different fillings and toppings to create your own signature crepe. And most importantly, have fun in the kitchen! Share your creations with friends and family, and let them know that healthy eating can be a delicious and joyful experience.