
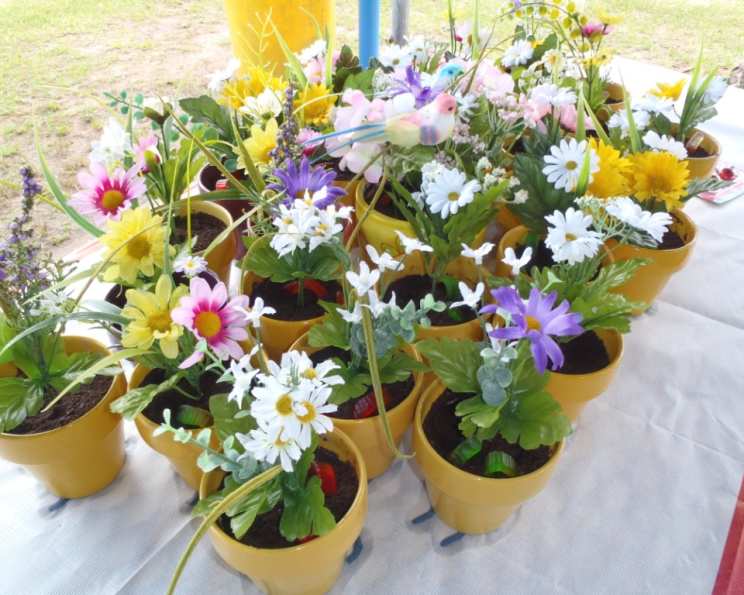
Flower Pot Cake: A Whimsical Dessert Garden
There’s something undeniably charming about a dessert that arrives looking like it sprouted straight from the earth. I remember the first time I saw Flower Pot Cake. It was at a children’s birthday party, and amidst the sea of brightly colored decorations and sugar-fueled excitement, these little terracotta pots filled with what looked like soil and flowers stole the show. Each child, armed with a tiny plastic shovel, dug into their own edible garden, giggling with delight as they unearthed layers of chocolatey goodness. It was pure magic, and I knew I had to recreate that joy in my own kitchen.
Recipe Overview
- Prep Time: 30 minutes
- Cook Time: According to cake mix instructions
- Total Time: Varies depending on cake baking time + 30 minutes
- Yields: 1 flower pot
- Serves: 8-10
Ingredients
For the Cake:
- 1 (18 1/4 ounce) box dark chocolate cake mix
- 1 1/4 cups water
- 1/3 cup vegetable oil
- 3 eggs
For the Pudding:
- 2 (4 ounce) boxes instant chocolate pudding mix
- 4 cups cold milk
Everything Else:
- 1 (14 ounce) package Oreo cookies
- 1 (8 ounce) package cream cheese, softened
- 4 tablespoons margarine
- 3/4 cup powdered sugar
- 1 (12 ounce) package Cool Whip
Non-Food Items:
- 1 plastic flower pot (approximately 9 inches tall)
- 1 bunch artificial flowers
- Gummy worms (optional)
Equipment Needed
- Large mixing bowl
- Electric mixer
- Baking pan (size according to cake mix directions)
- Blender or food processor
- Measuring cups and spoons
- Refrigerator
- Aluminum foil
- Rubber spatula
- Serving spade (optional)
Instructions
- Prepare the Cake: In a large bowl, combine the entire box of dark chocolate cake mix, water, vegetable oil, and eggs.
- Mix the Cake Batter: Using an electric mixer, beat the ingredients together until well combined and smooth. Follow the mixing directions specified on the cake mix box.
- Bake the Cake: Pour the batter into a prepared baking pan (size specified on the cake mix box). Bake according to the package directions for the pan size you are using. Remember, you will have leftover cake, so consider baking it in a muffin tin to freeze extra muffins for later.
- Prepare the Pudding: In a separate bowl, empty the two boxes of instant chocolate pudding mix.
- Add Milk: Pour the cold milk into the bowl with the pudding mix.
- Whisk the Pudding: Beat the mixture according to the package directions (usually with a whisk or electric mixer).
- Chill the Pudding: Refrigerate the pudding mixture until it thickens, usually around 5-10 minutes.
- Make the Oreo “Dirt”: In a blender or food processor, grind the entire package of Oreo cookies until they are reduced to very fine crumbs, resembling dirt or potting soil. Set aside.
- Cream Cheese Mixture: In another bowl, beat the softened cream cheese and margarine together until smooth and creamy.
- Add Powdered Sugar: Gradually add the powdered sugar to the cream cheese mixture and beat until fully incorporated and smooth.
- Combine Pudding and Cream Cheese: Gently fold the cream cheese mixture into the thickened chocolate pudding.
- Prepare the Flower Pot: Take your plastic flower pot and line the bottom with a small square of aluminum foil, especially if the pot has drainage holes. This prevents the dessert from leaking.
- Layer the Ingredients: Begin layering the ingredients into the flower pot. Start with a layer of Oreo cookie crumbs on the bottom.
- Add Cake: Top the cookie crumb layer with crumbled or small cubes of chocolate cake.
- Add Pudding Mixture: Follow the cake layer with a layer of the pudding mixture.
- Add Cool Whip: Top the pudding mixture with a layer of Cool Whip.
- Repeat Layers: Repeat the layering process (cookie crumbs, cake, pudding mixture, Cool Whip) three to four times, or until the pot is nearly full.
- Top with “Dirt”: Finish by topping the entire pot with about 1 inch of Oreo cookie crumbs. This will create the “soil” layer.
- Chill: Refrigerate the flower pot cake until it is set, usually for at least 2 hours, or preferably longer.
- Garnish: Before serving, garnish the top of the cake with artificial flowers. If desired, add gummy worms crawling out of the “soil” for a whimsical touch.
- Serve: Serve chilled with a small spade or spoon for digging into the dessert.
Expert Tips & Tricks
- For a richer chocolate flavor, use a dark chocolate pudding mix in addition to the dark chocolate cake mix.
- To prevent the aluminum foil from tearing, gently mold it to the shape of the flower pot base.
- If you want to make individual flower pot cakes, use smaller terracotta pots. Make sure they are food-safe and thoroughly cleaned.
- For an extra touch of realism, lightly spray the artificial flowers with water to make them look freshly watered.
- If you’re short on time, purchase a pre-made chocolate cake from the bakery.
Serving & Storage Suggestions
Serve the Flower Pot Cake chilled, ideally right out of the refrigerator. The presentation is key, so arrange the artificial flowers attractively. Leftovers can be stored in the refrigerator for up to 2-3 days. Cover the flower pot tightly with plastic wrap to prevent the cake from drying out. Freezing is not recommended, as the Cool Whip and pudding may change texture upon thawing. This dessert is best enjoyed fresh.
Nutritional Information
| Nutrient | Amount per Serving | % Daily Value |
|---|---|---|
| Calories | 450 kcal | 23% |
| Total Fat | 25g | 38% |
| Saturated Fat | 15g | 75% |
| Cholesterol | 60mg | 20% |
| Sodium | 400mg | 17% |
| Carbohydrates | 55g | 18% |
| Fiber | 2g | 8% |
| Sugar | 35g | N/A |
| Protein | 5g | 10% |
Note: Nutritional information is an estimate and may vary based on specific ingredients and portion sizes.
Variations & Substitutions
- Gluten-Free: Use a gluten-free chocolate cake mix and gluten-free Oreo cookies.
- Vegan: Use a vegan chocolate cake mix, vegan pudding mix (check labels carefully), vegan cream cheese alternative, vegan margarine, and a plant-based whipped topping. Omit the gummy worms, as most contain gelatin.
- Different Cake Flavors: Experiment with different cake flavors, such as vanilla, red velvet, or carrot cake.
- Different Pudding Flavors: Try vanilla, butterscotch, or even pistachio pudding for a unique flavor combination.
- Seasonal Adaptations: In the fall, use crushed gingersnap cookies instead of Oreos and garnish with candy corn. In the spring, use pastel-colored sprinkles.
FAQs (Frequently Asked Questions)
Q: Can I use real flowers instead of artificial ones?
A: While it’s tempting, it’s best to stick with artificial flowers for safety reasons. Many real flowers are not edible and could be harmful.
Q: Can I make this cake ahead of time?
A: Yes, you can assemble the cake a day or two in advance. Just wait to add the artificial flowers until just before serving.
Q: Can I use a different size flower pot?
A: Absolutely! Adjust the amount of ingredients accordingly. Smaller pots are great for individual servings.
Q: What if I don’t have a blender or food processor for the Oreos?
A: You can place the Oreos in a resealable bag and crush them with a rolling pin or mallet.
Q: My pudding didn’t thicken properly. What should I do?
A: Make sure you are using instant pudding mix and cold milk. If it’s still not thickening, try adding a tablespoon of cornstarch.
Final Thoughts
Flower Pot Cake is more than just a dessert; it’s an experience. It’s a conversation starter, a memory maker, and a delightful way to bring a touch of whimsy to any occasion. So, gather your ingredients, don your apron, and get ready to create a dessert that’s as fun to make as it is to eat. I encourage you to try this recipe and share your creations with friends and family. And who knows, maybe you’ll even inspire a new generation of edible garden enthusiasts!