
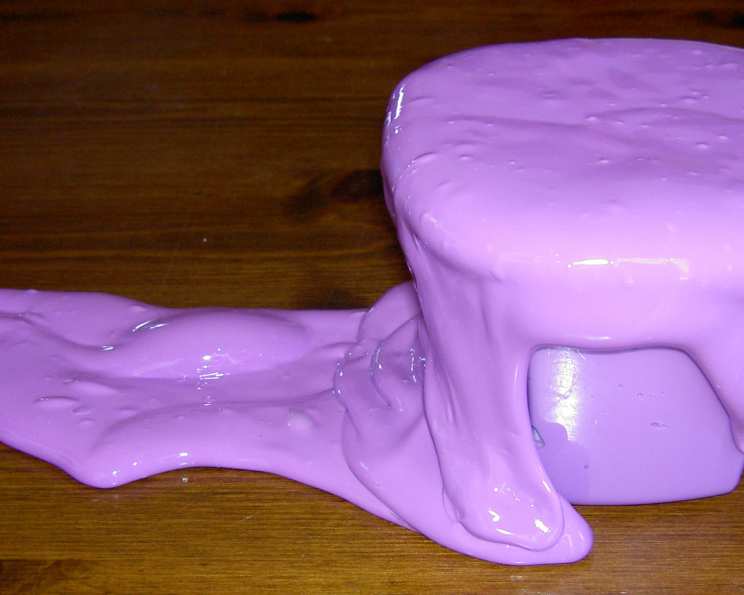
Flubber II (And Windbreakers): A Recipe for Polymer Fun
Do you remember the sheer, unadulterated joy of childhood science experiments? For me, it wasn’t the baking soda volcanoes, but a simpler delight: the marvel of turning everyday ingredients into something… else. I recall one sweltering summer afternoon, huddled around the kitchen table with my cousins, our hands submerged in a cool, gooey mixture. The giggles, the stretching, the inevitable competition to see who could make the biggest, stretchiest blob – those memories are inextricably linked to the simple pleasure of making flubber. And then came the day someone discovered that trapping air in these globs can cause a loud “windbreaker” effect… pure comedic gold!
Recipe Overview
- Prep Time: 5 minutes
- Cook Time: 0 minutes
- Total Time: 5 minutes
- Servings: Varies depending on size
- Yield: Approximately 4 cups of flubber
- Dietary Type: Non-Edible Science Experiment
Ingredients
- 2 cups all-purpose white glue
- 2 cups warm water
- 3 tablespoons borax
- 1/3 cup warm water
- Liquid watercolor (do not use food coloring)
Equipment Needed
- Small bowl
- Large bowl
- Measuring cups and spoons
- Airtight container for storage
Instructions
- In a small bowl, create the borax solution by mixing together 1/3 cup of warm water and 3 tablespoons of borax.
- Stir the borax solution until the borax is completely dissolved in the water. This is crucial for the flubber to form correctly.
- In a large bowl, prepare the glue mixture by combining 2 cups of all-purpose white glue and 2 cups of warm water.
- Add a few drops of liquid watercolor to the glue mixture, stirring until you achieve the desired color. Remember, do not use food coloring as it can stain and is generally not as vibrant as liquid watercolor in this application.
- Slowly pour the borax mixture into the glue mixture while continuously stirring with your hand. This is where the magic happens!
- Continue to stir and lift and stretch the combined mixture until all, or most, of the liquid is absorbed. The mixture will begin to clump together and form a rubbery mass.
- Continue kneading and stretching the flubber until it reaches your desired consistency. It should be pliable and hold its shape.
- To make Windbreakers, force air pockets out of small round containers (yogurt containers work very well) filled with the flubber. Press down on the flubber and enjoy the resulting noise!
- When not in use, store the flubber in an airtight container to prevent it from drying out.
Expert Tips & Tricks
- Temperature is Key: Ensure the water used for both the borax solution and the glue mixture is warm, not hot. Hot water can affect the flubber’s consistency and make it less pliable.
- Color Intensity: Start with a small amount of liquid watercolor and gradually add more until you reach your desired color intensity. Remember, a little goes a long way!
- Kneading is Essential: Don’t be afraid to get your hands dirty! Kneading the flubber thoroughly is crucial for achieving the right texture and elasticity.
- Borax Ratio: The borax to water ratio is important. Too much borax will make the flubber too stiff and brittle, while too little will result in a sticky, unusable mess.
- Troubleshooting Sticky Flubber: If your flubber remains too sticky even after kneading, add a very small amount of the borax solution (a teaspoon at a time) and continue kneading. Be careful not to overdo it!
- Achieving Maximum Stretch: To achieve maximum stretch, knead the flubber for a longer period of time. This helps to fully incorporate the ingredients and create a more cohesive structure.
- Don’t Overwork It: While kneading is essential, avoid overworking the flubber. Over-kneading can make it tough and less elastic.
- Adding Texture: For added fun, consider incorporating small objects into the flubber, such as glitter, small beads, or confetti.
- Windbreaker Technique: The key to a good windbreaker is ensuring there are no air gaps in the container other than the one you intend to force out. Compact the flubber well!
Serving & Storage Suggestions
Flubber is best enjoyed immediately after making it. It is not intended for consumption. Store the flubber in an airtight container at room temperature. Properly stored flubber can last for several days to a week, depending on the humidity and storage conditions. If the flubber starts to dry out, you can try adding a small amount of water and kneading it back in. If mold develops, discard the flubber immediately.
Nutritional Information
Since Flubber is not edible, nutritional information is not applicable.
| Nutrient | Amount per Serving | % Daily Value |
|---|---|---|
| Calories | 0 kcal | 0% |
| Total Fat | 0 g | 0% |
| Saturated Fat | 0 g | 0% |
| Cholesterol | 0 mg | 0% |
| Sodium | 0 mg | 0% |
| Carbohydrates | 0 g | 0% |
| Fiber | 0 g | 0% |
| Sugars | 0 g | 0% |
| Protein | 0 g | 0% |
Variations & Substitutions
- Scented Flubber: Add a few drops of essential oil (such as lavender or peppermint) to the glue mixture for a scented flubber experience.
- Glitter Flubber: Incorporate glitter into the glue mixture for a sparkly and dazzling effect.
- Clear Flubber: Use clear school glue instead of white glue for a translucent flubber.
- Glow-in-the-Dark Flubber: Add glow-in-the-dark powder to the glue mixture for a fun nighttime activity.
- Color Mixing Experiment: Make several batches of flubber in different colors and then combine them to explore color mixing.
- Holiday Themed Flubber: Adapt colors and add-ins to reflect holiday themes, such as red and green glitter for Christmas or orange and black for Halloween.
FAQs (Frequently Asked Questions)
Q: Is flubber safe for children?
A: While flubber is generally safe to play with, it is important to supervise children closely, especially young children who may be tempted to put it in their mouths. The ingredients are not edible and can cause stomach upset if ingested.
Q: How do I clean up flubber if it gets on clothes or carpet?
A: Flubber can usually be washed out of clothes with soap and water. However, it is important to note that it may not come out of carpet or upholstery. Act quickly and try to remove as much of the flubber as possible before it dries.
Q: How long does flubber last?
A: Properly stored flubber can last for several days to a week. If it starts to dry out, you can try adding a small amount of water and kneading it back in.
Q: Can I use food coloring instead of liquid watercolor?
A: While you can technically use food coloring, it is not recommended. Food coloring is not as vibrant as liquid watercolor and can also stain surfaces.
Q: What is borax and why is it used in this recipe?
A: Borax is a natural mineral that acts as a cross-linking agent, causing the glue molecules to bind together and form the stretchy, rubbery texture of flubber.
Final Thoughts
So, there you have it – the recipe for Flubber II (and Windbreakers)! More than just a recipe, it’s an invitation to recapture the simple joys of childhood and engage in a fun, hands-on activity with your loved ones. Gather your ingredients, embrace the mess, and prepare for an afternoon filled with laughter, creativity, and the satisfying squish of homemade flubber. Don’t forget to share your flubber creations and windbreaker antics with the world! Who knows, you might just start a new flubber trend. Enjoy!