
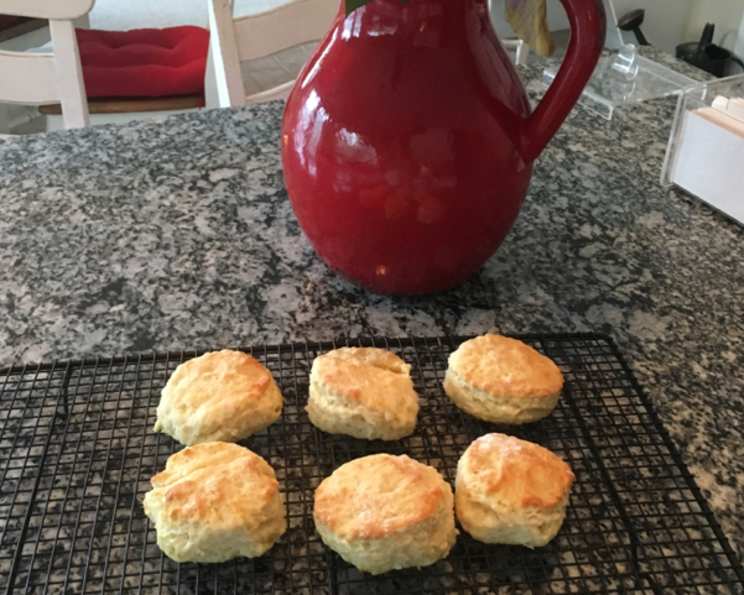
The Quintessential Fluffy Buttermilk Biscuit
The aroma of freshly baked biscuits is, for me, the scent of home. I remember standing on a stool next to my grandmother, her hands dusted with flour, teaching me the secrets to her legendary buttermilk biscuits. The way the dough felt between my fingers, the anticipation as they baked, and the sheer joy of that first warm, buttery bite – these are memories etched in my heart, and I’m excited to share a recipe that brings that same feeling to my own kitchen.
Recipe Overview
- Prep Time: 15 minutes
- Cook Time: 8-10 minutes
- Total Time: 23-25 minutes
- Yields: 12 biscuits
- Serves: 12
- Dietary Type: Vegetarian
Ingredients
- 1 1⁄4 cups cake flour
- 3⁄4 cup all-purpose flour
- 1 1⁄2 teaspoons baking powder
- 1⁄2 teaspoon baking soda
- 1⁄2 teaspoon salt
- 1⁄4 cup butter, cut into small chunks
- 3⁄4 cup buttermilk
- Melted butter, for brushing (optional)
Equipment Needed
- Medium-large bowl
- Pastry blender or two knives
- Floured work surface
- Biscuit cutter
- Ungreased baking sheet
- Wire rack
Instructions
-
Preheat your oven to a blazing 500 degrees Fahrenheit. This high heat is essential for achieving that impressive rise and golden-brown crust we all crave in a biscuit.
-
Prepare the Ingredients: This step is all about ensuring everything is perfectly chilled. Cut the butter into small chunks. Place these chunks in a bowl and return them to the refrigerator. Measure out the buttermilk and set it aside, allowing it to come to cool room temperature briefly. Sprinkle flour on a clean work surface, and keep extra flour nearby for your hands and biscuit cutter. Have your biscuit cutter and an ungreased baking sheet readily available.
-
Mix the Dough: In a medium-large bowl, whisk together the cake flour, all-purpose flour, baking powder, baking soda, and salt until these dry ingredients are exceptionally well blended. This even distribution ensures that the baking powder and baking soda can work their magic uniformly throughout the dough, contributing to that signature fluffy texture.
-
Add the butter to the flour mixture. Using a pastry blender, two knives, or even your fingertips, cut the butter into the flour until the mixture resembles coarse crumbs. The butter should be broken down into small pieces, but not completely incorporated. The goal is to create pockets of butter that will melt during baking, creating flaky layers within the biscuit.
-
Pour in the buttermilk and stir lightly until the dough just comes together in a ball. Be careful not to overmix at this stage; overmixing develops the gluten in the flour, resulting in tougher biscuits. We want a tender, delicate crumb.
-
Knead the Dough and Cut the Biscuits: Gently dump the dough mixture out onto your prepared floured work surface. With floured hands, lightly knead the dough a few times – no more than 4-5 – until it is fairly well blended. Again, we’re avoiding overworking the dough.
-
Pat the dough out into a circle, aiming for a thickness of approximately 3/4 to 1 inch. Use a floured biscuit cutter to cut out the biscuits. Important note: resist the urge to twist the cutter! Press straight down and lift straight up. Twisting seals the edges of the biscuit, hindering its ability to rise properly.
-
Form the dough scraps into an extra biscuit-like shape instead of re-rolling the dough repeatedly. Rerolling the scraps will result in tougher, less tender biscuits. These “ugly duckling” biscuits often taste just as delicious as their perfectly round counterparts, so don’t be afraid to embrace their rustic charm.
-
Place the cut biscuits close together on the ungreased baking sheet so that the sides are touching. This helps them rise upward rather than outward, contributing to their signature height.
-
If desired, brush the tops of the biscuits with melted butter. This step is optional but highly recommended, as it adds a lovely golden sheen and extra richness to the finished biscuits.
-
Bake the Biscuits: Place the baking sheet in the middle of your preheated 500 degree Fahrenheit oven. Bake for 8-10 minutes, or until the biscuits are beautifully golden brown. Keep a close eye on them during the last few minutes of baking to prevent burning. Ovens can vary, so adjust the baking time accordingly.
-
Remove the biscuits from the oven and transfer them to a wire rack to cool for a few minutes before serving. This allows any excess moisture to escape, preventing the bottoms from becoming soggy.
Expert Tips & Tricks
- Keep Everything Cold: The colder the butter and buttermilk, the better. This helps create those desirable pockets of fat that result in flaky layers. Some bakers even chill their flour before starting!
- Don’t Overmix: Overmixing is the enemy of tender biscuits. Mix the dough just until it comes together. A few streaks of flour are perfectly fine.
- High Heat is Key: The initial burst of high heat is crucial for creating steam, which is what helps the biscuits rise.
- Southern Flour Myth: While lower protein flours like White Lily are often recommended, you can achieve excellent results with all-purpose flour as long as you don’t overwork the dough.
- Make Ahead: You can cut the butter into the flour mixture and store it in the refrigerator for up to 24 hours before adding the buttermilk and baking.
- Adjust Baking Time: If your oven tends to run hot, reduce the temperature by 25 degrees Fahrenheit.
- Buttermilk Substitute: If you don’t have buttermilk, you can make a quick substitute by adding 1 tablespoon of lemon juice or white vinegar to a liquid measuring cup, then filling it with milk to reach 3/4 cup. Let it sit for 5 minutes before using.
Serving & Storage Suggestions
Serve these fluffy buttermilk biscuits warm from the oven with butter, jam, honey, or your favorite toppings. They are also delicious served alongside savory dishes like fried chicken, chili, or soup.
Store leftover biscuits in an airtight container at room temperature for up to 2 days, or in the refrigerator for up to 5 days. For longer storage, freeze the biscuits in a single layer on a baking sheet until solid, then transfer them to a freezer bag. They can be reheated in a 350-degree Fahrenheit oven for 10-15 minutes, or until warmed through. Microwaving is not recommended, as it can make them tough.
Nutritional Information
| Nutrient | Amount per Serving | % Daily Value |
|---|---|---|
| Calories | 120.4 kcal | N/A |
| Calories from Fat | 37 kcal | 31% |
| Total Fat | 4.2 g | 6% |
| Saturated Fat | 2.5 g | 12% |
| Cholesterol | 10.8 mg | 3% |
| Sodium | 245 mg | 10% |
| Total Carbohydrate | 18 g | 5% |
| Dietary Fiber | 0.5 g | 1% |
| Sugars | 0.8 g | N/A |
| Protein | 2.5 g | 5% |
Nutritional information is an estimate and can vary based on specific ingredients and serving sizes.
Variations & Substitutions
- Cheese Biscuits: Add 1/2 cup of shredded cheddar cheese to the flour mixture.
- Herb Biscuits: Stir in 1-2 tablespoons of chopped fresh herbs, such as rosemary, thyme, or chives.
- Sweet Biscuits: Add 2-3 tablespoons of sugar to the flour mixture for a slightly sweet biscuit.
- Gluten-Free Biscuits: Substitute the all-purpose and cake flour with a gluten-free flour blend. Be sure to use a blend that contains xanthan gum for best results.
- Vegan Biscuits: Use a vegan butter substitute and plant-based milk (such as soy, almond, or oat milk) in place of buttermilk.
FAQs (Frequently Asked Questions)
Q: Why didn’t my biscuits rise?
A: Several factors can affect biscuit rise: using old baking powder, overmixing the dough, twisting the biscuit cutter, or not baking at a high enough temperature.
Q: Can I use self-rising flour?
A: No, this recipe is formulated for all-purpose and cake flour. Self-rising flour already contains baking powder and salt, which would throw off the balance of ingredients.
Q: How do I prevent my biscuits from being tough?
A: Avoid overmixing the dough and use cold ingredients. Gentle handling is key for tender biscuits.
Q: Can I freeze the biscuit dough before baking?
A: Yes, you can freeze the cut-out biscuit dough on a baking sheet until solid, then transfer them to a freezer bag. Bake them directly from frozen, adding a few extra minutes to the baking time.
Q: What can I serve with these biscuits?
A: These biscuits are incredibly versatile! Serve them with butter and jam, alongside savory dishes like fried chicken or chili, or use them to make breakfast sandwiches.
Final Thoughts
These fluffy buttermilk biscuits are more than just a recipe; they’re a warm embrace, a reminder of simpler times, and a testament to the magic that happens when you combine simple ingredients with a little bit of love. I encourage you to try this recipe and experience the joy of baking your own homemade biscuits. Don’t be afraid to experiment with variations and make them your own. And please, share your feedback and photos – I’d love to see what you create! They pair perfectly with a steaming cup of coffee or a refreshing glass of sweet tea. Happy baking!