
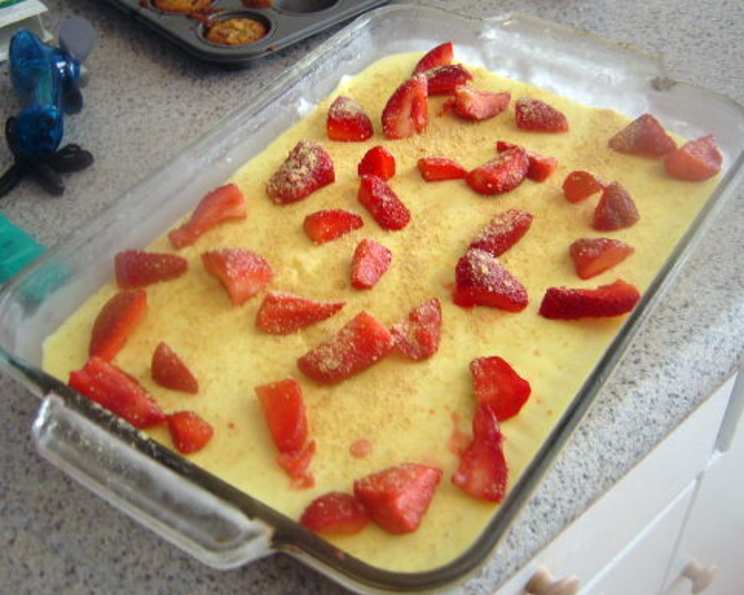
Fluffy Lemon Cheesecake Squares: A Taste of Sunshine
The first time I tasted these lemon cheesecake squares, I was sitting on a floral-printed sofa at my friend Sarah’s bridal shower. Sunlight streamed through the window, illuminating the pastel decorations and the laughter of women celebrating love and new beginnings. Sarah’s aunt, a woman known for her incredible baking skills, had brought a tray of these squares, and one bite transported me to a sun-drenched citrus grove. The creamy, tangy filling, paired with the buttery graham cracker crust, was pure bliss. Years later, I still make them, and every time, that first bite takes me right back to that joyful day.
Recipe Overview
- Prep Time: 20 minutes
- Cook Time: 0 minutes (plus chilling time)
- Total Time: 20 minutes (plus chilling time, typically 4+ hours)
- Servings: 12-16 squares
- Yield: 1 (13×9 inch) pan
- Dietary Type: Not suitable for vegan or dairy-free diets
Ingredients
For the Crust:
- 2 cups graham cracker crumbs
- ½ cup (1 stick) butter, melted
- ¼ cup sugar
For the Filling:
- ¾ cup sugar
- 8 ounces cream cheese, softened
- 1 (3 ounce) package lemon Jell-O gelatin
- ¾ cup boiling water
- ¼ cup lemon juice
- 1 teaspoon lemon extract
- 1 (12 ounce) can evaporated milk, chilled
Equipment Needed
- 13×9 inch baking pan
- Mixing bowls (various sizes)
- Electric mixer (stand or hand-held)
- Measuring cups and spoons
- Whisk
- Spatula
Instructions
- Prepare the Crust: In a medium bowl, combine the graham cracker crumbs, melted butter, and sugar. Mix well until evenly moistened.
- Press the Crust: Press the crumb mixture firmly into the bottom of a 13×9 inch baking pan. Ensure an even layer for a sturdy base.
- Make the Cream Cheese Base: In a small bowl, stir together the ¾ cup sugar and softened cream cheese until light and fluffy. An electric mixer works best for this. Set aside.
- Dissolve the Jell-O: In another small bowl, dissolve the lemon Jell-O gelatin in the ¾ cup boiling water. Stir until the gelatin is completely dissolved and the mixture is clear.
- Add Lemon Flavor: Stir in the ¼ cup lemon juice and 1 teaspoon lemon extract to the Jell-O mixture. Set aside to cool slightly. Cooling is crucial; otherwise, the hot mixture will melt the whipped evaporated milk.
- Chill the Equipment: Place a large mixing bowl and the beaters of your electric mixer into the freezer. This will help the evaporated milk whip up to its full potential. This step is essential for achieving the desired fluffy texture.
- Whip the Evaporated Milk: Remove the chilled bowl and beaters from the freezer. Pour the chilled evaporated milk into the bowl and whip on high speed until it thickens and forms stiff peaks. This may take several minutes. Be patient, as the cold temperature is key.
- Combine the Mixtures: Reduce the mixer speed to low. Gradually mix in the cream cheese mixture into the whipped evaporated milk. Mix until just combined. Be careful not to overmix, as this can deflate the whipped milk.
- Incorporate the Jell-O: Slowly pour the cooled Jell-O mixture into the whipped cream cheese mixture, mixing on low speed until everything is evenly incorporated. The mixture should be smooth and lump-free.
- Pour over Crust: Pour the cheesecake filling over the prepared graham cracker crust in the pan. Spread evenly with a spatula.
- Chill: Cover the pan with plastic wrap and chill in the refrigerator for at least 4 hours, or preferably overnight, to allow the cheesecake squares to set completely.
- Cut and Serve: Once the cheesecake has set, cut it into squares and serve chilled.
Expert Tips & Tricks
- Softening Cream Cheese: Make sure your cream cheese is fully softened before mixing it with the sugar. This will prevent lumps and ensure a smooth filling. Leaving it out at room temperature for an hour or two usually does the trick.
- Chilling Evaporated Milk: The evaporated milk needs to be ice cold for optimal whipping. Place the can in the freezer for about 30 minutes before whipping (but don’t let it freeze!). Alternatively, chill it in the refrigerator overnight.
- Preventing a Soggy Crust: If you’re worried about the crust becoming soggy, you can pre-bake it for 8-10 minutes at 350°F (175°C). Let it cool completely before adding the filling.
- Clean Cuts: For neat, clean cuts, use a sharp knife dipped in warm water and wiped clean between each slice.
- Flavor Boost: Add a teaspoon of lemon zest to the filling for an extra burst of lemon flavor.
Serving & Storage Suggestions
These Fluffy Lemon Cheesecake Squares are best served chilled straight from the refrigerator. They make a delightful dessert for potlucks, picnics, or any special occasion. Garnish with fresh berries or a sprig of mint for an elegant presentation.
- Storage: Store leftover cheesecake squares in an airtight container in the refrigerator for up to 3-4 days.
- Freezing: These squares freeze exceptionally well. Cut them into individual squares and wrap them tightly in plastic wrap, then place them in a freezer-safe container. They can be frozen for up to 2 months. Thaw in the refrigerator for a couple of hours before serving.
Nutritional Information
(Estimates per serving, based on 12 servings)
| Nutrient | Amount per Serving | % Daily Value |
|---|---|---|
| Calories | 315 kcal | 16% |
| Total Fat | 18g | 28% |
| Saturated Fat | 11g | 55% |
| Cholesterol | 50mg | 17% |
| Sodium | 260mg | 11% |
| Total Carbohydrate | 35g | 12% |
| Dietary Fiber | 0.5g | 2% |
| Sugars | 28g | – |
| Protein | 4g | 8% |
Variations & Substitutions
- Gluten-Free: Use gluten-free graham crackers for the crust to make these cheesecake squares gluten-free.
- Different Flavors: Experiment with different flavors of Jell-O gelatin, such as lime, orange, or strawberry, for a unique twist.
- Fruit Topping: Top the cheesecake squares with fresh berries, sliced peaches, or a homemade fruit compote for added flavor and visual appeal.
- Crust Variations: Try using crushed vanilla wafers, shortbread cookies, or even chocolate wafers for a different crust flavor.
- Less Sugar: If you prefer a less sweet dessert, reduce the amount of sugar in the filling by 1/4 cup.
FAQs (Frequently Asked Questions)
Q: Can I use regular milk instead of evaporated milk?
A: No, evaporated milk is crucial for achieving the light and fluffy texture. Regular milk will not whip up in the same way.
Q: What if my evaporated milk won’t whip?
A: Make sure your evaporated milk, bowl, and beaters are extremely cold. Also, ensure that the evaporated milk is full-fat, as low-fat versions may not whip properly.
Q: Can I make this ahead of time?
A: Absolutely! These cheesecake squares are perfect for making ahead of time. In fact, they need at least 4 hours to chill and set, so making them the day before is ideal.
Q: The filling seems a little loose before chilling. Is that normal?
A: Yes, the filling will be relatively soft before chilling. The gelatin will set as it chills in the refrigerator, firming up the cheesecake to the desired consistency.
Q: Can I use a different size pan?
A: While a 13×9 inch pan is recommended, you can use a slightly smaller pan (e.g., 9×9) for thicker squares. Adjust the chilling time accordingly.
Final Thoughts
These Fluffy Lemon Cheesecake Squares are a guaranteed crowd-pleaser, offering a delightful balance of tangy and sweet flavors in every bite. Don’t be intimidated by the multiple steps – each one is simple and contributes to the overall deliciousness. Give this recipe a try, and I’m confident you’ll be rewarded with a dessert that’s both refreshing and unforgettable. Share your creations and any variations you come up with! These squares pair beautifully with a light dessert wine or a cup of freshly brewed coffee. Enjoy!