
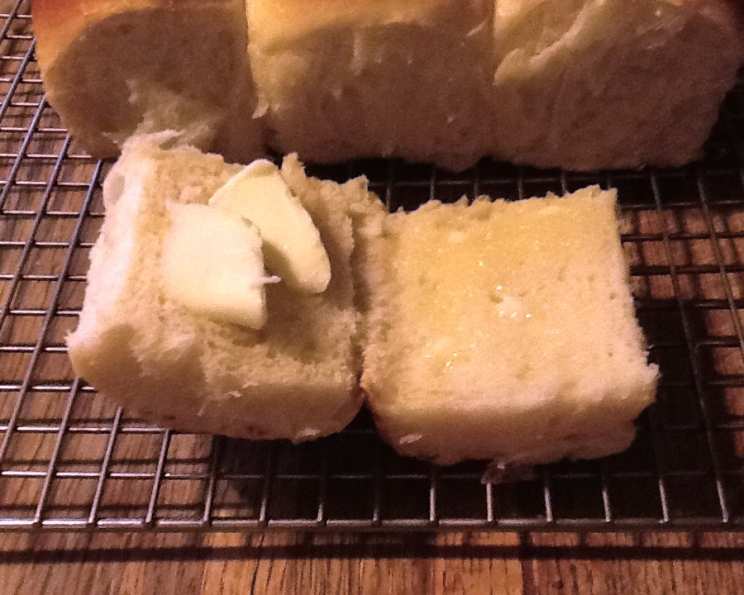
Fluffy Make-Ahead Dinner Rolls (Cook’s Country)
The memory is so vivid: a Thanksgiving table laden with dishes, the aroma of roasted turkey filling the air, and the star of the show—a basket overflowing with warm, impossibly soft dinner rolls. They were always my grandma’s pride and joy, and she guarded her recipe like a state secret. Each year, I’d try to sneak a peek over her shoulder as she worked her magic, hoping to decipher the mystery behind their perfect texture. Now, armed with this Cook’s Country recipe, I can finally recreate those cherished rolls and bring a little of Grandma’s love to my own table.
Recipe Overview
- Prep Time: 1 hour 15 minutes
- Cook Time: 25-27 minutes
- Inactive Time: 2 hours
- Total Time: 4 hours 40 minutes
- Yields: 15 rolls
- Serves: 15
- Dietary Type: Vegetarian
Ingredients
- 3 tablespoons unsalted butter, plus 2 tablespoons for bowl and baking dish
- 1 1/2 cups whole milk
- 1/3 cup honey
- 4 tablespoons vegetable shortening
- 5 – 5 1/2 cups all-purpose flour
- 1 tablespoon yeast (rapid rise or instant)
- 2 teaspoons salt
- 1 large egg, plus 1 large egg, beaten with 1 tablespoon water for egg wash
Equipment Needed
- Large bowl
- Large measuring cup
- Microwave
- Standing mixer with dough hook (optional)
- Plastic wrap
- 13 by 9-inch baking dish
- Foil
- Wire rack
- Baking sheet
Instructions
-
Prepare for the first rise: Adjust oven rack to middle position and heat oven to 200 degrees. When oven reaches 200 degrees, shut oven off. Grease a large bowl with 1 tablespoon of the butter. Line a 13 by 9-inch baking dish with foil, leaving an overhang on all sides. Grease the foil with the remaining 1 tablespoon of butter. This will help you easily remove the rolls later.
-
Warm the milk mixture: Place the milk, honey, shortening, and the remaining 3 tablespoons of butter in a large measuring cup. Microwave on high power until the milk is warm (110 degrees) and the butter and shortening begin to melt, about 1 to 2 minutes. Stir well to ensure everything is fully combined. The mixture should be warm but not hot; too much heat will kill the yeast.
-
Mix the dough: In the bowl of a standing mixer fitted with a dough hook (or in a large bowl if making by hand), mix 4 1/2 cups of the flour, the yeast, and the salt. Turn the mixer to low speed and slowly add the milk mixture. After the dough comes together, increase the speed to medium, add 1 egg, and mix until the dough is smooth, about 2 minutes. Add another 1/2 cup of flour and knead until the dough is shiny and smooth and comes away from the sides of the mixing bowl, 6 to 7 minutes. If the dough is too sticky, add up to 1/2 cup more flour, a tablespoon at a time, until it reaches the right consistency.
-
First rise: Turn the dough onto a lightly floured surface and knead briefly to form a smooth, cohesive ball. Transfer the dough to the buttered bowl and turn to coat. Cover the bowl with plastic wrap and place it in the turned-off oven until the dough has doubled in size, about 50 to 60 minutes. The warmth of the oven provides a consistent environment for the dough to rise.
-
Shape the rolls: Punch down the dough on a floured surface and divide it into 3 equal pieces. Roll each piece into a thick cylinder and cut each cylinder into 5 equal pieces, resulting in 15 rolls.
-
Form and arrange the rolls: Working one piece at a time (keep the remaining pieces covered with plastic wrap to prevent them from drying out), form the dough pieces into smooth, taut rounds. Pinch the seams on the bottom of the roll to create tension on top. Arrange the formed rolls in the prepared baking dish. Lightly press on the dough rounds so they just touch each other.
-
Second rise: Cover the baking dish with plastic wrap and return it to the turned-off oven until the dough rounds have doubled in size, about 50 to 60 minutes. This second rise is crucial for achieving that light and airy texture.
-
Bake the rolls: Remove the dish from the oven and heat the oven to 375 degrees. Unwrap the baking dish and brush the rolls with the egg-water mixture. Bake until the rolls are deep golden brown, about 25 to 27 minutes. Rotate the baking dish halfway through to ensure even browning.
-
Cool and freeze (optional): Remove the rolls from the oven and cool them on a wire rack for 5 minutes. Using the handles of the foil sling, remove the rolls from the baking dish and cool on a wire rack for 1 hour. Remove the foil from the rolls, return them to the rack, and cool completely, about 2 hours longer. Keeping the rolls together, wrap them tightly in plastic wrap, then in foil; freeze for up to 1 month.
-
Serving from frozen: To serve, remove the plastic wrap and foil (reserve the foil) from the rolls, wrap them in the reserved foil, and defrost at room temperature for 2 hours. Adjust oven rack to middle position and heat oven to 375 degrees. Bake the foil-wrapped rolls on a baking sheet until heated through, about 30 minutes. Serve warm.
-
Making the dough without a mixer: If you don’t have a stand mixer, you can still make these rolls! In step 3, mix 4 1/2 cups of the flour, the yeast, and the salt in a large bowl. Make a well in the flour, then add the milk mixture and 1 egg to the well. Stir with a wooden spoon until the dough becomes shaggy and difficult to stir. Turn the dough out onto a floured work surface and knead, adding the remaining 1/2 cup of flour (or more as needed), until the dough forms a smooth, cohesive ball, about 10 minutes. Proceed as directed from there.
Expert Tips & Tricks
- Temperature is key: Be meticulous about the milk mixture temperature. Too hot and you risk killing the yeast, too cold and the yeast won’t activate properly. Use a thermometer to ensure accuracy.
- Don’t over-knead: Over-kneading can result in tough rolls. Knead just until the dough is smooth and elastic.
- Proper proofing: Ensuring the dough doubles in size during both proofing stages is crucial for achieving a light and airy texture. Be patient and let the dough rise fully.
- Egg wash for shine: Brushing the rolls with the egg-water mixture before baking gives them a beautiful golden-brown sheen.
Serving & Storage Suggestions
Serve these fluffy dinner rolls warm with a generous pat of butter. They are the perfect accompaniment to any meal, especially holiday feasts, potlucks, or even just a cozy weeknight dinner.
- Room Temperature: Leftover rolls can be stored at room temperature in an airtight container for up to 2 days.
- Refrigerator: For longer storage, keep them in the refrigerator for up to 5 days.
- Freezer: As detailed in the recipe, these rolls freeze exceptionally well for up to 1 month. Ensure they are tightly wrapped in plastic wrap and then foil to prevent freezer burn. Reheat according to the instructions above.
To reheat refrigerated rolls, wrap them in foil and bake at 350 degrees Fahrenheit for about 10-15 minutes, or until warmed through. You can also microwave them for a short burst, but be careful not to overdo it, or they will become tough.
Nutritional Information
(Estimated per roll, based on 15 servings)
| Nutrient | Amount per Serving | % Daily Value |
|---|---|---|
| Calories | 247 kcal | N/A |
| Total Fat | 7.3 g | 11% |
| Saturated Fat | 3.1 g | 15% |
| Cholesterol | 20.9 mg | 6% |
| Sodium | 327.1 mg | 13% |
| Total Carbohydrate | 39.5 g | 13% |
| Dietary Fiber | 1.4 g | 5% |
| Sugars | 7.5 g | N/A |
| Protein | 5.9 g | 11% |
Note: Nutritional information is an estimate and can vary based on ingredient substitutions and specific brands used.
Variations & Substitutions
- Whole Wheat Rolls: Substitute up to half of the all-purpose flour with whole wheat flour for a slightly nuttier flavor and added fiber.
- Herb Rolls: Add 1-2 tablespoons of chopped fresh herbs, such as rosemary, thyme, or parsley, to the dough for an herbaceous twist.
- Garlic Rolls: Mix minced garlic and melted butter and brush over the rolls after baking.
- Sweet Rolls: Instead of honey, use maple syrup for a slightly different sweetness.
FAQs (Frequently Asked Questions)
Q: Can I use active dry yeast instead of rapid rise or instant yeast?
A: Yes, you can. Dissolve the active dry yeast in the warm milk mixture for about 5-10 minutes until it foams before adding it to the flour mixture.
Q: My dough isn’t rising. What could be the problem?
A: Several factors can affect rising. Ensure your yeast isn’t expired, the milk mixture isn’t too hot (which kills the yeast), and the room temperature is warm enough. Give the dough more time to rise if needed.
Q: Can I make the dough ahead of time and bake the rolls later?
A: Yes, you can prepare the dough through the first rise, punch it down, and refrigerate it for up to 24 hours. When ready to bake, remove the dough from the refrigerator, shape the rolls, and let them rise for the second time before baking.
Q: How do I prevent the rolls from drying out during baking?
A: Brushing the rolls with the egg-water mixture helps create a protective barrier. Also, avoid overbaking them.
Q: Can I make these rolls without a mixer?
A: Absolutely! The recipe includes instructions for making the dough by hand. Just be prepared to knead for a bit longer.
Final Thoughts
These Fluffy Make-Ahead Dinner Rolls are more than just bread; they’re a slice of comfort, a taste of tradition, and a testament to the simple pleasures of home baking. Whether you’re a seasoned baker or just starting out, I encourage you to give this recipe a try. Share them with loved ones, pair them with your favorite soup or stew, and savor every soft, buttery bite. Don’t hesitate to experiment with variations to make them your own, and please, share your baking triumphs (or learning experiences!) – I’d love to hear from you!