
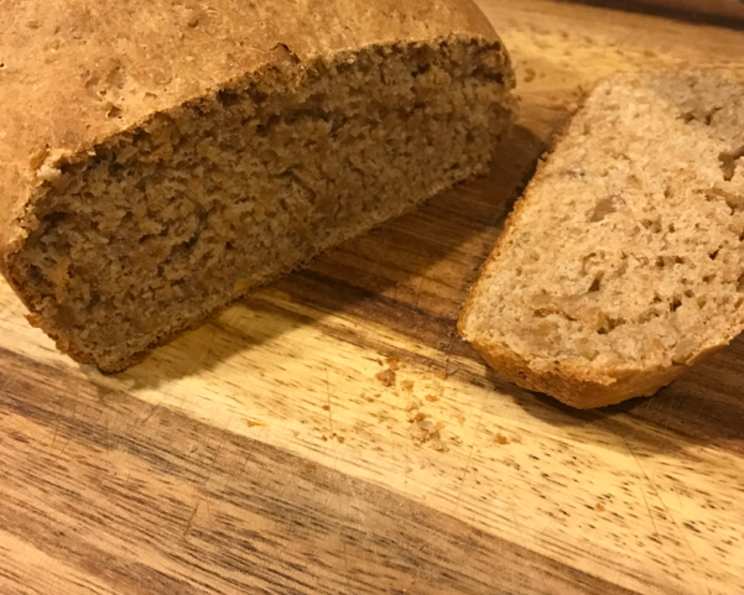
Fluffy Multi-Grain Bread: A Taste of Home
The scent of baking bread is, for me, the ultimate comfort. I remember being a small child, perched on a stool in my grandmother’s kitchen, watching her hands expertly knead dough on a well-worn wooden board. The warmth from the oven, the yeasty aroma filling the air, it all felt like a warm hug. This multi-grain bread, with its nutty flavor and satisfying chew, evokes that same sense of contentment. It’s a reminder that sometimes, the simplest things in life are the most profound.
Recipe Overview
- Prep Time: 2 hours
- Rise Time: 2 hours
- Cook Time: 35-40 minutes
- Total Time: 4 hours 35-40 minutes
- Yields: 2 loaves
- Serves: 18
- Dietary Type: Vegetarian
Ingredients
- 1 1⁄4 cups multi-grain hot cereal
- 1 1⁄2 cups boiling water
- 1 cup cold water
- 5 tablespoons honey
- 4 tablespoons butter
- 1 (1/4 ounce) package yeast
- 3 cups flour (all-purpose)
- 1 1⁄2 cups whole wheat flour
- 1⁄3 cup flax seed
- 1⁄3 cup salted sunflower seeds
- 1⁄2 cup chopped pecans (or walnuts)
- 1 tablespoon salt
- 2 tablespoons vegetable oil
Equipment Needed
- Large bowl
- Dinner plate or plastic wrap
- Large mixer with dough hook
- Floured bread board
- Measuring cups and spoons
- 2 loaf pans
- Oven
Instructions
-
In a large bowl, combine the multi-grain hot cereal mix, boiling water, honey, butter, and salt. Stir well to combine. The butter will melt from the heat of the water.
-
Cover the bowl tightly. I like to use a dinner plate to completely seal it, but plastic wrap works just as well. Let the mixture stand for 1 hour. This allows the cereal to soften and absorb the liquid, creating a flavorful base for the bread.
-
After an hour, remove the cover. Add the cold water and stir to combine all the ingredients thoroughly. This will cool down the mixture enough to add the yeast.
-
Add the yeast and stir gently to dissolve it. Ensure the water isn’t too hot, or it could kill the yeast. Let it sit for a minute or two to allow the yeast to activate.
-
Continue stirring to combine all the ingredients well. You can use a large mixer for this step if you prefer, which will make the process much easier. Mix just until combined, avoiding overmixing at this stage.
-
In a separate bowl, whisk together the flour and whole wheat flour. This ensures even distribution of the flours.
-
Attach the dough hook to your mixer. Start the mixer on low speed. Gradually add the flour mixture to the cereal mixture, one cup at a time. This gradual addition helps prevent the flour from flying everywhere.
-
Add the flax seed, sunflower seeds, and pecans. Continue mixing until the dough cleans the sides of the mixing bowl. You may need to add a bit more flour if the dough is too sticky, but be careful not to add too much, as this can make the bread dry. The dough should be slightly tacky but not stick to your hands.
-
Remove the dough from the mixer and place it on a floured bread board.
-
Knead the dough for 5 minutes. This develops the gluten, which is essential for a good bread texture. The dough should become smooth and elastic.
-
Clean the mixer bowl thoroughly.
-
Add the vegetable oil to the clean bowl, tipping it so that the oil coats the bottom and part-way up the sides of the bowl.
-
Place the dough in the bowl, then flip it over so that the oiled side is on top. This prevents the dough from drying out as it rises.
-
Turn on your oven light. This provides gentle warmth, creating the perfect environment for proofing the dough.
-
Place the bowl in the oven. Close the door to maintain the warmth.
-
Let the dough rise until it has doubled in size, which should take about 1 hour. The rising time may vary depending on the temperature of your kitchen.
-
Remove the dough from the oven (leave the light on and re-close the door).
-
Place the risen dough on a floured bread board.
-
Divide the dough into two equal pieces.
-
Knead each piece for 5 minutes. This releases any large air bubbles and prepares the dough for its final shaping.
-
Form each piece into a cylinder shape, sized to fit your loaf pans.
-
Oil two loaf pans generously. This prevents the bread from sticking and ensures easy removal after baking.
-
Place the dough in the prepared loaf pans.
-
Return the loaf pans to the oven (with the light still on). Close the door.
-
Let the dough rise for another hour, or until it mounds above the top of the pans. This second rise is crucial for a light and airy texture.
-
Preheat your oven to 375°F (190°C).
-
Bake the bread for 35-40 minutes. The bread is done when it is golden brown and sounds hollow when tapped on the bottom.
-
Remove the bread from the oven and let it cool in the pans for a few minutes before transferring it to a wire rack to cool completely.
Expert Tips & Tricks
- Proof Your Yeast: Before adding the yeast to the other ingredients, proof it by dissolving it in a small amount of warm water with a pinch of sugar. If it foams up in 5-10 minutes, it’s good to go.
- Don’t Overmix: Overmixing the dough can result in a tough bread. Mix just until the ingredients are combined and the dough is smooth.
- Adjust Flour: The amount of flour needed may vary depending on the humidity. Add flour gradually until the dough reaches the right consistency.
- Oven Temperature: Every oven is different. If your bread is browning too quickly, lower the oven temperature by 25°F.
- Cool Completely: Resist the urge to slice into the bread while it’s still warm. Let it cool completely to prevent a gummy texture.
Serving & Storage Suggestions
This multi-grain bread is delicious served warm with butter, honey, or your favorite jam. It also makes excellent toast for breakfast or sandwiches for lunch. To store the bread, wrap it tightly in plastic wrap or place it in an airtight container. It will keep at room temperature for 2-3 days, in the refrigerator for up to a week, or in the freezer for up to 3 months. To reheat frozen bread, thaw it completely and then warm it in the oven or toaster.
Nutritional Information
| Nutrient | Amount per Serving | % Daily Value |
|---|---|---|
| Calories | 216.1 kcal | N/A |
| Calories from Fat | N/A | N/A |
| Total Fat | 9.2 g | 14% |
| Saturated Fat | 2.3 g | 11% |
| Cholesterol | 6.8 mg | 2% |
| Sodium | 422.8 mg | 17% |
| Total Carbohydrate | 29.9 g | 9% |
| Dietary Fiber | 3.1 g | 12% |
| Sugars | 5.1 g | N/A |
| Protein | 5 g | 9% |
Note: These values are estimates and may vary depending on specific ingredients used.
Variations & Substitutions
- Nuts: Feel free to substitute walnuts or any other nuts you enjoy for the pecans.
- Seeds: Experiment with different types of seeds, such as pumpkin seeds or sesame seeds.
- Sweetener: Maple syrup can be used in place of honey for a different flavor profile.
- Flour: You can use a combination of different flours, such as spelt or rye flour, for a unique taste.
- Dairy-Free: Substitute the butter with vegan butter or coconut oil.
FAQs (Frequently Asked Questions)
Q: Why is my bread dense and not fluffy?
A: This could be due to several factors, including not using enough yeast, not letting the dough rise long enough, or adding too much flour. Make sure to use fresh yeast and allow the dough to fully double in size during both rising stages.
Q: Can I use a bread machine for this recipe?
A: Yes, you can adapt this recipe for a bread machine. Follow your bread machine’s instructions for adding ingredients and setting the cycle.
Q: How do I know when the bread is done baking?
A: The bread is done when it is golden brown and sounds hollow when tapped on the bottom. You can also use a thermometer to check the internal temperature, which should be around 200-210°F (93-99°C).
Q: Can I freeze this bread?
A: Yes, this bread freezes well. Let it cool completely before wrapping it tightly in plastic wrap and then placing it in a freezer bag. It can be stored in the freezer for up to 3 months.
Q: What can I do if my dough is too sticky?
A: If your dough is too sticky, gradually add more flour, one tablespoon at a time, until it reaches the right consistency. Be careful not to add too much flour, as this can make the bread dry.
Final Thoughts
This Fluffy Multi-Grain Bread is more than just a recipe; it’s an invitation to slow down, savor the simple pleasures, and create something beautiful with your own hands. I encourage you to give it a try, experiment with your favorite ingredients, and share the joy of homemade bread with your loved ones. Don’t be afraid to get creative and make it your own! Perhaps serve it alongside a hearty soup on a cold evening, or simply enjoy a slice with a cup of coffee in the morning. I’d love to hear about your baking experience and any variations you discover! Happy baking!