
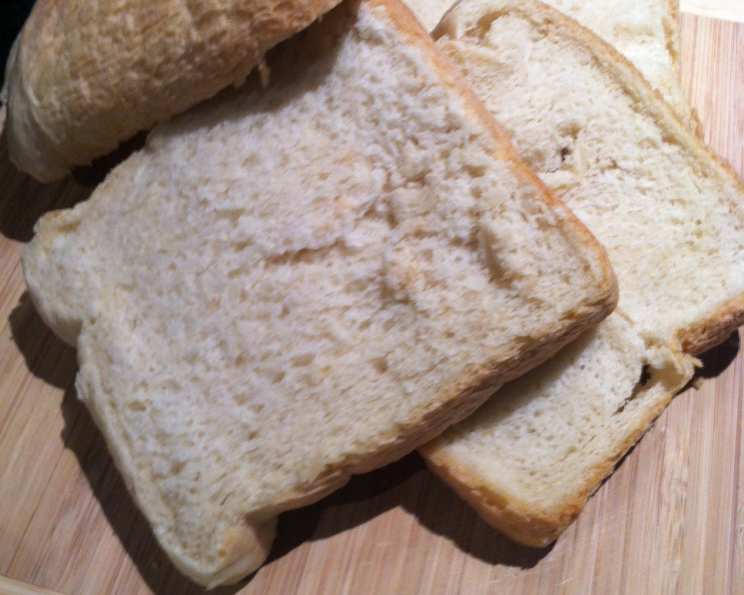
The Humble Loaf, Elevated: Vegan Peasant Bread for Every Table
There’s a particular scent that instantly transports me back to my grandmother’s kitchen: the warm, yeasty aroma of freshly baked bread. Her “peasant bread,” as she called it, was a staple – a simple, hearty loaf that graced every family gathering. It wasn’t fancy, but it was made with love and filled the house with a sense of comfort and belonging. While her recipe wasn’t vegan (or low-fat!), I’ve spent years perfecting this plant-based adaptation, ensuring it captures the same rustic charm and satisfying flavor. It’s a testament to the fact that even the most humble ingredients, when treated with care, can create something truly extraordinary.
Recipe Overview
- Prep Time: 30 minutes (including kneading and first rise)
- Cook Time: 30 minutes
- Total Time: 3 hours 5 minutes (includes two rising times)
- Servings: Approximately 12 slices
- Yield: 1 1/2 pound loaf
- Dietary Type: Vegan, Low Fat
Ingredients
- 1 1⁄2 cups water
- 1 tablespoon white sugar
- 1 1⁄2 teaspoons salt
- 3 1⁄2 cups bread flour
- 2 1⁄2 teaspoons active dry yeast
Equipment Needed
- Bread machine (optional)
- Large mixing bowl
- Measuring cups and spoons
- Clean kitchen towel
- Baking sheet
- Parchment paper (optional)
- Wire rack for cooling
Instructions
-
Combine the ingredients: Whether you’re using a bread machine or mixing by hand, start by gathering all your ingredients. If using a bread machine, place the ingredients into the machine in the order listed, or as suggested by your machine’s manufacturer. This usually means adding the wet ingredients first (water), followed by the dry ingredients (sugar, salt, flour, and yeast). Make sure the yeast doesn’t come into direct contact with the salt initially, as this can inhibit its activity.
-
Knead the dough (if not using a bread machine): If you’re making the dough by hand, combine the water, sugar, and salt in a large bowl. Gradually add the flour, mixing until a shaggy dough forms. Turn the dough out onto a lightly floured surface and knead for 8-10 minutes, until it becomes smooth and elastic. This step is crucial for developing the gluten, which gives the bread its structure.
-
First Rise: Place the dough in a lightly oiled bowl, turning to coat. Cover the bowl with a clean kitchen towel and let it rise in a warm place for 1 1/2 to 2 hours, or until doubled in size. The rising time will vary depending on the temperature of your environment. A warm spot will encourage the yeast to work its magic.
-
Shape the Loaf: Once the dough has doubled, gently punch it down to release the air. Turn it out onto a lightly floured surface and shape it into a loaf. You can create a simple oval or rectangular shape, or get creative with your shaping.
-
Second Rise: Place the shaped loaf on a baking sheet lined with parchment paper (optional, but it prevents sticking). Cover the loaf with a clean kitchen towel and let it rise again for 30-45 minutes, or until it has noticeably puffed up.
-
Bake: Preheat your oven to 375°F (190°C). Once the oven is preheated, bake the loaf for 30 minutes, or until it is golden brown and sounds hollow when tapped on the bottom.
-
Cool: Remove the bread from the oven and transfer it to a wire rack to cool completely before slicing and serving. This is essential to prevent a gummy texture. Resist the temptation to cut into it right away!
Expert Tips & Tricks
-
Crispier Crust: For a crispier crust, you can select the FRENCH cycle on your bread machine (if available). Alternatively, you can turn the machine off after the first rising cycle and start the cycle again from the beginning. This extended rising time will contribute to a more complex flavor and a crispier crust. Another method is to brush the loaf with water before baking.
-
Oven Temperature Variations: Ovens can vary, so keep an eye on the bread while it’s baking. If it’s browning too quickly, tent it with foil to prevent burning. If it’s not browning enough, you can increase the baking time slightly.
-
Yeast Activation: To ensure your yeast is active, you can proof it before adding it to the other ingredients. Simply combine the yeast with a tablespoon of the warm water and a pinch of sugar. If it foams up within 5-10 minutes, you know it’s good to go.
-
Flour Power: The type of flour you use can affect the texture of your bread. Bread flour has a higher protein content than all-purpose flour, which results in a chewier, more structured loaf.
Serving & Storage Suggestions
This vegan peasant bread is incredibly versatile and can be enjoyed in countless ways. Serve it warm with a drizzle of olive oil and a sprinkle of sea salt. It’s also fantastic for sandwiches, toast, or as an accompaniment to soups and stews.
To store leftovers, wrap the bread tightly in plastic wrap or place it in an airtight container. It will keep at room temperature for 2-3 days. For longer storage, you can freeze the loaf for up to 2-3 months. To thaw, simply leave it at room temperature for a few hours or warm it in the oven.
Nutritional Information
(Approximate values per slice, based on 12 slices per loaf)
| Nutrient | Amount per Serving | % Daily Value |
|---|---|---|
| Calories | 93 kcal | 5% |
| Total Fat | 0.3 g | 0% |
| Saturated Fat | 0.1 g | 0% |
| Cholesterol | 0 mg | 0% |
| Sodium | 195 mg | 8% |
| Total Carbohydrate | 19.5 g | 7% |
| Dietary Fiber | 0.8 g | 3% |
| Sugars | 0.8 g | 0% |
| Protein | 2.7 g | 5% |
Variations & Substitutions
-
Whole Wheat Peasant Bread: Substitute up to half of the bread flour with whole wheat flour for a nuttier flavor and added fiber.
-
Herb Infusion: Add chopped fresh herbs like rosemary, thyme, or oregano to the dough for an aromatic twist.
-
Garlic Bread Upgrade: After baking, brush the loaf with a mixture of minced garlic, olive oil, and parsley for a delicious garlic bread.
-
Seeded Sensation: Sprinkle the loaf with sesame seeds, poppy seeds, or sunflower seeds before baking for added texture and flavor.
-
Sweet Variation: Add a touch of cinnamon and a handful of raisins to the dough for a slightly sweet and spiced loaf.
FAQs (Frequently Asked Questions)
Q: Can I use all-purpose flour instead of bread flour?
A: Yes, you can, but the bread will have a slightly softer and less chewy texture. Bread flour is recommended for the best results.
Q: How do I know if my yeast is still good?
A: Proof your yeast by combining it with warm water and a pinch of sugar. If it foams up within 5-10 minutes, it’s active and ready to use.
Q: My dough isn’t rising. What could be the problem?
A: The most common reason for dough not rising is inactive yeast. Make sure your yeast is fresh and that the water you’re using is warm, not hot. Also, ensure that the room temperature is warm enough for the dough to rise properly.
Q: Can I freeze the dough before baking?
A: Yes, you can freeze the dough after the first rise. Punch it down, shape it into a loaf, wrap it tightly in plastic wrap, and freeze. Thaw completely in the refrigerator before letting it rise again and baking.
Q: How do I prevent the bread from sticking to the baking sheet?
A: Line your baking sheet with parchment paper to prevent sticking. You can also lightly grease the baking sheet with oil.
Final Thoughts
This vegan peasant bread is more than just a recipe; it’s an invitation to slow down, connect with the simple pleasure of baking, and share something delicious with those you love. I encourage you to try this recipe and make it your own. Experiment with different variations, add your favorite herbs or seeds, and most importantly, enjoy the process. Baking bread is a truly rewarding experience, and I hope this recipe brings you as much joy as it has brought me. Share your creations and feedback – I’d love to see how your loaves turn out!