
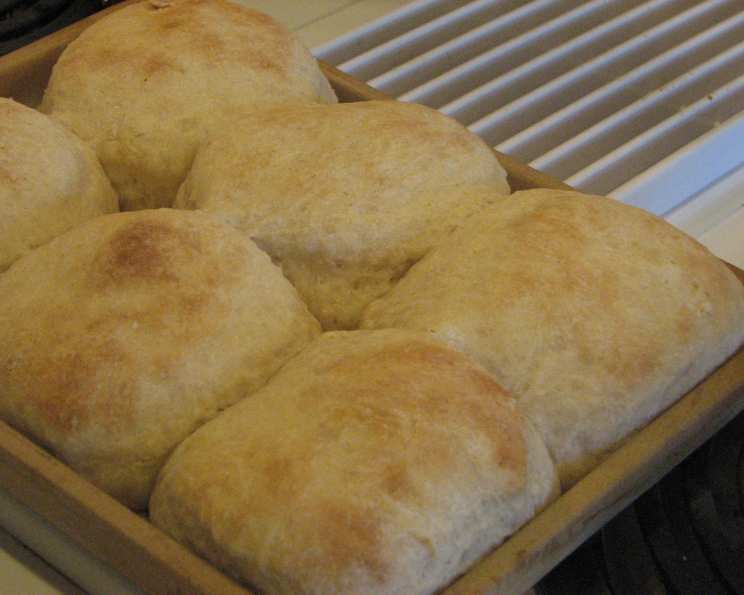
Cloud-Like Comfort: Mastering the Art of Fluffy Yeast Biscuits
The scent of baking biscuits… it’s more than just a smell; it’s a memory woven into the fabric of my childhood. I remember standing on a rickety stool, barely tall enough to reach the counter, watching my grandmother’s flour-dusted hands work their magic. She never measured, not really, but somehow her biscuits were always perfect: impossibly light, fluffy, and begging to be slathered with butter and homemade jam. This recipe, honed over years of experimentation, is my attempt to recapture that magic, to bring that same comforting warmth to your kitchen.
Recipe Overview
- Prep Time: 20 minutes
- Cook Time: 15 minutes
- Total Time: 2 hours (includes rising time)
- Servings: Variable, depends on biscuit size
- Yield: Approximately 24 biscuits
- Dietary Type: Vegetarian
Ingredients
- 3 cups sifted flour
- 3 tablespoons sugar
- ½ teaspoon salt
- 1 package (0.25 ounce) dry yeast
- 1 ½ cups warm water (105-115°F)
- 3 tablespoons melted shortening
- Melted butter, for dipping (optional, but highly recommended!)
Equipment Needed
- Large mixing bowl
- Measuring cups and spoons
- Rolling pin
- Biscuit cutter (or knife)
- Baking sheet
- Pastry brush (optional, for brushing butter)
Instructions
-
Proof the Yeast: In a large mixing bowl, dissolve the dry yeast in the warm water. Let it sit for about 5 minutes, or until it becomes foamy. This step is crucial to ensure the yeast is active and will give your biscuits the perfect rise. If the yeast doesn’t foam, it might be old and needs to be replaced.
-
Combine Dry Ingredients: In a separate bowl, whisk together the sifted flour, sugar, and salt. Sifting the flour is important for achieving that light and airy texture. If you don’t have a sifter, whisking vigorously will help break up any lumps.
-
Mix the Dough: Add the dry ingredients to the yeast mixture. Then, add the melted shortening. Mix until just combined. Be careful not to overmix. A slightly shaggy dough is perfectly fine. Overmixing develops the gluten, which can result in tough biscuits.
-
Roll and Cut: Lightly flour a clean surface. Turn the dough out onto the floured surface and gently roll it out to about ¼ inch thickness. Use a biscuit cutter (or a sharp knife) to cut out the biscuits. Don’t twist the cutter, as this can seal the edges and prevent them from rising properly. Just press straight down and lift.
-
Dip in Butter (Optional): This step is optional but adds a delightful richness. Dip each biscuit in melted butter before placing it on the baking sheet. This not only enhances the flavor but also helps the biscuits to brown beautifully.
-
First Rise: Place the biscuits on a greased or parchment-lined baking sheet, leaving a little space between each one. Cover loosely with a clean kitchen towel or plastic wrap and let rise in a warm place for about 1 ½ hours, or until doubled in size. A warm oven (turned off) or a sunny spot works well. This long, slow rise is what develops the flavor and airy texture of the biscuits.
-
Bake: Preheat your oven to 400 degrees Fahrenheit (200 degrees Celsius). Bake the biscuits for about 15 minutes, or until golden brown on top. Keep a close eye on them towards the end of the baking time to prevent burning.
-
Serve: Remove the biscuits from the oven and let them cool slightly on the baking sheet before serving. Enjoy warm with butter, jam, honey, or your favorite toppings.
Expert Tips & Tricks
- Temperature is Key: Make sure your water is warm, but not too hot, when proofing the yeast. Temperatures above 130°F (54°C) can kill the yeast.
- Don’t Overmix: Overmixing the dough develops the gluten and results in tough biscuits. Mix until just combined.
- Cold Butter for Flakiness: While this recipe calls for melted shortening, using very cold, grated butter in place of the shortening can add extra layers of flakiness. Just be sure to work quickly so the butter doesn’t melt.
- Make-Ahead Tip: You can prepare the dough ahead of time, cut out the biscuits, and refrigerate them overnight. Let them come to room temperature for about 30 minutes before baking.
- For Extra Flavor: Add a pinch of garlic powder or onion powder to the dry ingredients for a savory twist. You could also add shredded cheddar cheese or herbs like rosemary or thyme.
Serving & Storage Suggestions
These fluffy yeast biscuits are best served warm, straight from the oven. They are delicious with butter, jam, honey, or as a side to savory dishes like soups, stews, or fried chicken.
Storage:
- Room Temperature: Store cooled biscuits in an airtight container at room temperature for up to 2 days.
- Refrigerator: For longer storage, keep them in an airtight container in the refrigerator for up to 5 days.
- Freezer: To freeze, wrap the biscuits individually in plastic wrap and then place them in a freezer bag. They can be frozen for up to 2 months.
Reheating:
- Oven: Reheat the biscuits in a preheated oven at 350°F (175°C) for about 5-10 minutes, or until warmed through.
- Microwave: Microwave individual biscuits for 15-30 seconds, or until warmed through. Be careful not to overheat, as this can make them tough.
Nutritional Information
(Approximate values per biscuit, based on 24 biscuits yield):
| Nutrient | Amount per Serving | % Daily Value |
|---|---|---|
| Calories | 80 kcal | 4% |
| Total Fat | 2g | 3% |
| Saturated Fat | 1g | 5% |
| Cholesterol | 0mg | 0% |
| Sodium | 50mg | 2% |
| Total Carbohydrate | 14g | 5% |
| Dietary Fiber | 1g | 4% |
| Sugars | 2g | 4% |
| Protein | 2g | 4% |
Variations & Substitutions
- Whole Wheat Biscuits: Substitute up to half of the all-purpose flour with whole wheat flour for a nuttier flavor and added fiber.
- Buttermilk Biscuits: Replace the warm water with buttermilk for a tangier flavor and a slightly denser texture. You may need to adjust the amount of liquid depending on the consistency of the buttermilk.
- Dairy-Free Biscuits: Use a dairy-free butter substitute and plant-based milk instead of melted butter for dipping.
- Herb & Cheese Biscuits: Add 1/4 cup of chopped fresh herbs (such as rosemary, thyme, or chives) and 1/2 cup of shredded cheese (such as cheddar or Parmesan) to the dry ingredients for a savory twist.
- Sweet Biscuits: Add a teaspoon of vanilla extract and a sprinkle of cinnamon to the dry ingredients for a sweeter biscuit. You could also add dried fruit, such as raisins or cranberries.
FAQs (Frequently Asked Questions)
Q: Why didn’t my biscuits rise?
A: Several factors can contribute to this. Ensure your yeast is fresh and properly proofed. Also, make sure the dough isn’t overmixed, and allow sufficient rising time in a warm environment.
Q: Can I use self-rising flour?
A: No, this recipe is specifically formulated for all-purpose flour. Using self-rising flour would throw off the balance of ingredients and likely result in overly salty biscuits.
Q: How can I make my biscuits more tender?
A: Avoid overmixing the dough, and use sifted flour to ensure a light and airy texture. Also, adding a little extra shortening or butter can help keep the biscuits moist and tender.
Q: Can I use a stand mixer to make the dough?
A: Yes, you can use a stand mixer with the dough hook attachment. However, be careful not to overmix the dough. Mix on low speed until just combined.
Q: What’s the best way to reheat frozen biscuits?
A: For best results, reheat frozen biscuits in a preheated oven at 350°F (175°C) for about 10-15 minutes, or until warmed through. You can also microwave them, but they may not be as crispy.
Final Thoughts
Now it’s your turn to create some biscuit magic! Don’t be intimidated by yeast; it’s a friendly ingredient once you get to know it. Embrace the process, enjoy the aroma that fills your kitchen, and most importantly, share these warm, fluffy biscuits with the people you love. Let me know how your baking adventure goes – I’d love to hear your stories and any variations you come up with! Consider serving these alongside a hearty chicken pot pie for a truly comforting meal. Happy baking!