
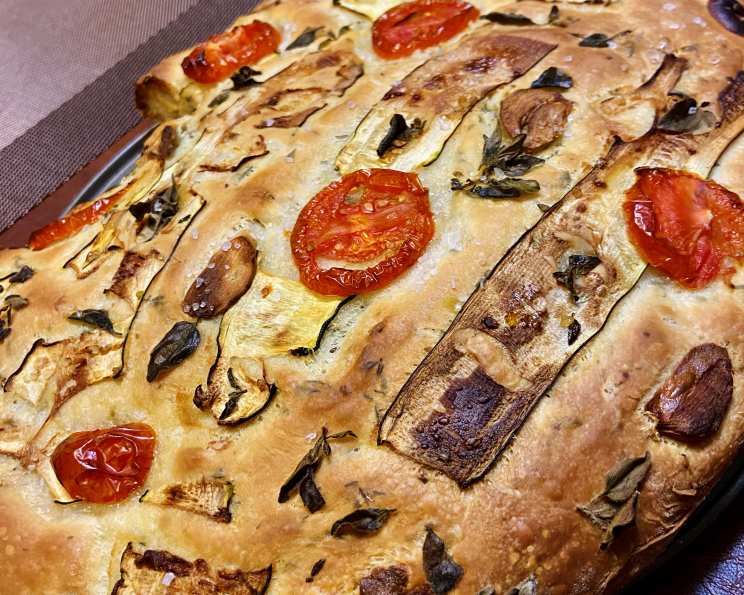
Focaccia Made Easy: A Bread Machine Delight
The scent of focaccia baking always transports me back to my grandmother’s kitchen in Tuscany. I remember watching her, a whirlwind of flour and olive oil, create these simple yet utterly divine flatbreads. The air would be thick with the aroma of rosemary and baking bread, a sensory symphony that spelled pure comfort and joy. While I can’t quite replicate her ancient wood-fired oven, this bread machine focaccia recipe comes surprisingly close, bringing a taste of Italy right to my own kitchen.
Recipe Overview
- Prep Time: 25 minutes
- Cook Time: 15 minutes
- Total Time: 1 hour 40 minutes (plus dough cycle)
- Servings: 4
- Yield: 1 loaf
- Dietary Type: Vegetarian
Ingredients
- 2 teaspoons dried yeast
- 3 cups bread flour
- 1 teaspoon salt
- 1 tablespoon sugar
- 1 teaspoon rosemary (dried)
- 1 teaspoon oregano (dried)
- 1 tablespoon oil
- 1 1/2 cups water
- 1 tablespoon olive oil, for drizzling
- Rock salt, for sprinkling (or equal measurements of olive oil and Basil pesto mixed together with grated Parmesan or Romano cheese)
- Chopped up sun-dried tomatoes, for topping
- Sliced black olives, for topping
Equipment Needed
- Bread Machine
- Measuring cups and spoons
- Mixing bowl
- Lightly floured surface
- Greased bowl
- Rolling pin
- Greased baking tray (or sponge roll tin)
- Oven
Instructions
- Begin by adding all the ingredients to your bread machine in the exact order listed: dried yeast, bread flour, salt, sugar, rosemary, oregano, oil, and water. Accuracy is key for successful dough development.
- Select the ‘dough’ cycle on your bread machine. This cycle will automatically mix and knead the dough, as well as provide the perfect environment for its first rise.
- Once the dough cycle is complete, carefully remove the dough from the bread machine.
- Place the dough on a lightly floured surface. Gently knead the dough for about 10 minutes. You may need to add a little extra flour during this step if the dough feels too sticky. The goal is to achieve a smooth and elastic texture.
- Place the focaccia dough in a well-greased bowl. Cover the bowl tightly with plastic wrap or a clean kitchen towel.
- Let the dough rise in a warm, draft-free place for about 30 minutes. This initial rise allows the yeast to work its magic, creating air pockets that contribute to the focaccia’s airy texture.
- After the first rise, gently knead the dough lightly in the bowl for about 1 minute. This helps to redistribute the gases and relax the gluten.
- On a lightly floured surface, use a rolling pin to roll the dough into a rectangular shape, approximately 20 cm x 30 cm (about 8 inches x 12 inches).
- Transfer the rolled-out dough to a well-greased baking tray (or a sponge roll tin).
- Cover the dough and let it rise again in a warm place for about 1 hour, or until it has doubled in size. This second rise is crucial for a light and airy focaccia.
- After the second rise, pour and smooth over 1 tablespoon of olive oil over the surface of the dough, using your fingers to evenly distribute it.
- Use two fingers to poke the dough at intervals all over the surface. These indentations are characteristic of focaccia and help to create little pools of olive oil that crisp up beautifully during baking.
- Now it’s time to add your toppings. Sprinkle the dough liberally with rock salt. Alternatively, you can mix equal measurements of olive oil and basil pesto together with grated Parmesan or Romano cheese and spread that over the surface. Then, sprinkle with chopped sun-dried tomatoes and sliced black olives. Feel free to experiment with other toppings you enjoy!
- Bake in a preheated oven at 225°C (437°F) for about 15 minutes, or until the focaccia is golden brown and cooked through. Check for doneness by inserting a toothpick into the center; it should come out clean.
- Remove from the oven and let cool slightly before slicing and serving.
Expert Tips & Tricks
- Don’t skip the kneading: Even though the bread machine does most of the work, the extra kneading step by hand helps to develop the gluten, resulting in a better texture.
- Temperature matters: Make sure your water is lukewarm (around 105-115°F) to activate the yeast properly. Too hot, and you’ll kill the yeast; too cold, and it won’t activate.
- Don’t overcrowd the toppings: While it’s tempting to load up the focaccia, too many toppings can weigh it down and prevent it from rising properly.
- For a crispier crust: Place a baking stone or overturned baking sheet in the oven while it preheats. This will provide a hot surface for the focaccia to bake on.
- Adjust baking time: Oven temperatures can vary, so keep an eye on the focaccia while it’s baking. If it’s browning too quickly, reduce the temperature slightly.
Serving & Storage Suggestions
Focaccia is best served warm, straight from the oven. It’s delicious on its own or served with a drizzle of olive oil and a sprinkle of sea salt. It also makes a fantastic base for sandwiches or panini. Leftover focaccia can be stored at room temperature in an airtight container for up to 2 days. For longer storage, wrap it tightly in plastic wrap and freeze it for up to 2 months. To reheat, thaw overnight in the refrigerator and then warm in a low oven (around 300°F) for about 10 minutes, or until heated through. You can also lightly toast individual slices.
Nutritional Information
| Nutrient | Amount per Serving | % Daily Value |
|---|---|---|
| Calories | 403.4 kcal | N/A |
| Calories from Fat | 43 g | N/A |
| Total Fat | 4.8 g | 7% |
| Saturated Fat | 0.7 g | 3% |
| Cholesterol | 0 mg | 0% |
| Sodium | 589.1 mg | 24% |
| Total Carbohydrate | 77.3 g | 25% |
| Dietary Fiber | 4.2 g | 16% |
| Sugars | 3.4 g | 13% |
| Protein | 12.1 g | 24% |
Note: Nutritional information is an estimate and may vary depending on specific ingredients and portion sizes.
Variations & Substitutions
- Gluten-Free: Substitute the bread flour with a gluten-free all-purpose flour blend. You may need to adjust the amount of liquid.
- Herb Variations: Experiment with different herbs, such as thyme, sage, or rosemary.
- Cheese Lovers: Add grated Parmesan, Romano, or Asiago cheese to the dough or sprinkle it on top before baking.
- Spicy Focaccia: Add a pinch of red pepper flakes to the dough or sprinkle them on top for a kick of heat.
- Sweet Focaccia: Omit the herbs and salt and add a tablespoon of honey or maple syrup to the dough. Top with sliced fruit, such as apples or pears, and a sprinkle of cinnamon sugar.
FAQs (Frequently Asked Questions):
Q: Can I use active dry yeast instead of instant yeast?
A: Yes, you can. Just proof the active dry yeast in warm water with a pinch of sugar for about 5-10 minutes before adding it to the bread machine.
Q: My dough is too sticky. What should I do?
A: Add a tablespoon of flour at a time while kneading, until the dough becomes smooth and elastic but not too dry.
Q: Can I make the dough ahead of time?
A: Yes, you can make the dough up to 24 hours in advance. After the first rise, punch down the dough, wrap it tightly in plastic wrap, and refrigerate. Let it come to room temperature before proceeding with the recipe.
Q: What if I don’t have a bread machine?
A: You can still make this recipe! Mix the ingredients in a bowl, knead by hand until smooth, and let rise in a warm place, following the same rising times as in the recipe.
Q: Can I freeze the baked focaccia?
A: Yes, focaccia freezes well. Let it cool completely, then wrap it tightly in plastic wrap and place it in a freezer bag. It will keep for up to 2 months.
Final Thoughts
This bread machine focaccia recipe is a fantastic way to enjoy homemade bread without the fuss. The bread machine does the heavy lifting, while you get to customize the flavors and toppings to your liking. Whether you serve it as a simple appetizer, a delicious sandwich base, or a side to your favorite Italian meal, this focaccia is sure to be a crowd-pleaser. So go ahead, give it a try, and let the aroma of freshly baked bread fill your kitchen! Buon appetito!