
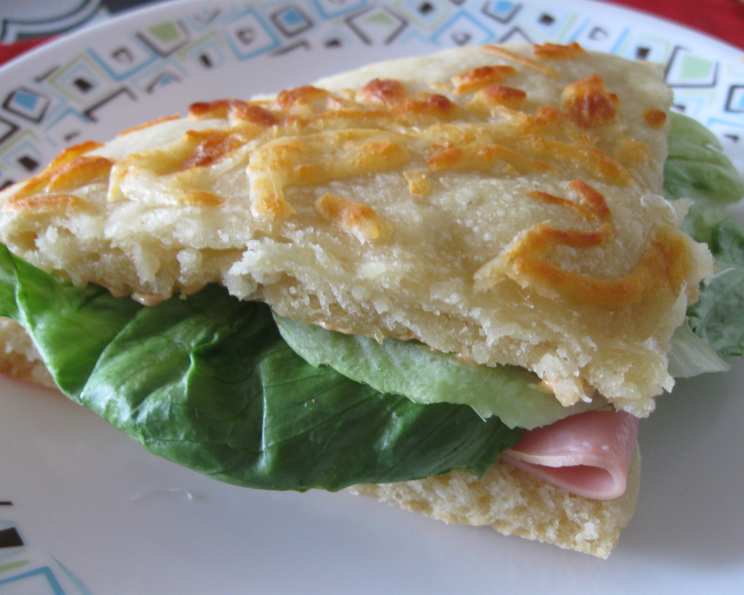
The Irresistible Allure of Homemade Focaccia
There are certain smells that instantly transport me back to cherished memories. The aroma of freshly baked focaccia is undeniably one of them. I vividly remember spending summers in Italy with my Nonna, her small kitchen filled with the intoxicating scent of olive oil, yeast, and herbs as she prepared her signature focaccia. The golden, dimpled bread, still warm from the oven, was always the centerpiece of our family meals, eagerly devoured with laughter and stories shared around the table. To this day, the taste of focaccia evokes those feelings of warmth, love, and togetherness.
Recipe Overview
- Prep Time: 30 minutes (plus rising time)
- Cook Time: 15-20 minutes
- Total Time: 2 hours 20 minutes (includes rising time)
- Yields: 2 baking sheets
- Serves: 30
- Dietary Type: Vegetarian
Ingredients
- 3 cups warm water (110 degrees)
- 5 teaspoons sugar
- 1/2 tablespoon yeast
- 4 1/2 cups all-purpose flour, plus more for dusting
- 1 3/4 cups semolina flour
- 2 1/2 teaspoons salt
- 1/4 cup olive oil, plus more for brushing
- 1 tablespoon minced garlic (optional)
- 1/4 cup grated Parmesan cheese (optional)
- Toppings of your choice (such as rosemary, sea salt, olives, cherry tomatoes)
Equipment Needed
- Stand mixer with dough hook attachment (or large bowl and wooden spoon)
- Measuring cups and spoons
- Large mixing bowl
- Cutting board or smooth work surface
- Two baking sheets
- Pastry brush
Instructions
-
Proof the Yeast: In a large measuring cup or bowl, combine the warm water and sugar. Sprinkle the yeast over the top and let it stand for about 10 minutes, or until the yeast is foamy. This indicates that the yeast is active and ready to use.
-
Combine Dry Ingredients: In the bowl of a stand mixer fitted with a dough hook (or in a large mixing bowl), combine the all-purpose flour, semolina flour, and salt. If you are using garlic and Parmesan cheese, add them to the flour mixture at this stage.
-
Add Wet Ingredients: Add the olive oil to the yeast water. Pour the mixture into the flour mixture and mix on low speed with the dough hook (or stir with a wooden spoon) until a smooth dough forms. The dough will be sticky, which is perfectly normal.
-
First Rise: Heavily flour a smooth surface, such as a cutting board or countertop. Pour the dough onto the floured surface and roll it around to coat the outside with flour. Place the dough in a large, oiled bowl, turning to coat. Cover the bowl with plastic wrap or a clean kitchen towel and let it rise in a warm place for about 1 to 1.5 hours, or until the dough has doubled in size.
-
Divide and Shape: Once the dough has doubled, gently deflate it and turn it out onto your floured surface again. Coat a large knife or bench scraper with olive oil. Cut the dough into 2 equal portions. Fold each dough piece into a rectangle shape as best you can (it doesn’t have to be perfect). Place each rectangle, seam-side down, onto a lightly oiled baking sheet. Let the dough rest for a few minutes.
-
Dimple and Top: With well-oiled fingers, gently spread the dough out to fill the baking sheet. It may not fill the entire pan, and that’s okay. Avoid spreading it too thin. Brush the tops generously with olive oil. Use your fingertips to create dimples all over the surface of the dough. Add your favorite toppings, such as rosemary, sea salt, olives, cherry tomatoes, or a combination of your choosing.
-
Second Rise: Cover the baking sheets with plastic wrap or a clean kitchen towel and let the dough rise again in a warm place for about 30-45 minutes, or until doubled.
-
Bake: Preheat your oven to 400 degrees Fahrenheit (200 degrees Celsius). Bake the focaccia for 15 to 20 minutes, or until golden brown and cooked through.
-
Cool and Serve: Remove the focaccia from the oven and let it cool slightly on the baking sheets before slicing and serving.
Expert Tips & Tricks
- The Right Flour: Using a combination of all-purpose and semolina flour gives the focaccia a wonderful texture. Semolina flour adds a slightly nutty flavor and a pleasant chewiness. If you don’t have semolina flour, you can use all all-purpose flour, but the texture will be slightly different.
- Sticky Dough is Key: Don’t be afraid of sticky dough! It’s crucial for a light and airy focaccia. Resist the urge to add too much flour during the mixing and kneading process.
- Oiling is Essential: Generously oiling the bowl, baking sheets, and your hands prevents the dough from sticking and helps create a beautifully golden crust.
- Don’t Rush the Rise: Allowing the dough to rise properly is essential for developing flavor and creating a light and airy texture. Be patient and let the dough double in size during both rising periods.
- Topping Variations: Get creative with your toppings! Focaccia is a blank canvas for your culinary imagination. Experiment with different herbs, cheeses, vegetables, and even fruits.
- Salt Bae Trick: For even distribution of toppings, lightly press them into the dough after dimpling.
Serving & Storage Suggestions
Serve focaccia warm or at room temperature. It is delicious on its own, drizzled with extra olive oil, or as a side to soups, salads, and pasta dishes. It’s also fantastic for making sandwiches or using as a base for appetizers.
To store leftover focaccia, wrap it tightly in plastic wrap or place it in an airtight container. It will keep at room temperature for up to 2 days, in the refrigerator for up to 5 days, or in the freezer for up to 2 months. To reheat, wrap the focaccia in foil and warm it in a preheated oven at 350 degrees Fahrenheit (175 degrees Celsius) for 5-10 minutes, or until heated through. You can also reheat individual slices in a toaster oven or microwave.
Nutritional Information
| Nutrient | Amount per Serving | % Daily Value |
|---|---|---|
| Calories | 122.6 kcal | N/A |
| Calories from Fat | 18 g | 15% |
| Total Fat | 2.1 g | 3% |
| Saturated Fat | 0.3 g | 1% |
| Cholesterol | 0 mg | 0% |
| Sodium | 195.1 mg | 8% |
| Total Carbohydrate | 22.2 g | 7% |
| Dietary Fiber | 0.9 g | 3% |
| Sugars | 0.8 g | N/A |
| Protein | 3.2 g | 6% |
Variations & Substitutions
- Gluten-Free Focaccia: Substitute the all-purpose and semolina flour with a gluten-free flour blend. Be sure to use a blend that is designed for bread making, as some gluten-free flours can be quite dry. You may also need to add a binder, such as xanthan gum, to help improve the texture.
- Vegan Focaccia: Simply omit the Parmesan cheese or use a vegan Parmesan alternative. Ensure all toppings are vegan-friendly.
- Herb Variations: Experiment with different herbs, such as thyme, oregano, or basil. You can add the herbs to the dough or sprinkle them on top before baking.
- Vegetable Variations: Add sliced onions, peppers, or zucchini to the top of the focaccia for a flavorful and colorful twist.
- Sweet Focaccia: For a sweet focaccia, omit the salt and garlic and add a touch more sugar to the dough. Top with fresh fruit, such as berries or sliced apples, and a sprinkle of cinnamon sugar.
FAQs (Frequently Asked Questions)
Q: Why is my focaccia dough so sticky?
A: Focaccia dough is meant to be sticky! This high hydration level is what gives the bread its light and airy texture. Just be sure to flour your work surface and hands well to prevent sticking.
Q: Can I make the dough ahead of time?
A: Yes, you can make the dough ahead of time. After the first rise, punch down the dough and store it in the refrigerator for up to 24 hours. Let it come to room temperature before continuing with the recipe.
Q: What’s the best way to get those signature dimples in the focaccia?
A: Use your fingertips to firmly press dimples into the dough. Make sure your fingers are well-oiled to prevent sticking.
Q: My focaccia is browning too quickly. What should I do?
A: If your focaccia is browning too quickly, tent it with foil during the last few minutes of baking.
Q: Can I freeze focaccia?
A: Yes, focaccia freezes well. Let it cool completely, then wrap it tightly in plastic wrap and foil. Freeze for up to 2 months. Thaw at room temperature before reheating.
Final Thoughts
Making focaccia at home is a rewarding experience that fills your kitchen with irresistible aromas. Don’t be intimidated by the yeast or the rising times. With a little patience and these simple steps, you can create a truly delicious and impressive loaf. I encourage you to experiment with different toppings and variations to create your own signature focaccia. Once you’ve mastered the basic recipe, the possibilities are endless! Share your creations with friends and family, and enjoy the simple pleasure of homemade bread. And if you discover any unique variations along the way, I’d love to hear about them! Buon appetito!