
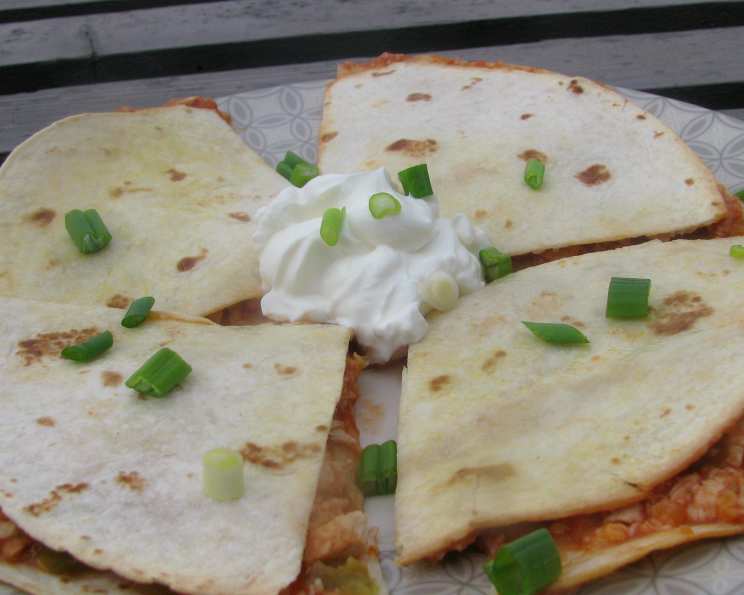
Forevermama’s Spicy Chicken Quesadillas or Burritos: A Taste of Home
There’s something about the sizzle of chicken hitting a hot pan and the aroma of taco seasoning that instantly transports me back to my college days. Late-night study sessions were always fueled by quick, customizable meals, and quesadillas—or, more often, burritos—were a constant favorite. We’d experiment with different fillings, but the spicy kick was always a must. This recipe reminds me of those simpler times, filled with laughter, friendship, and the comforting satisfaction of a delicious, home-cooked meal.
Recipe Overview
- Prep Time: 2 hours 15 minutes
- Cook Time: 10 minutes
- Total Time: 2 hours 25 minutes
- Servings: 5-6
- Dietary Type: Varies (see variations for gluten-free options)
Ingredients
- 4 chicken breast halves, cut into 1/4 inch thick strips
- 1 (1 1/4 ounce) package taco seasoning mix (see note about Chi-Chi’s below)
- 2 1/2 cups shredded Monterey Jack cheese
- 12 – 16 ounces picante sauce
- 2 – 3 medium red sweet bell peppers, chopped
- 10 – 12 flour tortillas (10-inch)
- Melted butter
Equipment Needed
- Heavy-duty zip-top bag
- Broiler pan or 15 x 10 x 1 inch jellyroll pan
- Bowl
- Cookie sheet
- Knife
- Cutting board
Instructions
- In a heavy-duty zip-top bag, combine the chicken strips and taco seasoning mix. Toss well to ensure the chicken is evenly coated.
- Refrigerate the chicken for at least 1 hour, or ideally 1-2 hours, or even overnight for maximum flavor infusion.
- Preheat your broiler. Place the marinated chicken in a broiler pan or a 15 x 10 x 1 inch jellyroll pan.
- Broil the chicken 6 inches from the heat source (with the electric oven door partially open, if using an electric oven) for 5-6 minutes. This ensures the chicken is cooked through without drying out.
- Remove the pan from the oven and allow the chicken to cool slightly.
- Once the chicken is cool enough to handle, cut it into bite-size pieces.
- In a large bowl, combine the bite-sized chicken, shredded Monterey Jack cheese, picante sauce, and chopped red bell peppers. Stir well to ensure all ingredients are evenly distributed.
- Brush one side of each tortilla with melted butter. This adds a delicious richness and helps the quesadillas brown beautifully.
- Place 2 tortillas, buttered side down, on a cookie sheet.
- Top each tortilla with about 1 cup of the chicken mixture, spreading it evenly to the edges of the tortilla.
- Top each with another tortilla, buttered side up.
- Bake in a preheated oven at 375 degrees Fahrenheit for 10 minutes, or until the tortillas are golden brown and the cheese is melted and bubbly.
- Remove from the oven and let cool slightly. Then, cut each quesadilla into wedges.
- Repeat the process with the remaining tortillas and chicken mixture.
- Serve immediately.
For Burritos:
- Mound about 1/4 of the chicken mixture down the center of each tortilla.
- Turn over the short side of the tortilla over the chicken mixture.
- Fold both the right and left sides of the tortilla inward, about 1 inch.
- Roll up tightly, cigar-style, enveloping the chicken mixture.
- Place the rolled burritos, seam-side down, on a greased cookie sheet.
- Brush each burrito with melted butter.
- Bake until golden brown.
Note About Taco Seasoning: The original recipe author suggests that Chi-Chi’s taco seasoning mix is ideal but difficult to find. If you can find it, use 2 packages (each approximately 1/2 – 3/4 ounces). Otherwise, use your favorite brand of taco seasoning.
Expert Tips & Tricks
- Don’t overcrowd the broiler pan: Broiling in batches will help the chicken cook evenly and brown properly.
- Adjust the spice level: If you prefer a milder flavor, use a mild picante sauce or reduce the amount of taco seasoning. For a spicier kick, add a pinch of cayenne pepper to the chicken mixture.
- Use a pizza cutter: A pizza cutter makes quick work of slicing the quesadillas into even wedges.
- Warm the tortillas: Gently warming the tortillas before assembling the quesadillas or burritos will make them more pliable and prevent them from cracking. You can do this by microwaving them for a few seconds or warming them in a dry skillet.
Serving & Storage Suggestions
Serve these spicy chicken quesadillas or burritos immediately while they are hot and the cheese is melted and gooey. They are delicious on their own or with your favorite toppings, such as sour cream, guacamole, salsa, or chopped cilantro.
Storage:
- Room Temperature: Cooked quesadillas or burritos should not be left at room temperature for more than 2 hours.
- Refrigerate: Leftover quesadillas or burritos can be stored in an airtight container in the refrigerator for up to 3-4 days.
- Freeze: For longer storage, wrap individual quesadillas or burritos tightly in plastic wrap and then place them in a freezer-safe bag or container. They can be frozen for up to 2-3 months.
Reheating:
- Oven: To reheat quesadillas or burritos in the oven, preheat to 350 degrees Fahrenheit. Place them on a baking sheet and bake for 10-15 minutes, or until heated through.
- Microwave: Reheating in the microwave is quick and easy, but the tortillas may become a bit soggy. Microwave on high for 1-2 minutes, or until heated through.
- Skillet: For a crispy texture, reheat quesadillas or burritos in a skillet over medium heat. Cook for a few minutes per side, or until heated through and golden brown.
Nutritional Information
| Nutrient | Amount per Serving | % Daily Value |
|---|---|---|
| Calories | 544.2 kcal | N/A |
| Calories from Fat | 246 g | 45% |
| Total Fat | 27.4 g | 42% |
| Saturated Fat | 13.5 g | 67% |
| Cholesterol | 87.4 mg | 29% |
| Sodium | 1702.9 mg | 70% |
| Total Carbohydrate | 42.3 g | 14% |
| Dietary Fiber | 5.3 g | 21% |
| Sugars | 6.8 g | 27% |
| Protein | 32.4 g | 64% |
Note: Nutritional information is an estimate and may vary depending on the specific ingredients used.
Variations & Substitutions
- Gluten-Free: Use gluten-free tortillas to make this recipe gluten-free.
- Vegetarian: Substitute the chicken with black beans, pinto beans, or a mixture of roasted vegetables.
- Cheese Variations: Experiment with different types of cheese, such as cheddar, pepper jack, or a blend of Mexican cheeses.
- Spicy Variations: Add a pinch of cayenne pepper, diced jalapeños, or a dash of hot sauce to the chicken mixture for extra heat.
- Deluxe Toppings: Top with sour cream, salsa, guacamole, pico de gallo, or shredded lettuce.
- Healthy Swap: Use whole wheat tortillas for a boost of fiber.
FAQs (Frequently Asked Questions)
Q: Can I make these quesadillas ahead of time?
A: Yes, you can assemble the quesadillas ahead of time and store them in the refrigerator for up to 24 hours before baking. Just be sure to keep them tightly covered to prevent the tortillas from drying out.
Q: Can I use pre-cooked chicken to save time?
A: Absolutely! Rotisserie chicken or leftover cooked chicken works perfectly in this recipe. Just shred it and add it to the chicken mixture.
Q: What’s the best way to prevent the tortillas from getting soggy?
A: Brushing the tortillas with melted butter helps create a barrier that prevents them from absorbing too much moisture from the filling. Also, be sure not to overfill the quesadillas.
Q: Can I grill these quesadillas instead of baking them?
A: Yes, grilling the quesadillas is a great option. Cook them over medium heat for a few minutes per side, or until the tortillas are golden brown and the cheese is melted.
Q: Can I add other vegetables to the filling?
A: Of course! Corn, black beans, onions, or diced tomatoes would all be delicious additions to the chicken mixture.
Final Thoughts
These Spicy Chicken Quesadillas or Burritos are a fantastic way to satisfy your cravings for a quick, easy, and flavorful meal. Whether you’re making them for a weeknight dinner, a weekend gathering, or a potluck, they are sure to be a hit. Don’t be afraid to experiment with different fillings and toppings to create your own signature version. Enjoy the process, and most importantly, enjoy the delicious results! I hope this recipe brings as much joy to your table as it has to mine. Please share your creations and feedback; I’d love to hear how you made it your own!