
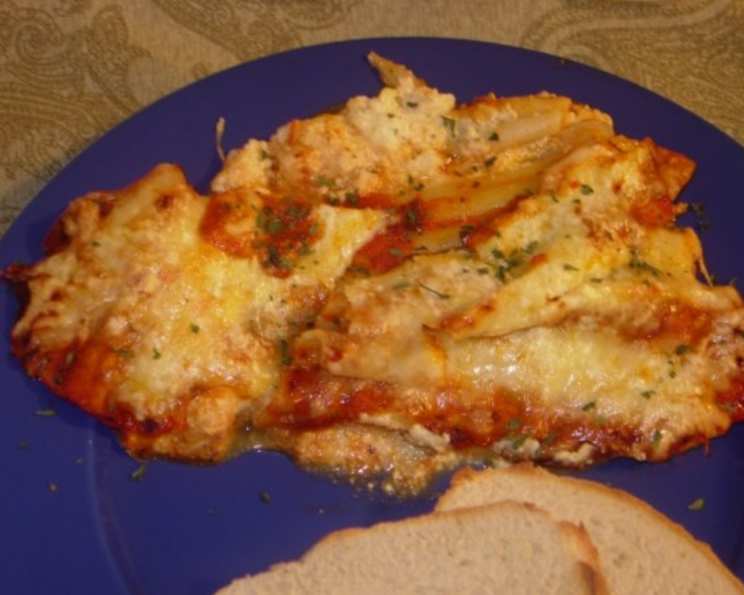
Freeze-Ahead Manicotti: A Taste of Home, Ready When You Are
The aroma of bubbling tomato sauce and warm, cheesy pasta—it’s a scent that instantly transports me back to my Nonna’s kitchen. Her manicotti was legendary, each perfectly stuffed shell a testament to her love. I remember watching her, mesmerized, as she deftly filled the pasta tubes with a creamy ricotta mixture, a flurry of activity fueled by years of tradition. While I might not have Nonna’s touch, I’ve adapted her approach to fit my busy life, creating a freezer-friendly version that captures that same comforting flavor whenever I need it most.
Recipe Overview
- Prep Time: 45 minutes
- Cook Time: 1 hour
- Total Time: 1 hour 45 minutes
- Servings: 8
- Dietary Type: Vegetarian
Ingredients
- 1 (8 ounce) package manicotti shells
- 1 tablespoon vegetable oil
- 1 (15 ounce) carton part-skim ricotta cheese
- 1 (16 ounce) carton small curd low fat cottage cheese
- 1 cup mozzarella cheese, grated
- 1/3 cup Parmesan cheese, grated
- 1 teaspoon salt
- 1/4 teaspoon pepper
- 1 tablespoon fresh parsley, chopped
- 2 eggs
- 2 1/2 cups spaghetti sauce (your favorite store-bought or homemade)
Equipment Needed
- Large pot
- Colander
- Mixing bowl
- 3-quart casserole dish
- Nonstick cooking spray
- Aluminum foil
- Freezer bags (optional)
Instructions
-
Begin by cooking the manicotti shells. Fill a large pot with salted water and bring to a boil. Add the manicotti and the vegetable oil (the oil is often debated, but some believe it helps prevent sticking!). Cook according to package directions, usually around 8-10 minutes, until al dente. Remember, you want them pliable enough to stuff but not falling apart.
-
While the manicotti cooks, prepare the cheese filling. In a large mixing bowl, combine the ricotta cheese, cottage cheese, mozzarella cheese, Parmesan cheese, salt, pepper, parsley, and eggs. Mix well until all ingredients are thoroughly incorporated. The eggs act as a binder, helping the filling hold its shape during baking.
-
Once the manicotti are cooked, carefully drain them in a colander. Then, run cold water over the pasta to stop the cooking process and prevent them from sticking together. This step is crucial for easy handling.
-
Now, it’s time to stuff the manicotti. Gently fill each shell with the cheese mixture. You can use a spoon or a piping bag for this. If using a spoon, be patient and work from both ends of the shell, packing the filling evenly. If using a piping bag, cut off a generous tip and pipe the filling into each shell.
-
Lightly coat a 3-quart casserole dish with nonstick cooking spray. This will prevent the manicotti from sticking to the bottom during baking.
-
Arrange the stuffed manicotti in the prepared casserole dish. Place them side by side, ensuring they fit snugly.
-
Pour the spaghetti sauce evenly over the manicotti, making sure to cover all the shells. The sauce will keep the manicotti moist and flavorful during baking.
-
Cover the dish tightly with aluminum foil. This will help retain moisture and prevent the cheese from browning too quickly.
-
Freeze the assembled manicotti. At this point, you have two options. You can freeze the entire casserole dish as is, or, once it’s completely frozen solid, you can remove the frozen manicotti from the dish and transfer them to a freezer bag for more convenient storage. This frees up your casserole dish for other uses.
-
To prepare for serving after freezing: Thaw the manicotti completely in the refrigerator overnight.
-
Preheat the oven to 350°F (175°C).
-
Bake the thawed manicotti covered with foil for 45 minutes.
-
Remove the foil and bake for an additional 15 minutes, or until the cheese is melted, bubbly, and lightly browned.
-
Let the manicotti rest for 5-10 minutes before serving. This allows the cheese to set slightly and makes it easier to slice and serve.
Expert Tips & Tricks
- Don’t overcook the manicotti shells: Slightly undercooking them ensures they don’t become mushy during baking, especially after being frozen and thawed.
- Use a high-quality ricotta cheese: The ricotta is the star of the filling, so choose a brand you love for the best flavor and texture.
- Add a pinch of nutmeg to the cheese filling: This seemingly small addition enhances the overall flavor and adds a subtle warmth.
- For extra richness, add a layer of béchamel sauce under the spaghetti sauce.
- If the manicotti starts to brown too quickly while baking, tent the foil loosely over the dish.
Serving & Storage Suggestions
Serve the manicotti hot, garnished with fresh parsley and a sprinkle of extra Parmesan cheese. A side of garlic bread or a simple green salad complements the dish perfectly.
Storage:
- Room Temperature: Cooked manicotti should not be left at room temperature for more than 2 hours.
- Refrigerator: Leftover manicotti can be stored in an airtight container in the refrigerator for up to 3-4 days.
- Freezer: While this recipe is designed for freezing before baking, already baked manicotti can also be frozen. Wrap individual portions tightly in plastic wrap and then in foil, or place them in freezer bags. They can be stored in the freezer for up to 2-3 months.
Reheating:
- Oven: Reheat leftover manicotti in a preheated oven at 350°F (175°C) until heated through, about 15-20 minutes.
- Microwave: Reheat individual portions in the microwave on high for 2-3 minutes, or until heated through.
- From Frozen (already baked): Thaw in the refrigerator overnight before reheating using either the oven or microwave method. You can also reheat directly from frozen in the oven, but it will take longer (about 45-60 minutes at 350°F, covered).
Nutritional Information
| Nutrient | Amount per Serving | % Daily Value |
|---|---|---|
| Calories | 360 kcal | N/A |
| Calories from Fat | 131 kcal | N/A |
| Total Fat | 14.6 g | 22% |
| Saturated Fat | 6.9 g | 34% |
| Cholesterol | 85.2 mg | 28% |
| Sodium | 882.8 mg | 36% |
| Total Carbohydrate | 32.4 g | 10% |
| Dietary Fiber | 2 g | 7% |
| Sugars | 6.8 g | N/A |
| Protein | 23.8 g | 47% |
Note: Nutritional information is an estimate and may vary based on specific ingredients and preparation methods.
Variations & Substitutions
- Gluten-Free: Use gluten-free manicotti shells and ensure all other ingredients are gluten-free.
- Vegan: Substitute the ricotta and cottage cheese with vegan ricotta alternatives. Use a plant-based mozzarella and Parmesan cheese. Replace the eggs with flax eggs (1 tablespoon ground flaxseed mixed with 3 tablespoons water per egg).
- Meat Lovers: Add cooked ground beef, Italian sausage, or shredded chicken to the cheese filling for a heartier dish.
- Vegetable Boost: Incorporate finely chopped spinach, zucchini, or mushrooms into the cheese filling for added nutrients and flavor. Sauté the vegetables before adding them to the filling to remove excess moisture.
- Spicy Kick: Add a pinch of red pepper flakes to the cheese filling or the spaghetti sauce for a touch of heat.
FAQs (Frequently Asked Questions)
Q: Can I use a different type of cheese in the filling?
A: Yes, you can substitute other cheeses like provolone or fontina for a different flavor profile. Just make sure they melt well.
Q: How long can I freeze the manicotti?
A: Properly wrapped, the manicotti can be frozen for up to 2-3 months without significant loss of quality.
Q: Can I bake the manicotti without thawing?
A: Yes, but you’ll need to increase the baking time. Bake covered for about 1 hour and 15 minutes, then uncover and bake for another 15-20 minutes, or until heated through and the cheese is bubbly.
Q: My manicotti shells keep breaking when I try to stuff them. What am I doing wrong?
A: Make sure you don’t overcook the shells. They should be pliable but not too soft. Also, be gentle when stuffing and avoid overfilling them.
Q: Can I use homemade spaghetti sauce?
A: Absolutely! Homemade spaghetti sauce will add an extra layer of flavor to the dish.
Final Thoughts
This freeze-ahead manicotti recipe is more than just a meal; it’s a warm hug on a plate, ready to comfort you on busy weeknights or lazy weekends. It’s a dish that brings people together, sparking conversations and creating memories. So, gather your ingredients, roll up your sleeves, and embark on this culinary adventure. Don’t be afraid to experiment with variations and make it your own. And most importantly, share your creation with those you love, because good food is always best enjoyed in good company. Perhaps a glass of Chianti to round it out? Buon appetito!