
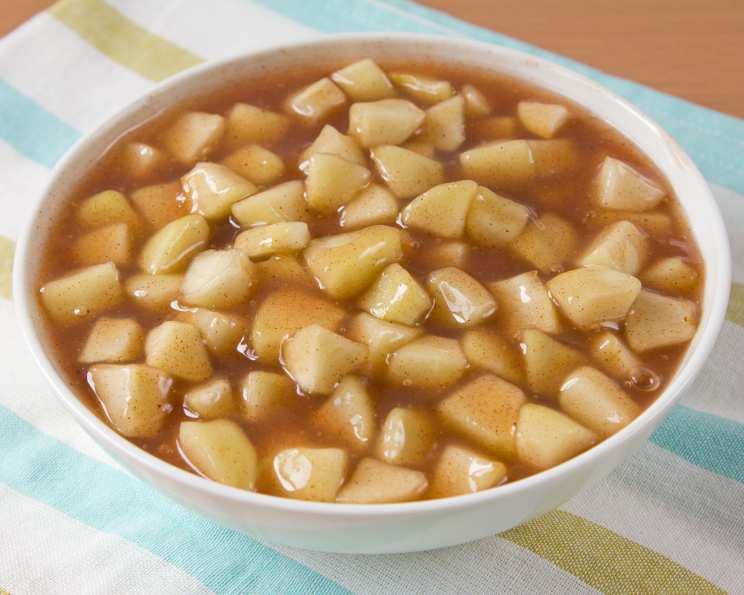
Freezer Apple Pie Filling – OAMC: Apple Pie Bliss All Year Round
The scent of apple pie always takes me back to my grandmother’s kitchen. She had a knack for making the most comforting, soul-warming pies, especially during the holidays. The aroma of cinnamon and baked apples would fill the entire house, a promise of warmth and family. Now, with this freezer-friendly apple pie filling recipe, I can recreate that nostalgic feeling any time of the year, without spending hours peeling and slicing apples on a busy weeknight.
Recipe Overview
- Prep Time: 30 minutes
- Cook Time: 15 minutes
- Total Time: 45 minutes
- Yields: Filling for 4 pies
- Serves: 32
- Dietary Type: Vegetarian (easily adaptable to vegan)
Ingredients
- 16 cups apples, peeled and thinly sliced (about 6-8 pounds, depending on size)
- 4 tablespoons lemon juice
- 4 cups white sugar
- 1 cup cornstarch
- 4 teaspoons ground cinnamon
- 1 teaspoon ground nutmeg
- 1 teaspoon salt
- 8 cups water
Equipment Needed
- Large bowl
- Dutch oven (or large, heavy-bottomed pot)
- Whisk
- Ladle
- Freezer-safe containers or gallon-sized freezer bags
Instructions
- In a large bowl, toss the apples with the lemon juice. This prevents browning and adds a touch of brightness to the filling. Be sure to coat all the apple slices evenly.
- Pour the water into a Dutch oven over medium heat. While the water is heating, in a separate bowl, combine the sugar, cornstarch, cinnamon, salt, and nutmeg. This ensures the spices are evenly distributed and prevents clumping when added to the water.
- Add the dry mixture to the water, stirring well to dissolve any lumps of cornstarch. Bring the mixture to a boil, stirring constantly to prevent sticking and burning.
- Boil the mixture for 2 minutes, continuing to stir constantly. This step is crucial for thickening the filling and preventing a starchy taste. The mixture should become noticeably thicker and more translucent.
- Add the apples to the boiling mixture. Stir gently to incorporate them into the liquid.
- Return the mixture to a boil. Once boiling, reduce the heat to low, cover the Dutch oven, and simmer until the apples are tender, about 6 to 8 minutes. The apples should be soft but still hold their shape; avoid overcooking them into mush.
- Cool the filling for 30 minutes. Allowing the filling to cool slightly before freezing prevents excessive condensation and ice crystal formation, which can affect the texture.
- Ladle the cooled filling into 4 freezer-safe containers or gallon freezer bags, leaving approximately 1/2 inch of headspace in each container. This allows for expansion during freezing and prevents the containers from cracking or the bags from bursting.
- Cool the filled containers or bags at room temperature for no longer than 1 1/2 hours. Speeding up the cooling process minimizes the time the filling spends in the “danger zone” (between 40°F and 140°F), reducing the risk of bacterial growth.
- Seal the containers or bags tightly, removing as much air as possible from the bags to prevent freezer burn. Freeze for up to 12 months.
- If you want to bake a pie right away, you can skip the freezing process and use the filling immediately.
Expert Tips & Tricks
- Apple Variety Matters: Use a blend of apple varieties for the best flavor and texture. Firm, tart apples like Granny Smith or Honeycrisp hold their shape well during cooking, while softer varieties like McIntosh will break down and add sweetness.
- Lemon Juice Boost: Don’t skimp on the lemon juice! It brightens the apple flavor and helps prevent oxidation.
- Spice It Up: Feel free to adjust the spices to your liking. Add a pinch of ground cloves or allspice for a warmer flavor profile.
- Preventing a Soggy Bottom Crust: If you’re using the filling immediately, consider blind-baking your pie crust for a few minutes before adding the filling to prevent a soggy bottom.
- Thawing the Filling: For best results, thaw the frozen filling in the refrigerator overnight. You can also thaw it in the microwave using the defrost setting, but be sure to stir it occasionally to ensure even thawing.
- Label Everything: Always label your freezer bags/containers with the date and contents to keep track of what’s inside.
Serving & Storage Suggestions
This apple pie filling is best served in a homemade pie crust, topped with a scoop of vanilla ice cream or a dollop of whipped cream. For an extra touch, consider adding a sprinkle of cinnamon or a drizzle of caramel sauce.
- Room Temperature: Baked apple pie can sit at room temperature for up to 2 hours.
- Refrigerator: Leftover apple pie should be stored in the refrigerator, covered, for up to 3-4 days.
- Freezer: Unbaked apple pie filling can be stored in the freezer for up to 12 months. Baked pies can also be frozen, but the crust may become slightly soggy upon thawing. Wrap the pie tightly in plastic wrap and then in foil before freezing. Thaw overnight in the refrigerator before reheating.
- Reheating: Reheat leftover apple pie in a preheated oven at 350°F (175°C) for 10-15 minutes, or until heated through. You can also microwave individual slices for a quicker option.
Nutritional Information
Estimated nutritional information per serving (1/4 of the recipe yield):
| Nutrient | Amount per Serving | % Daily Value |
|---|---|---|
| Calories | 280 kcal | 14% |
| Total Fat | 0g | 0% |
| Saturated Fat | 0g | 0% |
| Cholesterol | 0mg | 0% |
| Sodium | 48mg | 2% |
| Total Carbohydrate | 72g | 24% |
| Dietary Fiber | 3g | 12% |
| Sugars | 60g | – |
| Protein | 0g | 0% |
Note: Nutritional information is an estimate and may vary depending on specific ingredients and portion sizes.
Variations & Substitutions
- Vegan Apple Pie Filling: Substitute the white sugar with maple syrup or coconut sugar for a naturally sweetened, vegan-friendly option. Ensure your pie crust recipe is also vegan.
- Gluten-Free Apple Pie: Use a gluten-free pie crust recipe for a completely gluten-free apple pie. Many commercially available gluten-free pie crust mixes work well.
- Spiced Apple Cranberry Filling: Add 1-2 cups of fresh or frozen cranberries to the apple mixture for a festive twist. Adjust the sugar as needed, as cranberries can be tart.
- Caramel Apple Pie Filling: Drizzle caramel sauce into the filling after it has cooled slightly for a decadent caramel apple pie.
- Bourbon Apple Pie Filling: Add a tablespoon or two of bourbon or apple brandy to the filling after it has cooled for a more complex flavor.
FAQs (Frequently Asked Questions)
Q: Can I use frozen apples in this recipe?
A: Yes, you can use frozen apples. However, they may release more moisture than fresh apples, so you may need to adjust the amount of cornstarch slightly to achieve the desired thickness.
Q: How do I prevent the pie crust from burning while baking the pie?
A: You can use pie crust shields or strips of aluminum foil to cover the edges of the crust during baking. Remove the shields or foil during the last 15-20 minutes of baking to allow the crust to brown evenly.
Q: Can I reduce the amount of sugar in this recipe?
A: Yes, you can reduce the amount of sugar to your liking. However, keep in mind that sugar contributes to the overall flavor and texture of the filling. If you reduce the sugar significantly, you may need to adjust the other ingredients as well.
Q: How long does it take to bake a pie with this filling?
A: Baking time will vary depending on your oven and the type of crust you use. Generally, a pie with this filling will bake for about 45-55 minutes at 375°F (190°C), or until the crust is golden brown and the filling is bubbly.
Q: How do I know when the pie filling is thick enough?
A: The pie filling should be thick enough to coat the back of a spoon. If it seems too thin, you can simmer it for a few more minutes to allow it to thicken further. Remember that the filling will thicken slightly as it cools.
Final Thoughts
This freezer apple pie filling recipe is a true gift to any home cook. It’s a fantastic way to capture the flavors of fall and enjoy homemade apple pie all year round. The convenience of having pre-made filling on hand makes it easy to whip up a comforting dessert on a moment’s notice. Don’t hesitate to experiment with different apple varieties and spice combinations to create your own signature apple pie filling. Happy baking!