
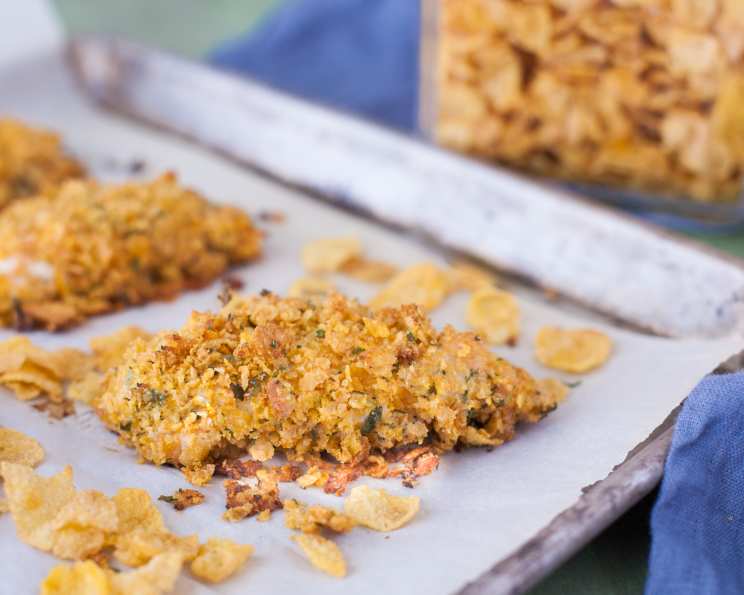
Freezer-Ready Cornflake Chicken Fingers: A Childhood Favorite, Elevated
There’s something undeniably comforting about chicken fingers. For me, they instantly transport me back to childhood summer afternoons, spent playing in the backyard until hunger pangs demanded a snack. While store-bought versions were a treat, nothing quite compares to the satisfying crunch of a homemade chicken finger, especially when paired with a creamy dipping sauce. These cornflake-crusted chicken fingers take that nostalgic favorite and elevate it, making them not only delicious but also incredibly convenient. The freezer-ready aspect means you can whip up a batch (or two!) and have a healthy, homemade meal ready to go whenever the craving strikes or time is short.
Recipe Overview
- Prep Time: 20 minutes
- Freeze Time: 2 hours
- Cook Time: 18-20 minutes
- Total Time: 2 hours 40 minutes
- Servings: 4
- Dietary Type: Adaptable
Ingredients
- 1 cup crushed corn flakes cereal (measure after crushing)
- 1 tablespoon fresh parsley, finely chopped
- 1/4 teaspoon salt
- 1 lb boneless skinless chicken breast halves
- 1/3 cup prepared blue cheese dressing or 1/3 cup ranch salad dressing, plus more for dipping
- 2 teaspoons water
- 1-2 teaspoons hot pepper sauce (such as Lousiana Hot Sauce or Crystal’s or to taste) (optional)
Equipment Needed
- Shallow dish
- Large mixing bowl
- Cookie sheet
- Aluminum foil
- Freezer bags
- Jelly roll pan (or large cookie sheet with sides)
Instructions
- Start by lining a cookie sheet that will fit into your freezer with foil and set it aside. This prevents sticking and makes it easy to transfer the frozen chicken fingers.
- In a shallow dish, combine the crushed corn flakes cereal, finely chopped fresh parsley, and salt. Mix well to ensure the parsley and salt are evenly distributed throughout the cornflake crumbs. This mixture will form the crispy, flavorful crust for your chicken fingers.
- In a large mixing bowl, whisk together the 1/3 cup dressing (either blue cheese or ranch), water, and hot pepper sauce (if using). Adjust the amount of hot sauce to your preference; a little goes a long way! This mixture will act as a marinade and help the cornflake crumbs adhere to the chicken.
- Prepare the chicken. Cut each chicken breast half into several long strips, approximately 1/2-inch to 3/4-inch thick. Trim away any excess fat to ensure a clean and even cook.
- Add the chicken strips to the wet dressing mixture in the large mixing bowl. Stir gently to coat each piece thoroughly, making sure every strip is covered in the marinade.
- Now, it’s time to coat the chicken. Take each chicken strip one at a time and roll it into the cornflake mixture, pressing gently to ensure the crumbs adhere well on all sides.
- Place each coated chicken strip onto the prepared foil-lined cookie sheet, leaving a small space between each to prevent them from sticking together during freezing.
- Place the cookie sheet in the freezer and freeze the chicken fingers until firm, about 2 hours or so. This ensures they don’t stick together when stored in a freezer bag.
- Once the chicken fingers are frozen solid, transfer them to freezer bags. Be sure to remove as much air as possible from the bag to prevent freezer burn.
- Store the chicken fingers in airtight freezer containers or freezer bags for up to 1 month.
- When ready to serve, preheat your oven to 425 degrees F.
- Lightly grease a foil-lined jelly roll pan (or a large cookie sheet with sides) with cooking spray. Arrange the frozen chicken fingers in a single layer on the prepared pan, ensuring they are not overlapping.
- Bake the chicken fingers for 18-20 minutes from frozen, or until they are no longer pink inside and the outside is golden brown and crispy. The internal temperature should reach 165 degrees F.
- Serve the warm chicken fingers immediately with a bowl of your favorite dressing for dipping. Extra ranch or blue cheese dressing works well!
Expert Tips & Tricks
- Crushing the Cornflakes: For a finer, more even coating, pulse the cornflakes in a food processor. Be careful not to over-process them into a powder. You want some texture.
- Preventing Soggy Chicken: Ensure the chicken strips are well-drained before coating them in the cornflake mixture. Excess moisture can lead to a soggy crust.
- Even Baking: For even cooking, flip the chicken fingers halfway through the baking time.
- Freezer Burn Prevention: Press out as much air as possible from the freezer bags before sealing them. This helps prevent freezer burn. Consider using a vacuum sealer for optimal results.
Serving & Storage Suggestions
Serve these freezer-ready cornflake chicken fingers warm, straight from the oven. They are delicious with a variety of dipping sauces, such as ranch dressing, blue cheese dressing, honey mustard, or even a spicy sriracha mayo. They can also be served alongside classic sides like french fries, coleslaw, or a simple green salad.
Leftover cooked chicken fingers should be stored in an airtight container in the refrigerator for up to 3 days. Reheat them in the oven or air fryer to maintain their crispness.
Do not leave cooked chicken fingers at room temperature for more than 2 hours.
Nutritional Information
| Nutrient | Amount per Serving | % Daily Value |
|---|---|---|
| Calories | 252.1 kcal | N/A |
| Calories from Fat | 120 g | 48% |
| Total Fat | 13.4 g | 20% |
| Saturated Fat | 2.3 g | 11% |
| Cholesterol | 79 mg | 26% |
| Sodium | 540.5 mg | 22% |
| Total Carbohydrate | 7.1 g | 2% |
| Dietary Fiber | 0.3 g | 1% |
| Sugars | 1.4 g | 5% |
| Protein | 24.9 g | 49% |
Note: Nutritional information is an estimate and may vary based on specific ingredients and preparation methods.
Variations & Substitutions
- Gluten-Free: Use gluten-free cornflakes to make this recipe gluten-free.
- Spice It Up: Add a pinch of cayenne pepper to the cornflake mixture for an extra kick.
- Herb Variations: Experiment with different herbs in the cornflake mixture, such as dried thyme, oregano, or rosemary.
- Cheese Please: Add a sprinkle of grated Parmesan cheese to the cornflake mixture for a cheesy flavor.
- Different Dipping Sauces: Offer a variety of dipping sauces to suit different tastes, such as barbecue sauce, sweet and sour sauce, or a homemade aioli.
FAQs (Frequently Asked Questions)
Q: Can I use chicken tenders instead of cutting chicken breasts?
A: Absolutely! Chicken tenders are already in the perfect shape for this recipe and will save you a bit of prep time.
Q: Can I bake these without freezing them first?
A: Yes, you can. Reduce the baking time to 15-18 minutes, or until the chicken is cooked through.
Q: How long can I store these in the freezer?
A: For the best quality, store them in the freezer for up to 1 month. After that, they may start to develop freezer burn.
Q: Can I air fry these instead of baking them?
A: Yes! Preheat your air fryer to 400°F and cook for 12-15 minutes, flipping halfway through, until golden brown and cooked through.
Q: What if I don’t have blue cheese or ranch dressing?
A: You can substitute with any creamy dressing you like, such as Caesar, Italian, or even a simple mayonnaise mixed with a little lemon juice and herbs.
Final Thoughts
These freezer-ready cornflake chicken fingers are a delightful and convenient way to enjoy a classic comfort food. They’re perfect for busy weeknights, kid-friendly meals, or even as a tasty appetizer. Don’t be afraid to experiment with different flavor combinations and dipping sauces to create your own signature version. Give this recipe a try, and you’ll always have a delicious, homemade meal ready to go! Share your creations and variations; I’d love to hear how they turn out! Consider pairing these chicken fingers with a crisp green salad and a refreshing lemonade for a complete and satisfying meal.