
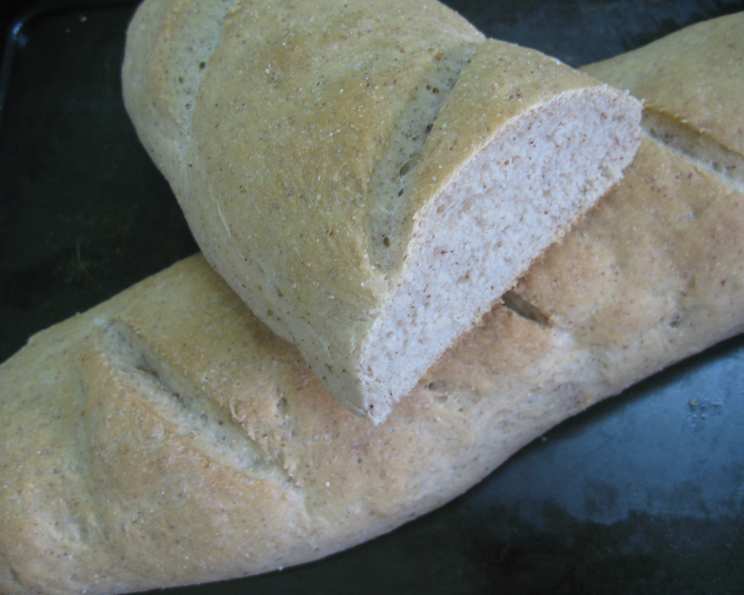
The Simple Joy of Homemade French Bread
The aroma of freshly baked bread is, for me, the essence of home. I still remember my grandmother’s kitchen, always warm and filled with the yeasty scent of rising dough. She would let me “help” by punching down the dough, a task I approached with the seriousness of a seasoned baker. Her French bread, crusty on the outside and soft within, was the foundation of countless family meals, transformed into everything from elegant crostini to simple, comforting grilled cheese sandwiches. Recreating that simple magic in my own kitchen is a little act of love and remembrance, a way to keep her spirit alive with every golden-brown loaf.
Recipe Overview
- Prep Time: 1 hour 30 minutes
- Cook Time: 30 minutes
- Total Time: 2 hours
- Servings: 20-24
- Yield: 2 loaves
- Dietary Type: Vegetarian
Ingredients
- 1 tablespoon yeast
- 1 1/2 cups warm water, divided
- 1 tablespoon sugar
- 2 teaspoons salt
- 1 tablespoon vegetable oil
- 4 cups flour, plus extra for dusting
Equipment Needed
- Mixing bowl
- Measuring cups and spoons
- Greased bowl
- Lightly floured surface
- Greased cookie sheet
- Clean kitchen towel
- Very sharp knife
- Wire racks
Instructions
-
In a mixing bowl, dissolve the yeast in 1/2 cup of warm water. It’s important the water is warm, but not too hot, or you risk killing the yeast. Aim for about 105-115°F (40-46°C). Let it sit for about 5 minutes to activate; you should see some bubbling.
-
Add the sugar, salt, vegetable oil, and the remaining 1 cup of warm water to the yeast mixture. Stir until the sugar and salt are dissolved.
-
Gradually add the flour to the wet ingredients, stirring until a smooth dough forms. You may need to add a little extra flour to achieve a soft, but not sticky, dough. The texture should be pliable and easy to handle.
-
Place the dough in a greased bowl, turning to coat all sides. This will prevent the dough from drying out as it rises.
-
Cover the bowl with a clean kitchen towel or plastic wrap. Let rise in a warm place for 1 hour, or until the dough has doubled in size. A warm environment encourages the yeast to work its magic.
-
Once the dough has doubled, turn it out onto a lightly floured surface. This will prevent the dough from sticking as you shape it.
-
Divide the dough in half.
-
Let the dough rest for 10 minutes. This allows the gluten to relax, making it easier to shape the loaves.
-
Roll each half into a 15-inch chain, similar to how you would roll playdough to make a snake. Aim for a uniform thickness throughout the length of each loaf.
-
Place both rolls onto a greased cookie sheet, leaving some space between them to allow for expansion during the second rise.
-
Cover the cookie sheet with a clean kitchen towel and let rise until doubled, approximately 45 minutes to 1 hour.
-
Preheat your oven to 400°F (200°C).
-
Using a very sharp knife, make 3 diagonal cuts across the top of each loaf. These cuts not only look aesthetically pleasing but also allow the bread to expand evenly in the oven.
-
Bake at 400°F (200°C) for 30 minutes, or until the loaves are golden brown and sound hollow when tapped on the bottom.
-
Cool the bread on wire racks before slicing and serving. This allows the steam to escape, preventing the crust from becoming soggy.
Expert Tips & Tricks
- For an extra-crispy crust, place a pan of hot water on the bottom rack of the oven during baking. The steam creates a humid environment, which encourages a thicker, more flavorful crust.
- If your kitchen is cold, you can create a warm environment for rising dough by placing the bowl in an oven preheated to 170°F (77°C) for a few minutes, then turned off. Ensure the oven is not too hot, or it will kill the yeast.
- Don’t overwork the dough. Overmixing can result in a tough bread. Mix until just combined.
- If you want to make this bread ahead of time, you can prepare the dough up to the first rise, then refrigerate it overnight. Bring it back to room temperature before shaping and baking.
- If the tops of your loaves are browning too quickly, tent them with foil during the last 10 minutes of baking.
- For a richer flavor, try using olive oil instead of vegetable oil.
Serving & Storage Suggestions
This French bread is incredibly versatile. Serve it warm with butter, alongside your favorite soup or pasta dish, or use it to make sandwiches, bruschetta, or croutons. It pairs perfectly with a hearty bowl of French onion soup or as an accompaniment to a rich, creamy pasta like fettuccine alfredo.
To store leftover bread, wrap it tightly in plastic wrap or place it in a bread bag. It will stay fresh at room temperature for 2-3 days. For longer storage, slice the bread and freeze it in a freezer-safe bag for up to 2-3 months. To reheat, simply thaw and warm in a 350°F (175°C) oven for a few minutes. You can also wrap it in foil while reheating to prevent it from drying out.
Nutritional Information
| Nutrient | Amount per Serving | % Daily Value |
|---|---|---|
| Calories | 101 kcal | 5% |
| Total Fat | 1g | 1% |
| Saturated Fat | 0g | 0% |
| Cholesterol | 0mg | 0% |
| Sodium | 234mg | 10% |
| Total Carbohydrate | 20g | 7% |
| Dietary Fiber | 1g | 4% |
| Sugars | 1g | – |
| Protein | 3g | 6% |
Nutritional information is an estimate and may vary based on specific ingredients and portion sizes.
Variations & Substitutions
- Herb-Infused: Add 1-2 tablespoons of dried herbs like rosemary, thyme, or oregano to the dough for a fragrant variation.
- Garlic Bread: Brush the baked loaves with garlic butter and sprinkle with Parmesan cheese before serving.
- Whole Wheat: Substitute up to half of the all-purpose flour with whole wheat flour for a nuttier flavor and increased fiber.
- Seeded: Sprinkle the tops of the loaves with sesame seeds, poppy seeds, or sunflower seeds before baking for added texture and flavor.
- Sourdough: Use sourdough starter instead of commercial yeast for a tangy and complex flavor. This will require adjusting the rising times and baking temperature.
FAQs (Frequently Asked Questions)
Q: Why is my bread not rising?
A: The most common reason is that your yeast is old or inactive. Make sure to check the expiration date on your yeast and proof it with warm water and sugar before adding it to the dough.
Q: Can I use a stand mixer for this recipe?
A: Yes, you can definitely use a stand mixer with a dough hook attachment. Simply combine the ingredients in the mixer bowl and knead on low speed until a smooth dough forms.
Q: How do I know when the bread is done baking?
A: The bread is done when it is golden brown and sounds hollow when tapped on the bottom. You can also use a thermometer to check the internal temperature, which should be around 200-210°F (93-99°C).
Q: Can I freeze the dough instead of baking it right away?
A: Yes, you can freeze the dough after the first rise. Punch it down, divide it into loaves, wrap each loaf tightly in plastic wrap, and freeze for up to 2 months. Thaw in the refrigerator overnight before shaping and baking.
Q: What if my dough is too sticky?
A: If your dough is too sticky, gradually add more flour, one tablespoon at a time, until it becomes easier to handle. Be careful not to add too much flour, as this can make the bread tough.
Final Thoughts
There’s a certain magic in taking simple ingredients like flour, water, and yeast and transforming them into a golden, crusty loaf of French bread. It’s a skill worth learning and sharing. Don’t be intimidated by the process; even if your first attempt isn’t perfect, it will still be delicious. So, gather your ingredients, preheat your oven, and embark on this rewarding baking adventure. I encourage you to experiment with variations, share your creations with loved ones, and let the comforting aroma of freshly baked bread fill your home. Bon appétit!