
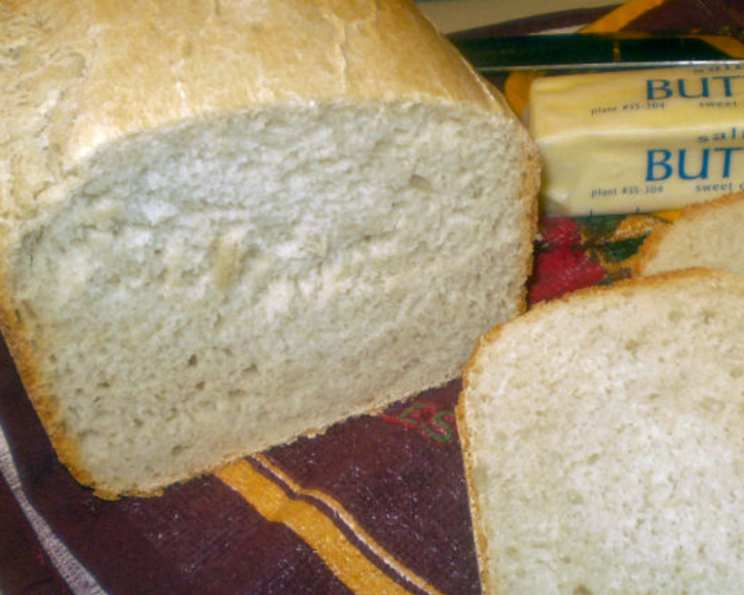
French Countryside Bread: A Bread Machine Delight
The aroma of freshly baked bread is a powerful time machine. For me, it instantly transports me back to my grandmother’s farmhouse kitchen. I remember watching, mesmerized, as she pulled warm, crusty loaves from her ancient oven, the scent of yeast and wheat filling the air. This French Countryside Bread, made easy with a bread machine, evokes that same comforting feeling and delicious taste, bringing a touch of rustic charm to my modern kitchen. It’s a simple recipe, but it yields a loaf worthy of sharing with loved ones, just like my grandmother did.
Recipe Overview
- Prep Time: 10 minutes
- Cook Time: 3 hours 10 minutes (including bread machine cycle)
- Total Time: 3 hours 20 minutes
- Servings: 10-12
- Yield: 1-2 loaves
- Dietary Type: Vegetarian
Ingredients
- 1 3/8 cups water, room temperature
- 1 1/2 tablespoons olive oil
- 1 1/2 teaspoons salt
- 4 cups bread flour
- 1 tablespoon sugar
- 2 teaspoons active dry yeast
Equipment Needed
- Bread Machine
- Measuring cups and spoons
- Large, ungreased baking sheet (if baking in oven)
- Clean kitchen towel (if baking in oven)
- Wire racks
- Very sharp knife
- Small bowl (optional, for egg wash)
- Pastry brush (optional, for egg wash)
Instructions
- Add all ingredients to your bread machine pan in the order recommended by your machine’s manufacturer. This is crucial for proper mixing and yeast activation. Generally, you’ll start with the liquid ingredients.
- Pour the 1 3/8 cups of room temperature water into the bread pan.
- Add the 1 1/2 tablespoons of olive oil to the pan. The olive oil contributes to the bread’s flavor and texture, adding a subtle richness.
- Add the 1 1/2 teaspoons of salt. Salt is essential for controlling the yeast activity and enhancing the overall flavor.
- Carefully measure out 4 cups of bread flour and add it to the pan, covering the liquid ingredients. Bread flour has a higher protein content than all-purpose flour, resulting in a chewier, more structured loaf.
- Add the 1 tablespoon of sugar. Sugar provides food for the yeast, helping it to rise and create a light, airy texture.
- Make a small well in the center of the dry ingredients. This prevents the yeast from coming into direct contact with the liquids too early.
- Carefully pour the 2 teaspoons of active dry yeast into the well. Make sure the yeast is fresh for the best results.
- Select the “French bread” setting on your bread machine. This setting is specifically designed for breads with a crisp crust and chewy interior.
- Choose your desired crust color setting, if your bread machine offers this option. A darker crust will have a more pronounced flavor.
- Press start and let the bread machine do its work! The machine will mix, knead, proof, and bake the bread for you.
- If you prefer to bake the bread in the oven: Use the “Dough” cycle on your bread machine.
- When the dough cycle is complete, gently punch the dough down to release any excess air.
- Divide the dough into 2 equal parts. This will yield two smaller loaves of French bread.
- On a lightly floured surface, roll each half into a rectangle, about 10 x 15 inches. This helps to create the desired shape and structure for the loaves.
- Starting at the long side, roll each rectangle, jelly roll style, into a tight, long loaf. The tighter the roll, the better the structure of the bread.
- Seal the seams and ends by pinching the dough together firmly. This prevents the loaves from unraveling during baking.
- Place the loaves seam sides down on a large, ungreased baking sheet. You can sprinkle some cornmeal or flour on the pan under where you’ll be placing the loaves to prevent sticking.
- Cover the loaves with a clean kitchen towel and let rise in a warm place for about 30 minutes, or until almost double in size. This allows the yeast to continue working, resulting in a lighter, airier loaf.
- Preheat your oven to 375°F (190°C).
- Place a pan of hot water on the bottom rack of your oven. This creates steam inside the oven while the bread is baking, which is essential for achieving an authentic, crispy crust.
- Using a very sharp knife, carefully make 3 or 4 diagonal slashes in each loaf, cutting about 1/2 inch down into the dough. These slashes allow the bread to expand during baking and create the characteristic appearance of French bread.
- If you choose, at this time you can carefully brush on an egg white glaze (one egg white beaten with 1 tablespoon of water) and sprinkle with sesame seeds, poppy seeds, dried onion or garlic, etc., if desired. This adds a beautiful sheen and extra flavor to the crust.
- Bake for 25-30 minutes (or until the loaves sound hollow when tapped) on the middle oven rack.
- Cool on wire racks before slicing and serving.
Expert Tips & Tricks
- For an extra crispy crust, try spritzing the loaves with water a few times during the first 10 minutes of baking in the oven.
- If you don’t have bread flour, you can use all-purpose flour, but the texture will be slightly different. You can add 1 tablespoon of vital wheat gluten to the all-purpose flour to improve the texture.
- Ensure your yeast is active. Proof it by mixing it with a little warm water and sugar; if it foams up after 5-10 minutes, it’s good to use.
- Don’t over-knead the dough in the bread machine – follow the machine’s instructions. Over-kneading can result in a tough loaf.
- If your bread is browning too quickly, tent it with foil during the last few minutes of baking.
Serving & Storage Suggestions
Serve your French Countryside Bread warm with a pat of butter, alongside soups or stews, or as part of a cheese board. It’s also delicious toasted and served with jam or avocado.
Store leftover bread in an airtight container at room temperature for up to 2 days. For longer storage, wrap tightly in plastic wrap and freeze for up to 2 months. To reheat, thaw completely and bake at 350°F (175°C) for 5-10 minutes, or until warmed through. You can also revive a slightly stale loaf by sprinkling it with water and baking it for a few minutes.
Nutritional Information
| Nutrient | Amount per Serving | % Daily Value |
|---|---|---|
| Calories | 207 kcal | 10% |
| Total Fat | 2.58g | 4% |
| Saturated Fat | 0.36g | 2% |
| Cholesterol | 0 mg | 0% |
| Sodium | 351 mg | 15% |
| Total Carbohydrate | 39.7g | 13% |
| Dietary Fiber | 1.57g | 6% |
| Sugars | 1.39g | 3% |
| Protein | 5.5g | 11% |
Note: Nutritional information is an estimate and may vary based on specific ingredients and serving sizes.
Variations & Substitutions
- Garlic Herb Bread: Add 2 cloves of minced garlic and 2 tablespoons of chopped fresh herbs (such as rosemary, thyme, or parsley) to the dough before the kneading cycle.
- Cheese Bread: Add 1 cup of shredded cheese (such as cheddar, mozzarella, or Parmesan) to the dough before the kneading cycle.
- Olive Bread: Add 1/2 cup of chopped Kalamata olives to the dough before the kneading cycle.
- Whole Wheat Bread: Substitute up to 2 cups of the bread flour with whole wheat flour. You may need to adjust the amount of water slightly to achieve the desired dough consistency.
- Sweet Bread: Increase the sugar to 2 tablespoons and add 1/2 teaspoon of vanilla extract for a slightly sweeter loaf.
FAQs (Frequently Asked Questions)
Q: Can I use all-purpose flour instead of bread flour?
A: Yes, but bread flour is recommended for its higher protein content, which results in a chewier texture. If using all-purpose, add 1 tablespoon of vital wheat gluten per cup.
Q: How do I know when the bread is done if baking in the oven?
A: The bread is done when it’s golden brown and sounds hollow when tapped on the bottom. An internal temperature of 200-210°F (93-99°C) is also a good indicator.
Q: Can I freeze this bread?
A: Yes! Let the bread cool completely, then wrap it tightly in plastic wrap and place it in a freezer bag. It can be frozen for up to 2 months.
Q: My bread machine makes a sunken loaf. What am I doing wrong?
A: This can be caused by too much yeast, too much liquid, or not enough gluten development. Make sure your yeast is fresh, accurately measure the liquids, and consider adding a tablespoon of vital wheat gluten.
Q: Can I make this recipe without a bread machine?
A: Yes, you can mix and knead the dough by hand or with a stand mixer. Allow it to rise in a warm place for 1-1.5 hours, punch it down, shape it, and bake as directed above.
Final Thoughts
This French Countryside Bread recipe offers a delightful journey back to simpler times, filling your kitchen with the irresistible aroma of homemade goodness. Whether you choose the convenience of a bread machine or the hands-on approach of traditional baking, the result is a crusty, flavorful loaf that’s perfect for sharing. Don’t be afraid to experiment with variations and make it your own. I encourage you to try this recipe and experience the joy of baking a truly satisfying loaf of bread. Bon appétit!