
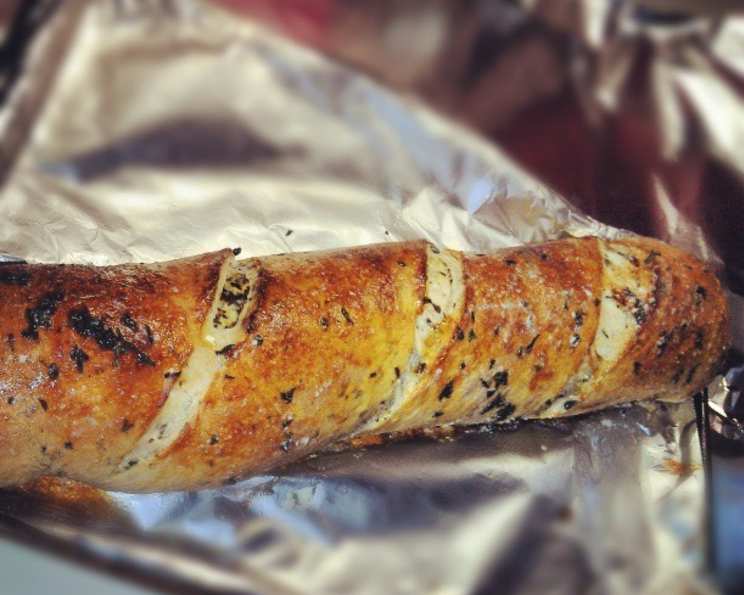
The Quintessential French Herb Bread: A Culinary Journey
The scent of warm bread, especially one laced with fragrant herbs, instantly transports me back to a small boulangerie in the heart of Provence. Sunlight streamed through the windows, illuminating rows of golden loaves. The baker, a woman with flour-dusted hands and a knowing smile, offered me a slice of her freshly baked herb bread. It was a revelation – the perfect balance of savory herbs, a soft, yielding crumb, and a crust that crackled with delight. That experience ignited my passion for baking and taught me the transformative power of simple, quality ingredients. Today, I’m thrilled to share a recipe that captures the essence of that unforgettable loaf.
Recipe Overview
- Prep Time: 1 hour
- Cook Time: 20-30 minutes
- Total Time: 1 hour 30 minutes
- Servings: 12
- Yield: 1 loaf
- Dietary Type: Vegetarian
Ingredients
- 1 tablespoon active dry yeast
- 2 tablespoons white sugar
- 1 teaspoon salt
- 3 ½ cups all-purpose flour (plus extra for kneading)
- 1 cup milk
- 1 tablespoon distilled white vinegar
- ¼ cup water
- ¼ cup margarine (or butter)
- ½ cup minced onion
- 1 garlic clove, minced
- ½ teaspoon salt
- 1 tablespoon minced parsley (fresh is best, but dried works too)
- 2 tablespoons margarine (or butter), melted for brushing after baking
Equipment Needed
- Large mixing bowl
- Saucepan
- Electric mixer (optional, but recommended)
- Measuring cups and spoons
- Floured surface for kneading
- Greased bowl for rising
- Rolling pin
- Greased cookie sheet
Instructions
-
Activate the yeast: In a large bowl, combine the active dry yeast, sugar, 1 teaspoon salt, and 1 ½ cups of the all-purpose flour.
-
Prepare the milk mixture: In a saucepan, combine the milk, water, and ¼ cup of margarine (or butter). Heat over low heat until the margarine is melted and the mixture reaches 110 degrees F (43 degrees C). Using a thermometer ensures the correct temperature, which is crucial for yeast activation. Avoid overheating, as it will kill the yeast.
-
Combine wet and dry ingredients: Add the warm milk mixture and vinegar to the flour mixture. Blend at low speed using an electric mixer (or by hand) until moistened. The vinegar helps to tenderize the gluten, resulting in a softer crumb.
-
Knead the dough: Beat the mixture at medium speed for 3 minutes. Stir in 1 ½ cups of additional flour to form a sticky dough.
-
Knead until smooth: Turn the dough out onto a floured surface. Knead, adding ½ to 1 cup more of flour as needed, until the dough is smooth and pliable. The dough should be elastic and spring back when poked. This step is crucial for developing the gluten, which gives the bread its structure.
-
First rise: Place the dough in a greased bowl, turning to coat all sides. Cover with plastic wrap or a clean kitchen towel. Let rise in a warm place until doubled in volume, about 1 hour. A warm, draft-free environment is essential for proper rising. You can place the bowl in a slightly warmed oven (turned off!) or near a radiator.
-
Punch down and roll: Once the dough has doubled, gently punch it down to release the air. Roll the dough into a rectangle shape, approximately 16×8 inches.
-
Prepare the herb mixture: In a saucepan, heat the minced onion, minced garlic, ½ teaspoon salt, minced parsley, and 2 tablespoons margarine (or butter) over low heat until the margarine is melted and the onions are softened. Do not brown the garlic.
-
Assemble the loaf: Spread the herb mixture evenly over the dough rectangle. Starting from the 16-inch side, roll the dough up tightly, like a jelly roll. Pinch the seam to seal.
-
Second rise: Place the bread seam side down onto a greased cookie sheet. Cover with plastic wrap or a clean kitchen towel and let rise until doubled in size, about 30 minutes.
-
Bake: Preheat oven to 400 degrees F (200 degrees C). Bake the bread until golden brown, about 20 to 30 minutes. The internal temperature should reach around 200°F (93°C). If the top is browning too quickly, tent it with foil.
-
Finish and serve: Brush the hot bread with melted margarine (or butter) and sprinkle with chopped parsley. Let cool slightly before slicing and serving.
Expert Tips & Tricks
- Yeast Activation: Ensure your yeast is fresh. If it doesn’t foam after adding to the warm milk mixture, it’s likely expired, and you’ll need to start with fresh yeast.
- Kneading Technique: Proper kneading is vital for gluten development. Use the heel of your hand to push the dough away from you, then fold it over and turn. Repeat this process for about 8-10 minutes.
- Warm Rise: A consistently warm environment is key for a good rise. In colder months, try placing the dough on top of a preheating oven (be sure it’s not too hot!).
- Herb Infusion: For a more intense herb flavor, infuse the milk with the herbs and garlic while heating. Remove the solids before adding the milk to the flour mixture.
- Doneness Test: Tap the bottom of the loaf. If it sounds hollow, it’s done.
Serving & Storage Suggestions
This French Herb Bread is best served warm, either on its own or as an accompaniment to soups, stews, or salads. It’s also delicious as part of a cheese board or charcuterie platter.
- Serving: Serve slices immediately after baking or slightly cooled.
- Storage: Store leftover bread in an airtight container at room temperature for up to 2 days.
- Refrigeration: For longer storage, wrap the bread tightly in plastic wrap and refrigerate for up to a week.
- Freezing: To freeze, wrap the bread tightly in plastic wrap and then in foil. It can be frozen for up to 2 months. Thaw completely before reheating.
- Reheating: To reheat, wrap the bread in foil and warm in a preheated oven at 350 degrees F (175 degrees C) for 10-15 minutes, or until heated through. You can also microwave slices for a few seconds, but this may affect the texture.
Nutritional Information
| Nutrient | Amount per Serving | % Daily Value |
|---|---|---|
| Calories | 211.2 kcal | N/A |
| Calories from Fat | 61 g | 29% |
| Total Fat | 6.9 g | 10% |
| Saturated Fat | 1.7 g | 8% |
| Cholesterol | 2.9 mg | 0% |
| Sodium | 369.1 mg | 15% |
| Total Carbohydrate | 32.1 g | 10% |
| Dietary Fiber | 1.4 g | 5% |
| Sugars | 2.5 g | N/A |
| Protein | 5 g | N/A |
Note: Nutritional information is an estimate and may vary based on specific ingredients and preparation methods.
Variations & Substitutions
- Gluten-Free: Substitute the all-purpose flour with a gluten-free blend. You may need to adjust the liquid content, as gluten-free flours tend to absorb more moisture.
- Vegan: Ensure your margarine is vegan-friendly. You can also substitute it with olive oil. For a richer flavor, use a high-quality olive oil.
- Herb Variations: Experiment with different herbs, such as rosemary, thyme, oregano, or basil. You can also add a pinch of red pepper flakes for a touch of heat.
- Cheese Addition: Sprinkle shredded Parmesan or Asiago cheese over the herb mixture before rolling up the dough for an extra layer of flavor.
- Garlic Lovers: Roast the garlic before mincing for a sweeter, less pungent flavor.
FAQs (Frequently Asked Questions)
Q: Why is my dough not rising?
A: Several factors can affect the rise of the dough, including the freshness of the yeast, the temperature of the milk mixture, and the warmth of the environment. Ensure your yeast is active, the milk mixture is not too hot, and the dough is placed in a warm, draft-free location.
Q: Can I make the dough ahead of time?
A: Yes, you can prepare the dough ahead of time. After the first rise, punch down the dough, wrap it tightly in plastic wrap, and refrigerate for up to 24 hours. Allow the dough to come to room temperature for about 30 minutes before rolling and assembling the loaf.
Q: What if I don’t have an electric mixer?
A: You can absolutely make this bread without an electric mixer. Simply mix the ingredients by hand, ensuring they are thoroughly combined. Kneading by hand will require a bit more effort, but it’s a rewarding process.
Q: How do I prevent the bottom of the bread from burning?
A: If the bottom of the bread is browning too quickly, place a baking sheet on the rack below it. This will help to deflect some of the heat.
Q: Can I use dried herbs instead of fresh?
A: Yes, you can use dried herbs. Use about 1 teaspoon of dried herbs for every tablespoon of fresh herbs. Keep in mind that dried herbs have a more concentrated flavor, so adjust accordingly.
Final Thoughts
I hope this recipe inspires you to create your own unforgettable loaf of French Herb Bread. Baking is an act of love, and this bread is a perfect way to share that love with family and friends. Don’t be afraid to experiment with different herbs and flavors to make it your own. And, most importantly, savor the process and enjoy the delicious results! Bon appétit!