
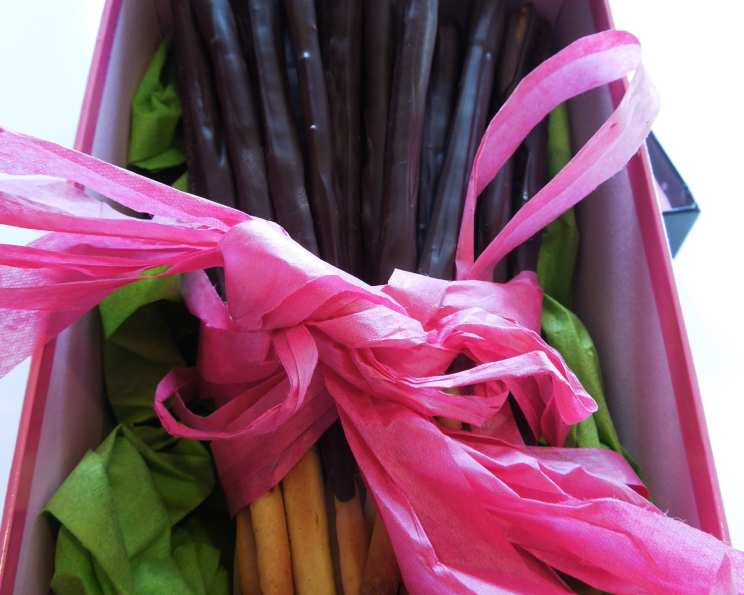
French Mikado Chocolate Biscuits: A Childhood Treat Reimagined
The aroma of warm biscuits and melted chocolate instantly transports me back to my childhood summers in France. I remember meticulously lining up these delicate chocolate-covered sticks on a makeshift cooling rack crafted from an old shoe box, my small hands sticky with melted chocolate. These weren’t just any biscuits; they were my homemade version of the iconic Mikado sticks, a symbol of simple joy and shared moments with my family. The slightly imperfect, rustic charm of our creations, compared to the store-bought variety, only made them taste even sweeter.
Recipe Overview
- Prep Time: 30 minutes
- Cook Time: 8-10 minutes
- Total Time: 2 hours 40 minutes (including cooling time)
- Servings: Varies (Yield depends on stick size, approximately 20-30)
- Dietary Type: Not specified, can be adapted (see Variations)
Ingredients
-
For the Biscuit Sticks:
- ¼ cup sweetened condensed milk
- 2 teaspoons water
- 150 g (approximately 1 ¼ cups) all-purpose flour
- 8 g (approximately 2 teaspoons) sugar
- 1 pinch baking powder
- 1 teaspoon salt
- 50 g (approximately ¼ cup) unsalted butter, softened
-
For the Chocolate Coating:
- Dark chocolate (quantity depends on desired thickness of coating; approximately 200g)
- Optional: Sprinkles, chopped nuts, or other toppings for decoration
Equipment Needed
- Large mixing bowl
- Small bowl
- Plastic wrap
- Rolling pin
- Baking sheet
- Microwave-safe bowl
- Pastry brush
- Makeshift stick holder (e.g., empty box with holes)
- Scissors (for making holes in the box)
Instructions
-
Prepare the Liquid Mixture: In a small bowl, combine the sweetened condensed milk and water. Whisk until well blended and set aside.
-
Combine Dry Ingredients: In a large mixing bowl, pour in the all-purpose flour, salt, sugar, and baking powder.
-
Incorporate the Butter: Add the softened unsalted butter to the flour mixture. Use your fingertips to rub the butter into the flour. This process should take around 5 minutes. Continue rubbing until the mixture resembles coarse cornmeal. This step is crucial for creating a tender, crumbly biscuit.
-
Form the Dough: Pour the sweetened condensed milk mixture into the flour and butter mixture. Blend well until the ingredients come together to form a cohesive dough “ball.” Avoid overmixing, as this can develop the gluten in the flour and result in tougher biscuits.
-
Chill the Dough: Transfer the dough onto a sheet of plastic wrap. Wrap it tightly and refrigerate for 20 minutes. It is essential not to exceed this chilling time significantly. Prolonged refrigeration can make the dough excessively hard, making it difficult to roll out.
-
Preheat the Oven: While the dough is chilling, preheat your oven to 200°C (392°F). Make sure the rack is placed in the center.
-
Shape the Biscuit Sticks: Remove the dough from the refrigerator. Divide the dough into small balls, approximately the size of walnuts.
-
Roll the Sticks: On a lightly floured surface, roll each ball into a stick that is approximately 20 cm (8 inches) long and about the thickness of a chopstick. Aim for uniform size and thickness for consistent baking. If you end up with varying sizes, bake them on separate baking sheets, as larger sticks will require a longer cooking time.
-
Arrange on Baking Sheet: Transfer the shaped biscuit sticks onto a baking sheet lined with parchment paper or a silicone baking mat. This prevents sticking and ensures even baking.
-
Bake the Sticks: Bake for 8-10 minutes at 200°C (392°F), or until the sticks are golden brown. Keep a close watch, as they can burn easily.
-
Cool Completely: Once baked, remove the baking sheet from the oven and let the biscuit sticks cool completely on the baking sheet. This is essential for achieving a crisp texture. Allow them to cool for at least 2 hours before covering them with chocolate. Ideally, letting them rest for 12 hours will allow the sticks to be completely dried before adding the chocolate.
-
Prepare the Stick Holder: While the biscuit sticks are cooling, prepare a stick holder to hold them upright while the chocolate sets. Take an empty box (such as a nappy box, shoe box, egg carton, or pizza box) and carefully drill or poke holes into it using scissors. Make sure the holes are large enough to accommodate the sticks without being too loose.
-
Melt the Chocolate: Melt the chocolate in a microwave-safe bowl in short intervals to avoid burning it. Heat for 30 seconds, then remove and stir well. Repeat this process until the chocolate is melted, shiny, and smooth. The ideal temperature is warm enough to dip a finger in without burning. The total melting time typically takes around 2 minutes, but it depends on your microwave.
-
Coat with Chocolate: Using a pastry brush, dip the brush into the melted chocolate and carefully cover approximately ¾ of each biscuit stick.
-
Remove Excess Chocolate: Hold the coated stick upside down for a few seconds to allow any excess chocolate to drip off. Gently twist the stick to ensure even coverage and prevent large drips.
-
Place in Stick Holder: Insert the chocolate-covered end of the stick into one of the holes in your prepared stick holder, allowing it to stand upright.
-
Repeat and Decorate: Repeat the coating process for each biscuit stick. At this stage, you can get creative and add sprinkles, chopped nuts, or other toppings to the chocolate before it sets.
-
Set the Chocolate: Leave the coated biscuit sticks in the stick holder at room temperature for approximately 3 hours, or until the chocolate is completely set. Avoid placing them in the refrigerator, as this can cause the dark chocolate to bloom, resulting in a white, chalky appearance.
Expert Tips & Tricks
- For a richer flavor, use high-quality dark chocolate with a cocoa content of at least 70%.
- If the dough becomes too sticky to handle, lightly dust your work surface with flour.
- To prevent the chocolate from burning in the microwave, add a teaspoon of coconut oil to the chocolate before melting. It also adds more flavor.
- If you don’t have a pastry brush, you can dip the biscuit sticks directly into the melted chocolate, but be sure to remove any excess to avoid a thick coating.
- For a smoother chocolate finish, temper the chocolate properly before coating the biscuit sticks. This involves heating and cooling the chocolate to specific temperatures.
- For a fun twist, use different types of chocolate, such as milk chocolate, white chocolate, or flavored chocolate.
- If the chocolate starts to thicken while you are coating the sticks, gently reheat it in the microwave for a few seconds.
Serving & Storage Suggestions
Serve these delightful French Mikado Chocolate Biscuits as a snack, dessert, or alongside a cup of coffee or tea. They are best enjoyed at room temperature when the chocolate is firm and the biscuit is crisp.
Store leftover biscuit sticks in an airtight container at room temperature. They will stay fresh for up to 5 days. Avoid storing them in the refrigerator, as the chocolate can become dull and develop a white bloom. Freezing is not recommended, as it can affect the texture of the biscuit and the chocolate.
Nutritional Information
Note: The following is an estimate and can vary based on specific ingredients and serving size.
| Nutrient | Amount per Serving (approx. 3 sticks) | % Daily Value* |
|---|---|---|
| Calories | 250 kcal | 13% |
| Total Fat | 12g | 18% |
| Saturated Fat | 7g | 35% |
| Cholesterol | 15mg | 5% |
| Sodium | 250mg | 10% |
| Total Carbohydrate | 30g | 10% |
| Dietary Fiber | 1g | 4% |
| Sugars | 15g | N/A |
| Protein | 4g | 8% |
*Based on a 2,000-calorie diet.
Variations & Substitutions
- Gluten-Free: Use a gluten-free all-purpose flour blend in place of regular all-purpose flour. You may need to adjust the amount of liquid depending on the blend.
- Dairy-Free: Substitute the unsalted butter with a plant-based butter alternative. Ensure the chocolate used is also dairy-free.
- Different Flavors: Add a few drops of vanilla extract, almond extract, or orange zest to the dough for added flavor.
- Spiced Biscuits: Incorporate a pinch of cinnamon, nutmeg, or ginger into the dough for a warm, spiced twist.
- Nutty Coating: Dip the chocolate-covered sticks in chopped nuts, shredded coconut, or crushed pretzels before the chocolate sets.
FAQs (Frequently Asked Questions)
Q: Why is my dough too hard to roll out after chilling?
A: The dough may have been refrigerated for too long. The recipe specifies a 20-minute chilling time. If it’s too hard, let it sit at room temperature for a few minutes to soften slightly.
Q: Can I use milk chocolate instead of dark chocolate?
A: Yes, you can use milk chocolate, white chocolate, or any other type of chocolate you prefer. Keep in mind that milk chocolate will be sweeter than dark chocolate.
Q: How do I prevent the chocolate from blooming (turning white)?
A: Avoid refrigerating the chocolate-covered sticks. Store them at room temperature in an airtight container.
Q: Can I make the dough ahead of time?
A: Yes, you can prepare the dough a day in advance and store it in the refrigerator. Be sure to let it sit at room temperature for a few minutes before rolling it out.
Q: My chocolate is too thick. What can I do?
A: Add a teaspoon of vegetable oil or coconut oil to the melted chocolate and stir well. This will thin it out slightly and make it easier to work with.
Final Thoughts
Now it’s your turn to create your own memories with these French Mikado Chocolate Biscuits! This recipe is simple enough for beginner bakers, yet rewarding enough for seasoned chefs. Don’t be afraid to get creative with your decorations and share your creations with loved ones. And I would love to know how they turned out, so feel free to leave comments with your experience!