
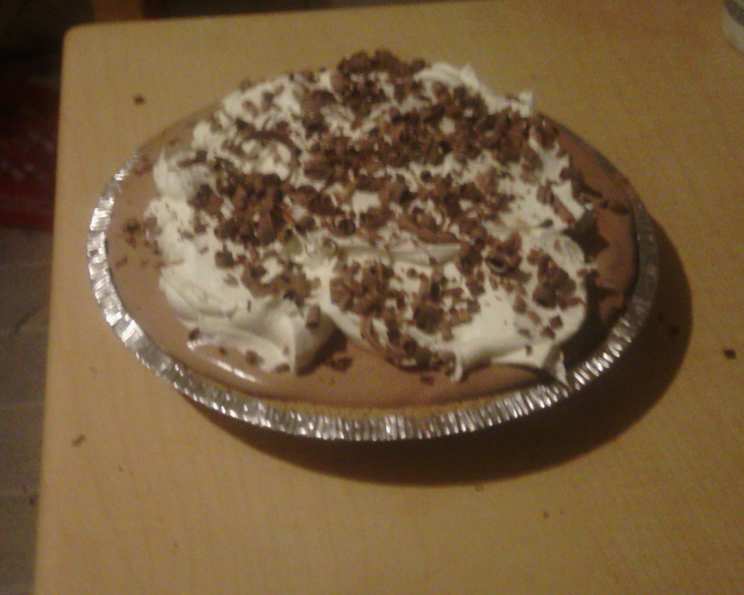
The Decadent Dream: Mastering French Silk Pie
My earliest memories of holidays aren’t filled with tinsel and carols, but rather the intoxicating aroma of chocolate wafting from the kitchen. Aunt Millie, a woman whose hugs smelled of vanilla and whose smile could melt glaciers, always arrived with her signature French Silk Pie. That first bite—the airy, velvety filling, the crisp, buttery crust, the delicate chocolate shavings—was pure magic. It wasn’t just dessert; it was a symbol of love, family, and the sweet joy of togetherness. Years later, I’ve finally perfected my own version, and I’m thrilled to share this cherished recipe with you.
Recipe Overview
- Prep Time: 20 minutes
- Cook Time: 12-15 minutes
- Total Time: 2 hours 35 minutes (includes chilling)
- Servings: 8
- Yield: 1 pie
- Dietary Type: Not Gluten-Free
Ingredients
- 1 (9-inch) pie crust, unbaked
- ½ cup (1 stick) butter, softened
- ¾ cup sugar
- 2 ounces unsweetened chocolate (baker’s chocolate), melted and cooled
- 2 large eggs
- 9 ounces Cool Whip (extra creamy), divided
- Sweet chocolate bar, for shaving
Equipment Needed
- 9-inch pie dish
- Mixer (stand or hand-held)
- Double boiler or microwave-safe bowl
- Rubber spatula
- Potato peeler or microplane
Instructions
- Preheat your oven to 425°F (220°C).
- Place the pie crust in the pie dish. If you’re using a pre-made crust, ensure it’s properly seated.
- Bake the pie shell at 425°F (220°C) for 12-15 minutes, or until golden brown. Watch it carefully to prevent burning. If the crust starts to puff up during baking, gently prick it with a fork.
- Remove the baked pie shell from the oven and let it cool completely on a wire rack. This is crucial for the filling to set properly.
- While the crust is cooling, prepare the filling. In a large mixing bowl, cream together the softened butter and sugar until light and fluffy. This step is important to incorporate air and create a smooth texture.
- In a double boiler or microwave-safe bowl, melt the unsweetened chocolate. Be careful not to overheat it, or it can seize up. If using a microwave, melt in 30-second intervals, stirring in between, until smooth.
- Allow the melted chocolate to cool slightly. Then, gradually stir it into the creamed butter and sugar mixture. Mix until well combined.
- Now comes the key step for that silky texture: Add one egg to the mixture and beat at high speed for a full 5 minutes. Set a timer; it’s crucial for aeration.
- Add the second egg and beat at high speed for another 5 minutes. Again, don’t skimp on the beating time. This is what creates the light and airy texture that is characteristic of French Silk Pie.
- Gently fold in half of the Cool Whip into the chocolate mixture. Be careful not to overmix; you want to maintain the airiness.
- Pour the filling into the cooled pie shell, spreading it evenly.
- Top the pie with the remaining Cool Whip, creating swirls or a decorative pattern as desired.
- Using a potato peeler or microplane, shave curls of the sweet chocolate bar over the top of the Cool Whip. The chocolate shavings add a touch of elegance and enhance the chocolate flavor.
- Chill the pie in the refrigerator for at least 2 hours before serving. This allows the filling to set completely and the flavors to meld together.
Expert Tips & Tricks
- Perfect Crust: For a truly exceptional pie, consider making your own pie crust from scratch. Use cold butter and ice water for a flaky texture. Blind baking with pie weights can prevent the crust from shrinking or bubbling.
- Chocolate Tempering: If you want your chocolate shavings to have a glossy shine and a crisp snap, consider tempering the chocolate before shaving. This involves carefully heating and cooling the chocolate to stabilize the cocoa butter crystals.
- Egg Safety: Because this recipe uses raw eggs, it’s important to use pasteurized eggs if you have concerns about salmonella. Look for “pasteurized” on the egg carton.
- Room Temperature Butter: Ensure the butter is properly softened before creaming it with the sugar. It should be soft enough to easily blend, but not melted.
- Cool Whip Alternative: While Cool Whip is traditional, you can use stabilized whipped cream made from heavy cream and a bit of sugar. For stabilization, consider adding a touch of gelatin or cream cheese.
- Preventing a Soggy Crust: To prevent the crust from becoming soggy, you can brush the bottom of the cooled pie shell with melted chocolate before adding the filling.
Serving & Storage Suggestions
Serve the French Silk Pie chilled, directly from the refrigerator. A dusting of cocoa powder or a few fresh berries can add an extra touch of elegance. Leftover pie should be stored in the refrigerator, covered tightly with plastic wrap or in an airtight container. It will keep for up to 3 days. While freezing is not recommended due to the Cool Whip, it can be done; however, the texture may change upon thawing. Do not leave the pie at room temperature for more than 2 hours due to the dairy content.
Nutritional Information
| Nutrient | Amount per Serving | % Daily Value |
|---|---|---|
| Calories | 442.8 kcal | N/A |
| Calories from Fat | 287 g | 65% |
| Total Fat | 31.9 g | 49% |
| Saturated Fat | 18.8 g | 93% |
| Cholesterol | 77 mg | 25% |
| Sodium | 245.8 mg | 10% |
| Total Carbohydrate | 38.6 g | 12% |
| Dietary Fiber | 2 g | 8% |
| Sugars | 26.2 g | 104% |
| Protein | 4.4 g | 8% |
Note: Nutritional information is an estimate and can vary based on specific ingredients and preparation methods.
Variations & Substitutions
- Gluten-Free: Use a gluten-free pie crust. There are many commercially available options, or you can make your own using a blend of gluten-free flours.
- Dairy-Free: While Cool Whip is technically non-dairy, many contain trace amounts of dairy. For a truly dairy-free version, use a coconut whipped cream alternative. Be sure to chill the coconut cream can overnight and only use the solidified cream at the top of the can.
- Chocolate Intensity: Adjust the amount of unsweetened chocolate to your preference. For a richer, more intense flavor, use slightly more chocolate, but be mindful of the balance of sweetness.
- Extracts: Add a teaspoon of vanilla extract or a complementary extract like almond or peppermint to the filling for an extra layer of flavor.
- Crust Variations: Experiment with different pie crust flavors, such as chocolate or graham cracker crusts.
FAQs (Frequently Asked Questions)
Q: Why is it important to beat the eggs for 5 minutes each?
A: The extended beating time incorporates air into the egg mixture, creating the signature light and airy texture of French Silk Pie. It’s crucial for achieving the right consistency.
Q: Can I use a different type of chocolate?
A: While unsweetened chocolate is traditional, you can experiment with semi-sweet or bittersweet chocolate. However, adjust the amount of sugar accordingly to maintain the proper sweetness balance.
Q: Can I make this pie ahead of time?
A: Yes, French Silk Pie can be made a day or two in advance. Store it covered in the refrigerator until ready to serve. The flavors will meld together beautifully over time.
Q: What if my pie crust shrinks while baking?
A: To prevent the crust from shrinking, prick the bottom with a fork before baking and use pie weights or dried beans to weigh it down during the first half of the baking time.
Q: Why did my filling turn out grainy?
A: A grainy filling can occur if the butter and sugar are not creamed together properly or if the chocolate is not fully incorporated. Ensure the butter is softened and the ingredients are well combined.
Final Thoughts
There’s something undeniably comforting about a slice of French Silk Pie. It’s a dessert that evokes feelings of nostalgia, warmth, and pure indulgence. I hope this recipe brings you as much joy as it has brought my family over the years. Don’t be afraid to experiment with variations and make it your own. And most importantly, share it with the people you love. After all, the best desserts are those that are enjoyed together. So go ahead, indulge in a slice of chocolate heaven!