
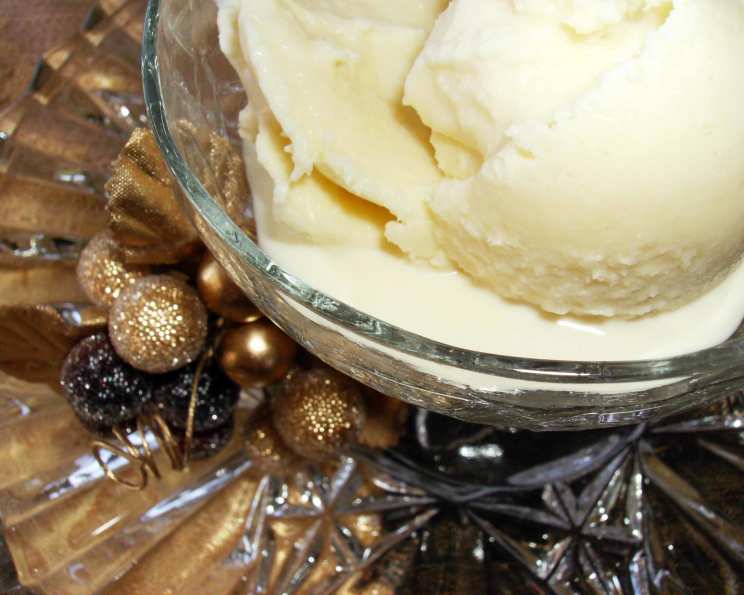
French Vanilla Ice Cream: A Taste of Pure Indulgence
The first time I tasted truly exceptional vanilla ice cream, I was a child visiting my grandmother in Louisiana. It wasn’t store-bought; it was churned by hand on her porch, the rhythmic whir of the old ice cream maker filling the humid air. The flavor was intoxicating – a symphony of creamy sweetness and pure vanilla that danced on my tongue, leaving an imprint of summer happiness that I’ve carried with me ever since. That memory, and the quest to recreate that perfect scoop, led me to this recipe – a French vanilla that is truly extraordinary.
Recipe Overview
- Prep Time: 15 minutes
- Cook Time: 10-15 minutes
- Chill Time: 8 hours
- Total Time: 8 hours 30 minutes
- Servings: 16
- Yield: Approximately 1/2 gallon (16 – 1/2 cup servings)
- Dietary Type: Not Gluten-Free, Contains Dairy, Contains Eggs
Ingredients
- 2 1/2 cups half-and-half cream
- 8 large egg yolks (Save the whites for angel food cake!)
- 1 cup granulated sugar
- 2 1/2 cups whipping cream (heavy cream)
- 4 teaspoons vanilla extract (Use a good quality vanilla for the best flavor!)
- 1/8 teaspoon salt
Equipment Needed
- Medium saucepan
- Whisk
- Mixer (stand mixer or hand mixer)
- Large glass bowl
- Plastic wrap
- Ice cream maker
Instructions
-
In a medium saucepan over medium heat, gently heat the half-and-half cream until it is very hot but not boiling, stirring frequently to prevent scorching. Watch closely; you want it steaming but not bubbling violently. Remove from heat and set aside.
-
In the bowl of your mixer, place the egg yolks and sugar. Using the whip attachment (or beaters if using a hand mixer), whip on speed 2 (low/medium speed) for about 30 seconds, or until the mixture is well blended and slightly thickened. It should lighten in color slightly.
-
Continue mixing on speed 2, and very gradually add the warm half-and-half cream to the egg yolk mixture, mixing until everything is thoroughly blended. Add it slowly to prevent the yolks from scrambling.
-
Return the mixture to the saucepan over medium heat. Stir constantly with a spatula or wooden spoon until small bubbles begin to form around the edge of the pan and the mixture is steamy. It’s important to stir continuously to prevent the eggs from cooking unevenly and creating lumps. DO NOT BOIL. You’re aiming for a custard consistency that coats the back of a spoon. This process typically takes 5-8 minutes. The mixture is ready when you can run your finger across the back of the spoon and the line remains clear.
-
Transfer the hot custard (the half-and-half/egg mixture) to a large glass bowl. Stir in the whipping cream, vanilla extract, and salt. The cold cream will help to cool down the custard base.
-
Cover the bowl tightly with plastic wrap, pressing the wrap directly onto the surface of the custard to prevent a skin from forming. Chill thoroughly in the refrigerator for at least 8 hours, or preferably overnight. This chilling period is crucial for developing the best flavor and texture.
-
Once the custard base is thoroughly chilled, pour it into your ice cream maker and process according to the manufacturer’s directions, or until you reach your desired consistency. With a KitchenAid freezer bowl attachment, this typically takes about 17 minutes to achieve a soft-set consistency.
-
Immediately transfer the ice cream to serving dishes for immediate enjoyment, or freeze it in an airtight freezer container for a firmer texture.
Expert Tips & Tricks
- Use high-quality vanilla extract: Since vanilla is the star of the show, splurge on a good quality vanilla extract. It makes a world of difference. You can even use a vanilla bean – scrape the seeds into the half-and-half when heating it, and then toss the pod in as well to infuse even more flavor. Remove the pod before adding the mixture to the egg yolks.
- Don’t skip the chilling step: Chilling the custard base allows the flavors to meld and the mixture to properly freeze. A longer chilling time is always better.
- Monitor the custard closely: Overcooking the custard will result in scrambled eggs! Keep the heat low and stir constantly.
- Temper the egg yolks: Slowly adding the warm half-and-half to the egg yolks while whisking constantly is crucial for tempering them and preventing them from cooking too quickly.
- Alcohol boost: A tablespoon of vodka or other clear alcohol added to the base before churning will help prevent ice crystals from forming and result in a smoother ice cream.
Serving & Storage Suggestions
Serve your French vanilla ice cream in a chilled bowl or cone. It’s delicious on its own, or as a complement to warm pies, cakes, or brownies. A sprinkle of cocoa powder, a drizzle of chocolate sauce, or a handful of fresh berries makes a wonderful topping.
Store leftover ice cream in an airtight container in the freezer. Homemade ice cream tends to develop ice crystals more quickly than store-bought varieties, so try to consume it within 1-2 weeks for the best quality. If your ice cream becomes too hard, let it soften at room temperature for a few minutes before scooping. Do not let it sit at room temperature for long periods, as this will affect the texture.
Nutritional Information
Here’s an approximate nutritional breakdown per serving (1/2 cup):
| Nutrient | Amount per Serving | % Daily Value |
|---|---|---|
| Calories | 253.5 kcal | N/A |
| Calories from Fat | 181 g | 72% |
| Total Fat | 20.1 g | 30% |
| Saturated Fat | 12 g | 60% |
| Cholesterol | 147.9 mg | 49% |
| Sodium | 51.7 mg | 2% |
| Total Carbohydrate | 15.6 g | 5% |
| Dietary Fiber | 0 g | 0% |
| Sugars | 12.8 g | N/A |
| Protein | 3.1 g | 6% |
Note: Nutritional information is an estimate and may vary based on specific ingredients and portion sizes.
Variations & Substitutions
- Vanilla Bean Ice Cream: As mentioned earlier, use a vanilla bean in addition to the extract for a richer flavor.
- Spiced Vanilla: Add a pinch of nutmeg or cinnamon to the custard base for a warm, spiced flavor.
- Coffee Vanilla: Infuse the half-and-half with coffee beans for a delicious coffee-flavored ice cream.
- Chocolate Chip Vanilla: Add mini chocolate chips during the last few minutes of churning.
- Strawberry Swirl: Swirl in strawberry jam or fresh strawberry puree after churning.
- Dairy-Free Variation: While it significantly changes the flavor profile, you could try substituting the half-and-half and heavy cream with full-fat coconut milk and the egg yolks with a plant-based egg replacer. Expect a different texture and flavor. This is not a recommended substitution for this specific recipe however.
FAQs (Frequently Asked Questions)
Q: Why do I need to chill the custard base for so long?
A: Chilling allows the flavors to meld together and the custard to thicken, which results in a smoother and creamier ice cream. It also ensures that the mixture is cold enough for proper freezing in the ice cream maker.
Q: Can I skip the egg yolks?
A: This recipe is for French vanilla ice cream, which is defined by the inclusion of egg yolks. They contribute to the richness and creamy texture. Omitting them will result in a different type of ice cream, closer to Philadelphia-style.
Q: My ice cream is icy, what did I do wrong?
A: Icy ice cream is often caused by slow freezing, inadequate chilling, or temperature fluctuations during storage. Make sure your ice cream maker bowl is fully frozen before churning, and store the finished ice cream in an airtight container in the coldest part of your freezer.
Q: Can I make this without an ice cream maker?
A: While an ice cream maker is ideal, you can try the “no-churn” method. Pour the chilled custard into a freezer-safe container and freeze for 30 minutes. Then, use a fork to break up any ice crystals. Repeat this process every 30 minutes for 2-3 hours, or until the ice cream reaches your desired consistency. It won’t be quite as smooth as ice cream churned in a machine, but it’s a good alternative.
Q: How long does homemade ice cream last in the freezer?
A: Homemade ice cream is best consumed within 1-2 weeks for optimal texture and flavor. After that, it may develop ice crystals.
Final Thoughts
Now it’s your turn to experience the joy of homemade French vanilla ice cream! Gather your ingredients, dust off your ice cream maker, and prepare to be transported to a realm of pure, creamy delight. Don’t be afraid to experiment with variations and toppings to create your own signature scoop. Share your creations with friends and family, and let the sweet taste of homemade ice cream bring a little bit of sunshine into their day. Enjoy!