
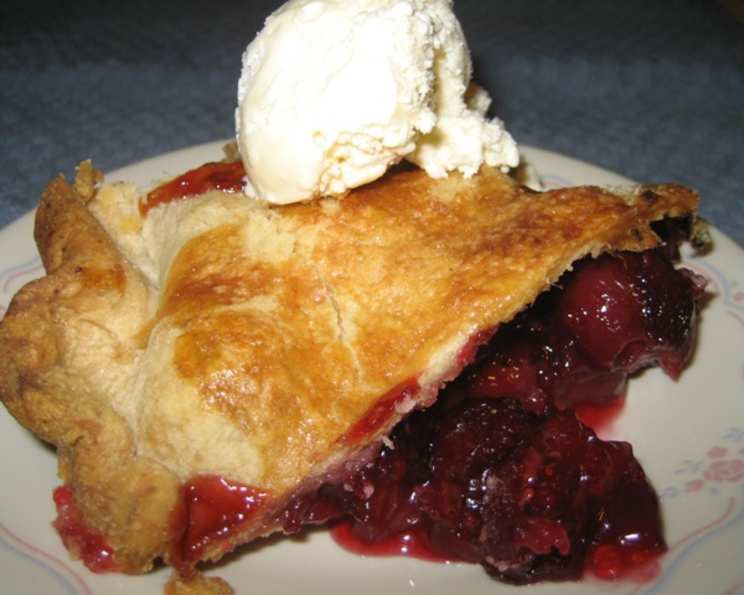
Fresh Cherry Pie: A Taste of Summer
My grandmother, bless her heart, always made the most incredible cherry pies. I remember standing on a stool in her sun-drenched kitchen, watching her deftly pit each ruby-red cherry, a splash of juice occasionally landing on my eager face. The air would be thick with the sweet, almost intoxicating aroma of baking cherries, a scent that instantly transports me back to those carefree summer days. That memory, that taste, is what I try to recreate every time I bake this pie.
Recipe Overview
- Prep Time: 30 minutes
- Cook Time: 50 minutes
- Total Time: 1 hour 20 minutes
- Servings: 8
- Yield: 1 9-inch pie
- Dietary Type: Vegetarian
Ingredients
- 1 pastry for a double-crust 9-inch pie
- 4 tablespoons quick-cooking tapioca
- 1/8 teaspoon salt
- 1 cup white sugar
- 4 cups pitted cherries
- 1/4 teaspoon almond extract
- 1/2 teaspoon vanilla extract
- 1 1/2 tablespoons butter
Equipment Needed
- 9-inch pie dish
- Large mixing bowl
- Rolling pin
- Cookie sheet
- Aluminum foil
Instructions
-
Begin by preheating your oven to 400 degrees F (200 degrees C). This initial high heat helps to set the crust quickly, preventing a soggy bottom.
-
Carefully place one rolled-out pastry crust in the bottom of your 9-inch pie plate. Gently press it into the edges, ensuring it fits snugly. Trim any excess pastry that overhangs significantly.
-
Roll out the second pastry crust. This will be your top crust, so set it aside for now. You can keep it chilled in the refrigerator until needed to prevent it from becoming too soft.
-
In a large mixing bowl, combine the following ingredients: 4 tablespoons of quick-cooking tapioca, 1/8 teaspoon of salt, 1 cup of white sugar, 4 cups of pitted cherries, 1/4 teaspoon of almond extract, and 1/2 teaspoon of vanilla extract.
-
Thoroughly mix the ingredients together until the cherries are evenly coated with the tapioca, sugar, salt, and extracts. The tapioca acts as a thickener, absorbing the juices released by the cherries during baking.
-
Let the cherry mixture stand for 15 minutes. This allows the tapioca to begin absorbing the cherry juices, which will help prevent a runny pie.
-
Turn the cherry mixture out into the pastry-lined pie plate. Spread the cherries evenly across the bottom crust.
-
Dot the top of the cherry filling with 1 1/2 tablespoons of butter, distributing the butter evenly over the cherries. This adds richness and flavor to the filling as it bakes.
-
Carefully cover the cherry filling with the rolled-out top crust. Trim any excess pastry around the edges of the pie plate.
-
Flute the edges of the top and bottom crusts together to seal the pie. This creates a decorative edge and helps to prevent the filling from leaking out during baking.
-
Cut several vents in the top crust using a sharp knife. These vents allow steam to escape during baking, which prevents the top crust from becoming soggy and helps the filling to thicken properly. You can make decorative slits or simple crosses, as you prefer.
-
Place the pie on a cookie sheet lined with aluminum foil. This is crucial, as cherry pies are notorious for bubbling over, and the foil will catch any drips, saving your oven from a sticky mess.
-
Bake the pie in the preheated oven for 50 minutes, or until the crust is golden brown and the filling is bubbling. Keep a close eye on the pie during the last 15-20 minutes of baking. If the crust starts to brown too quickly, you can tent it loosely with aluminum foil to prevent it from burning.
-
Once the pie is done, remove it from the oven and let it cool completely on a wire rack before slicing and serving. This allows the filling to set properly and prevents it from being too runny.
Expert Tips & Tricks
- For a flakier crust: Use very cold ingredients, including the butter and water. Cut the butter into small cubes and keep them chilled until ready to use. Avoid overmixing the dough, as this will develop the gluten and result in a tougher crust.
- Thickening the filling: If you prefer a thicker filling, you can increase the amount of quick-cooking tapioca to 5 tablespoons. However, be careful not to add too much, as it can give the filling a slightly gummy texture. Cornstarch can also be used as a substitute, but the texture won’t be quite the same.
- Preventing a soggy bottom crust: Blind bake the bottom crust for 10-15 minutes before adding the filling. To do this, line the crust with parchment paper and fill it with pie weights or dried beans. This will prevent the crust from puffing up and becoming soggy during baking.
- Enhancing the flavor: A pinch of cinnamon or a few drops of lemon juice can add depth and complexity to the cherry filling.
Serving & Storage Suggestions
Serve your fresh cherry pie slightly warm or at room temperature. A scoop of vanilla ice cream or a dollop of freshly whipped cream makes the perfect accompaniment.
Leftover cherry pie can be stored at room temperature for up to 2 days, or in the refrigerator for up to 4 days. To store, cover the pie loosely with plastic wrap or foil.
To reheat, warm individual slices in the microwave for 20-30 seconds, or bake the entire pie in a preheated oven at 350 degrees F (175 degrees C) for 10-15 minutes.
For longer storage, you can freeze the baked pie for up to 2-3 months. Wrap it tightly in plastic wrap and then foil. Thaw it overnight in the refrigerator before reheating.
Nutritional Information
| Nutrient | Amount per Serving | % Daily Value |
|---|---|---|
| Calories | 426 kcal | 21% |
| Total Fat | 22g | 34% |
| Saturated Fat | 14g | 70% |
| Cholesterol | 20mg | 7% |
| Sodium | 180mg | 8% |
| Total Carbohydrate | 55g | 18% |
| Dietary Fiber | 2g | 8% |
| Sugars | 35g | – |
| Protein | 4g | 8% |
Note: Nutritional information is an estimate and may vary based on specific ingredients and portion sizes.
Variations & Substitutions
- Gluten-Free Crust: Use a store-bought or homemade gluten-free pie crust for a gluten-free version.
- Different Fruit: Substitute other fruits for the cherries, such as peaches, blueberries, or apples. Adjust the amount of sugar as needed, depending on the sweetness of the fruit.
- Lattice Top: Instead of a full top crust, create a lattice top by weaving strips of pastry over the filling. This adds a decorative touch and allows more steam to escape.
- Vegan Cherry Pie: Use a vegan pie crust recipe (many store-bought options are vegan) and substitute the butter in the filling with vegan butter or coconut oil.
FAQs (Frequently Asked Questions)
Q: Why is my cherry pie filling runny?
A: This can be due to not using enough thickener (like tapioca) or not letting the pie cool completely before slicing.
Q: Can I use frozen cherries?
A: Yes, but be sure to thaw them completely and drain off any excess liquid before using them in the filling. You might also need to increase the amount of tapioca slightly.
Q: How do I prevent the crust from burning?
A: Tent the pie loosely with aluminum foil during the last 15-20 minutes of baking to protect the crust from browning too quickly.
Q: Can I make the pie crust ahead of time?
A: Absolutely! In fact, it’s often recommended. You can make the pie crust dough up to 2 days in advance and store it in the refrigerator, or freeze it for up to 2 months.
Q: What kind of cherries are best for pie?
A: Tart cherries, such as Montmorency, are traditionally used in cherry pie. They provide a balance of sweetness and tartness that is perfect for baking. However, you can also use sweet cherries, such as Bing, but you may need to reduce the amount of sugar in the filling.
Final Thoughts
This fresh cherry pie is more than just a dessert; it’s a slice of summer, a taste of nostalgia, and a celebration of simple pleasures. I encourage you to give this recipe a try and create your own cherished memories around it. Don’t be afraid to experiment with variations and substitutions to make it your own. And most importantly, share it with the people you love. After all, the best things in life are meant to be shared, especially a delicious cherry pie!