
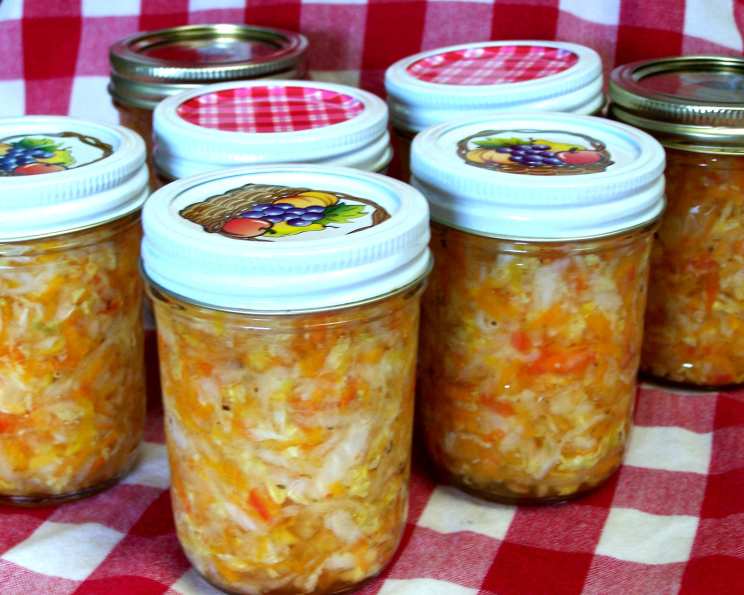
Fresh Garden Relish: A Celebration of Summer’s Bounty
The scent of garden relish instantly transports me back to my grandmother’s kitchen. Every summer, as the garden overflowed with vibrant vegetables, she’d gather us grandkids for a chopping extravaganza. Mountains of cabbage, carrots, onions, and peppers would transform into a sweet and tangy condiment, a taste of sunshine bottled and preserved for the colder months. It wasn’t just about the food; it was about family, tradition, and the pure joy of working together.
Recipe Overview
- Prep Time: 30 minutes
- Cook Time: Varies (see instructions)
- Total Time: 2 hours 30 minutes (includes resting time)
- Yields: 6 pints
- Dietary Type: Vegan (naturally)
Ingredients
- 2 medium cabbages
- 8 large carrots
- 12 large onions
- 8 green peppers or 8 red peppers
- 1 cup salt
- 2 pints vinegar (5% acidity)
- 6 cups sugar
- 1 teaspoon celery seed
- 1 teaspoon mustard seeds
Equipment Needed
- Food chopper or grater
- Large bowls
- Colander
- Large pot or stockpot
- Sterilized canning jars and lids
- Canning funnel (optional)
Instructions
-
Prepare the Vegetables: Thoroughly wash all the vegetables. Core the cabbages, peel the carrots, and peel the onions. Remove the seeds and membranes from the peppers.
-
Grind or Grate: Using a food chopper, coarsely grind the cabbages, carrots, onions, and peppers. Alternatively, you can use a grater for a finer texture. The vegetables should be uniformly chopped to ensure even flavor distribution.
-
Salt and Rest: Place the ground vegetables in a large bowl and thoroughly mix in the salt. This step is crucial for drawing out excess moisture and helping to preserve the relish. Let the mixture stand for 2 hours at room temperature.
-
Drain: After 2 hours, transfer the vegetable mixture to a colander. Allow it to drain for at least 30 minutes, pressing down gently to remove as much liquid as possible. This step prevents the relish from becoming watery. If the mixture tastes excessively salty after draining, you can briefly rinse it under cold water. Be sure to drain it well again.
-
Combine Ingredients: In a large pot or stockpot, combine the drained vegetable mixture, vinegar, sugar, celery seed, and mustard seeds. Stir well to ensure the sugar is dissolved and the spices are evenly distributed.
-
Heat and Jar: Bring the mixture to a simmer over medium heat, stirring occasionally to prevent sticking. The cooking time will vary depending on the desired consistency. Some prefer a very crisp relish, while others prefer it cooked down slightly.
- For No-Cook Relish: Simply stir to dissolve ingredients thoroughly, then proceed to jarring. This will result in a crisper texture, but may require refrigeration after opening.
- For Cooked Relish: Simmer for 15-20 minutes, stirring occasionally, until the vegetables soften slightly and the flavors meld.
-
Jarring (Canning): Carefully ladle the hot relish into sterilized canning jars, leaving 1/2 inch of headspace. Wipe the jar rims clean with a damp cloth. Place the lids on the jars and screw on the bands finger-tight.
-
Processing (Optional): For long-term storage, process the filled jars in a boiling water bath canner for 10 minutes. This step creates a vacuum seal and helps prevent spoilage. If you prefer to skip this step, the relish must be stored in the refrigerator and consumed within a few weeks.
- No Water Bath Processing: If you choose not to water bath process, allow jars to cool completely and check for proper seal. Store opened jars in the refrigerator.
- Water Bath Processing: Place jars in boiling water bath and process for specified time according to altitude.
-
Cool and Store: Remove the jars from the canner and let them cool completely on a towel-lined surface. As the jars cool, you should hear a “pop” sound, indicating that a vacuum seal has formed. Check the seals by pressing down on the center of each lid. If the lid doesn’t flex, the jar is sealed properly. Store sealed jars in a cool, dark place for up to a year. Unsealed jars should be refrigerated and consumed within a few weeks.
Expert Tips & Tricks
- Spice it Up: For a spicier relish, add finely minced jalapeños or a pinch of red pepper flakes to the mixture. Start with a small amount and adjust to your preference.
- Sweetness Adjustment: The amount of sugar can be adjusted to your taste. If you prefer a less sweet relish, start with 4 cups of sugar and add more as needed. Consider using a natural sweetener like honey or maple syrup, but be aware that this may affect the flavor and shelf life.
- Vegetable Variations: Feel free to experiment with different vegetables. Grated summer squash, green tomatoes, or even corn can be added to the mix.
- Prevent Discoloration: To prevent the relish from darkening during cooking, add a tablespoon of lemon juice or citric acid to the pot.
- Sterilizing Jars: Sterilize jars by boiling them in water for 10 minutes, or by running them through a hot cycle in the dishwasher.
Serving & Storage Suggestions
Fresh garden relish is a versatile condiment that can be enjoyed in many ways. Serve it as a topping for grilled meats, hot dogs, or hamburgers. Use it as a filling for sandwiches or wraps. Add it to potato salad or coleslaw for a burst of flavor.
Store unopened jars of relish in a cool, dark place for up to a year. Once opened, refrigerate and consume within a few weeks. Properly canned and sealed relish can last for several months in the pantry.
Nutritional Information
Note: Nutritional information is an estimate and may vary based on specific ingredients and portion sizes.
| Nutrient | Amount per Serving | % Daily Value |
|---|---|---|
| Calories | ~400 kcal | ~20% |
| Total Fat | ~1g | ~2% |
| Saturated Fat | ~0g | ~0% |
| Cholesterol | 0mg | 0% |
| Sodium | ~3000mg | ~125% |
| Total Carbohydrate | ~100g | ~33% |
| Dietary Fiber | ~5g | ~20% |
| Sugars | ~80g | ~160% |
| Protein | ~2g | ~4% |
Variations & Substitutions
- Spicy Garden Relish: Add diced jalapeños or a pinch of red pepper flakes.
- Sweet & Sour Relish: Use brown sugar instead of white sugar and add a splash of rice vinegar.
- No-Sugar Added Relish: Substitute the sugar with a sugar alternative like Stevia or Monk Fruit, adjusting to taste. Note that this will affect the texture and shelf life, so refrigeration is crucial.
- Vinegar Variety: Experiment with different vinegars, like apple cider vinegar or white wine vinegar, for nuanced flavor profiles.
FAQs (Frequently Asked Questions)
Q: Do I have to use a food chopper?
A: No, you can also use a grater or even finely chop the vegetables by hand, though a food chopper will save time and ensure more uniform results.
Q: Can I reduce the amount of salt?
A: While salt is crucial for drawing out moisture and preserving the relish, you can reduce it slightly. However, be aware that this may affect the texture and shelf life, so be sure to refrigerate the relish and consume it within a few weeks.
Q: How do I know if the jars are properly sealed?
A: After processing and cooling, the lid should be slightly concave and not flex when pressed down in the center. If a jar doesn’t seal, refrigerate it immediately and use the relish within a few weeks.
Q: Can I use different types of peppers?
A: Absolutely! Feel free to experiment with different colored bell peppers, or even add some hot peppers for a spicy kick.
Q: Is water bath canning necessary?
A: Water bath canning is recommended for long-term storage. If you skip this step, the relish must be refrigerated and consumed within a few weeks.
Final Thoughts
Fresh garden relish is more than just a condiment; it’s a taste of summer, a celebration of fresh ingredients, and a way to preserve the bounty of the garden. Don’t be afraid to experiment with different vegetables and spices to create your own unique version. Whether you’re topping a grilled burger or adding a spoonful to your favorite salad, this relish is sure to brighten up any meal. I encourage you to try this recipe and share your creations with friends and family. Your feedback is greatly appreciated.