
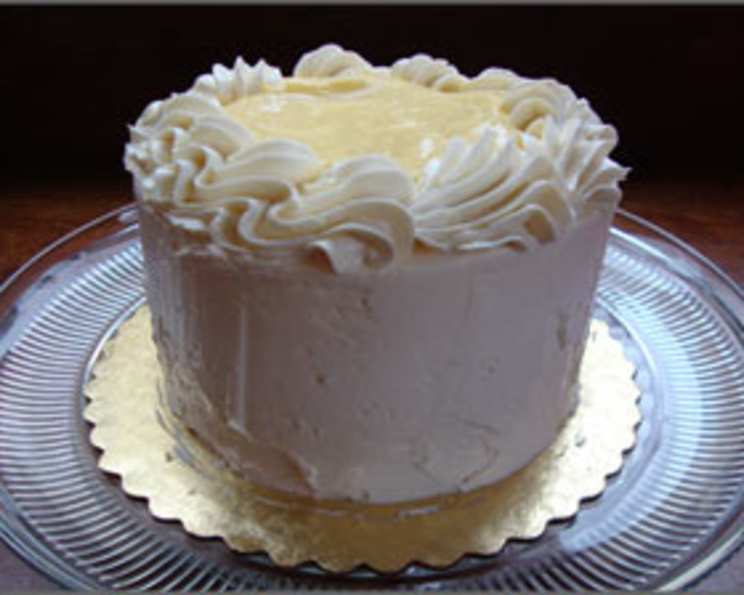
Fresh Lemon Chiffon Cake: A Burst of Sunshine in Every Slice
The aroma of lemon has always transported me back to my grandmother’s sun-drenched kitchen. She had a lemon tree that seemingly produced an endless supply of golden orbs. We would spend afternoons zesting lemons together, the fragrant oils clinging to our fingers, as she told me stories of her childhood. Her lemon chiffon cake, light as air and bursting with citrusy flavor, was a family favorite, a taste of pure sunshine. This recipe is my humble attempt to recreate that magic, bringing a touch of her joy to your kitchen.
Recipe Overview
- Prep Time: 30 minutes
- Cook Time: 20 minutes
- Total Time: 1 hour 10 minutes
- Servings: 12
- Yield: One 3-layer cake
- Dietary Type: Not specified
Ingredients
- Cooking spray
- 1 tablespoon cake flour
- 2 cups sifted cake flour (7 1/2 oz)
- 1 1/4 cups sugar, divided
- 2 1/2 teaspoons baking powder
- 1/2 teaspoon salt
- 7 tablespoons canola oil
- 1/3 cup fresh lemon juice (about three lemons)
- 1 teaspoon lemon extract
- 3 tablespoons water
- 1 teaspoon finely grated lemon rind
- 3 egg yolks
- 8 egg whites
- 1 teaspoon cream of tartar
- Lemon curd (use for filling)
- Frosting (Your preference, I use homemade buttercream with grated lemon rind)
- Fresh mint sprig, for garnish (optional)
- Fresh lemon wedge, for garnish (optional)
- Fresh blueberries, for garnish (optional)
Equipment Needed
- 3 (8-inch) round cake pans
- Measuring cups and spoons
- Mixing bowls
- Whisk
- Electric mixer
- Wax paper
- Wire rack
- Knife
Instructions
- Have your frosting ready at your preferred temperature for frosting. This step is crucial, as you’ll want to frost the cake as soon as it’s cooled.
- Preheat your oven to 320°F (160°C). Accurate oven temperature is key for a chiffon cake’s delicate rise.
- Prepare the cake pans: Generously coat the bottoms of three 8-inch round cake pans with cooking spray. Important: Do not grease the sides of the pans. This allows the cake to grip the sides and rise properly.
- Place circles of wax paper on the bottom of each pan, and then spray the wax paper with cooking spray. This ensures easy removal of the cakes later.
- Dust the wax paper bottom of all three pans with 1 tablespoon of cake flour, distributing it evenly. This prevents sticking.
- Sift 2 cups of cake flour into a dry measuring cup, then lightly spoon it into the cup. Level it off with a knife. This ensures you’re not packing the flour, which can result in a dense cake. You should have 7 1/2 oz of sifted cake flour.
- In a large bowl, combine the 2 cups of cake flour, 1 cup of sugar, 2 1/2 teaspoons of baking powder, and 1/2 teaspoon of salt. Whisk these dry ingredients together until thoroughly combined. This distributes the baking powder and salt evenly throughout the flour.
- In a medium bowl, combine 7 tablespoons of canola oil, 1/3 cup of fresh lemon juice, 3 tablespoons of water, 1 teaspoon of lemon rind, 1 teaspoon of lemon extract, and 3 egg yolks. Whisk this wet mixture together until well combined and slightly emulsified.
- Add the wet ingredients to the dry ingredients. Using an electric mixer at medium speed, beat until smooth. Be careful not to overmix at this stage, as it can develop the gluten in the flour and make the cake tough.
- In a separate large bowl, place the 8 egg whites. Using an electric mixer at high speed, beat until foamy.
- Add 1 teaspoon of cream of tartar to the egg whites and continue beating until soft peaks form. The cream of tartar helps stabilize the egg whites and create a more voluminous meringue.
- Gradually add the remaining 1/4 cup of sugar, 1 tablespoon at a time, beating until stiff peaks form. The meringue should be glossy and hold its shape when you lift the beaters.
- Gently stir one-fourth of the egg white mixture into the flour mixture. This lightens the batter and makes it easier to fold in the remaining meringue.
- Gently fold in the remaining egg white mixture. It’s crucial to fold gently, not stir, to avoid deflating the meringue. Use a spatula and cut down through the center of the batter, scrape along the bottom of the bowl, and fold the batter over the top. Repeat until just combined.
- Divide the cake batter equally among the prepared pans, spreading it evenly.
- Break any air pockets by cutting through the batter with a knife in each pan. This helps prevent large holes from forming in the baked cake.
- Bake at 320°F (160°C) for 20 minutes, or until the cake springs back when lightly touched. Baking times may vary slightly depending on your oven.
- Cool the cakes in the pans for 10 minutes on a wire rack. This allows them to cool slightly and contract, making them easier to remove from the pans.
- Remove the cakes from the pans and carefully remove the wax paper.
- Cool the cake layers completely on wire racks. Make sure the cake layers are completely cooled prior to frosting.
- To assemble the cake, place one cake layer on a plate or cake stand.
- Spread half of the lemon curd filling over the cake layer.
- Top with the second cake layer, spread the remaining half of the filling, and then top with the third layer.
- Spread your preferred frosting over the top and sides of the cake. I recommend a homemade buttercream frosting with grated lemon rind for an extra burst of flavor.
- Garnish with fresh mint sprigs, blueberries, and lemon wedges, if desired. These add a pop of color and freshness to the cake.
- Store the cake loosely covered in the refrigerator for up to three days.
- Slice into cake wedges and serve.
Expert Tips & Tricks
- Room Temperature Eggs: For best volume in your meringue, use egg whites that are at room temperature.
- Sifting is Key: Sifting the cake flour is crucial for a light and airy texture. Don’t skip this step!
- Gentle Folding: The key to a light and airy chiffon cake is gently folding in the meringue. Overmixing will deflate the air and result in a dense cake.
- Pan Prep Matters: Do not grease the sides of the cake pans. The cake needs to grip the sides to rise properly.
- Lemon Zest Power: Don’t be afraid to add more lemon zest to the batter or frosting for an even more intense lemon flavor.
Serving & Storage Suggestions
Serve this Fresh Lemon Chiffon Cake chilled or at room temperature. Garnish each slice with a sprig of fresh mint, a few blueberries, and a thin lemon wedge for an elegant presentation. This cake is best enjoyed within 2-3 days of baking.
Store leftovers loosely covered in the refrigerator for up to three days. The cake can also be frozen for longer storage. Wrap individual slices tightly in plastic wrap and then place them in a freezer-safe container. Thaw in the refrigerator before serving. The cake will maintain optimal quality for up to 2 months in the freezer.
Nutritional Information
| Nutrient | Amount per Serving | % Daily Value |
|---|---|---|
| Calories | 265.3 kcal | N/A |
| Calories from Fat | 84 kcal | N/A |
| Total Fat | 9.4 g | 14% |
| Saturated Fat | 1 g | 5% |
| Cholesterol | 41.5 mg | 13% |
| Sodium | 211.9 mg | 8% |
| Total Carbohydrate | 40.4 g | 13% |
| Dietary Fiber | 0.4 g | 1% |
| Sugars | 21.2 g | N/A |
| Protein | 5 g | 9% |
Note: Nutritional information is an estimate and may vary based on specific ingredients and portion sizes.
Variations & Substitutions
- Gluten-Free: Substitute the cake flour with a gluten-free all-purpose flour blend. You may also need to add a binder like xanthan gum to improve the texture.
- Lime Chiffon Cake: Replace the lemon juice and zest with lime juice and zest for a refreshing twist.
- Orange Chiffon Cake: Substitute orange juice and zest for the lemon for a sweeter, more mellow flavor.
- Berry Chiffon Cake: Fold fresh raspberries, blueberries, or strawberries into the batter before baking for added flavor and visual appeal.
- Vegan Chiffon Cake: This recipe is difficult to convert to vegan. It would require significant modifications to replace the eggs with a vegan egg replacer and other vegan ingredients.
FAQs (Frequently Asked Questions)
Q: Why didn’t my cake rise properly?
A: Make sure you didn’t grease the sides of the cake pans. The batter needs to grip the sides to rise. Also, be careful not to overmix the batter after adding the meringue.
Q: Can I use regular all-purpose flour instead of cake flour?
A: Cake flour has a lower protein content than all-purpose flour, which results in a more tender crumb. If you must substitute, use all-purpose flour but reduce the amount by 2 tablespoons per cup.
Q: My cake is too sweet. Can I reduce the sugar?
A: You can reduce the sugar slightly, but keep in mind that sugar contributes to the cake’s structure and moisture. Reducing it too much may affect the texture.
Q: How do I prevent the cake from sticking to the pan?
A: Using wax paper circles and greasing the bottom of the pans thoroughly should prevent sticking. Make sure to cool the cake in the pans for 10 minutes before inverting.
Q: Can I make the cake layers ahead of time?
A: Yes, you can bake the cake layers a day or two in advance. Wrap them tightly in plastic wrap and store them at room temperature or in the refrigerator.
Final Thoughts
I hope this Fresh Lemon Chiffon Cake recipe brings a little sunshine into your kitchen. Baking this cake is more than just following steps; it’s about creating a moment of joy and sharing it with loved ones. Don’t be afraid to experiment with different flavors and garnishes to make it your own. And please, let me know how it turns out! I’d love to hear about your experience and any variations you try. Perhaps you could enjoy a slice with a cup of Earl Grey tea for a perfect afternoon treat.