
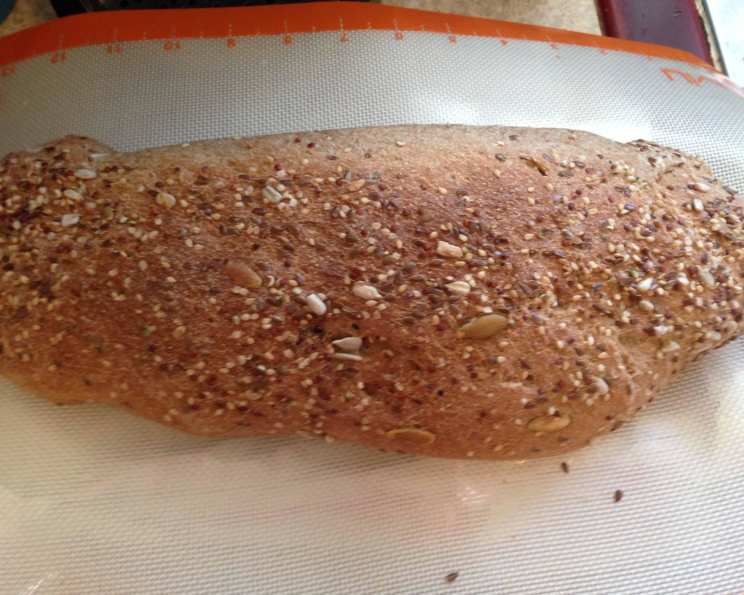
Fresh Milled Grain Whole Wheat Bread in Bread Machine
The aroma of freshly baked bread has always been a siren song to me, pulling me back to my grandmother’s kitchen. I remember standing on a stool, mesmerized as she coaxed life from simple ingredients. The earthy scent of whole wheat, the gentle hum of the bread machine, and the warmth radiating from the oven – those are the sensory details etched in my memory. While she used store-bought flour, this recipe, using freshly milled grains, elevates that comforting experience to a whole new level of flavor and satisfaction, a testament to patience and simple, wholesome ingredients.
Recipe Overview
- Prep Time: 30 minutes (including grinding and soaking)
- Cook Time: 25-30 minutes
- Total Time: 12 hours 30 minutes (including soaking time)
- Servings: 12
- Yield: 2 loaves
- Dietary Type: Vegetarian
Ingredients
- 600 g whole wheat flour (freshly milled)
- 4 tablespoons vital wheat gluten
- 2 tablespoons honey
- 1 1/2 tablespoons butter
- 2 teaspoons salt
- 16 ounces buttermilk
- 2 teaspoons yeast
Equipment Needed
- Grain mill (Vitamix or similar)
- Bread machine
- Kitchen scale
- Measuring spoons
- Measuring cups
- Two bread pans
- Clean kitchen towel
Instructions
-
Begin by grinding approximately 5 cups of hard red or hard white spring wheat. Aim for a yield slightly exceeding 600 grams of flour to account for any loss during milling.
-
Vitamix Tip: To prevent overheating during grinding, store the wheat berries in the freezer beforehand. Grind in small batches, about 1 cup at a time, and re-grind any larger pieces to achieve a fine consistency.
-
Using a kitchen scale, carefully weigh out 600 grams of the freshly milled whole wheat flour. Precise measurement by weight is crucial for consistent results, as the volume of flour can vary depending on the fineness of the grind.
-
In your bread machine pan, combine the buttermilk, honey, melted butter, salt, and vital wheat gluten. Add all but about 1 cup of the freshly milled whole wheat flour.
-
Start the bread machine on the dough cycle. Allow the ingredients to mix. You may need to gently assist the process by using a spatula to incorporate any dry flour and ensure all the whole wheat flour is thoroughly moistened. Do not overmix. The mixture will be quite gloppy, this is expected. Turn off the machine once the ingredients are mixed. This initial mixing step can also be done by hand if you prefer.
-
Set the bread machine timer for a delay of at least 8 hours, but ideally up to 24 hours, and select the dough cycle function. This extended soaking period is critical.
-
The long soaking time allows the whole wheat to develop its gluten structure and break down phytic acids. The use of buttermilk, with its inherent acidity (or a substitute of water and 2 teaspoons of apple cider vinegar), further enhances this process.
-
After the soaking period, pour the remaining 1 cup of whole wheat flour over the soaked dough in the bread machine pan. Create a small well or indentation in the flour.
-
Carefully pour the yeast into this well, ensuring it remains separate from the wet dough below. This prevents premature activation of the yeast. Alternatively, if your bread machine has a separate yeast dispenser, add the yeast to the dispenser without holding back any flour in the prior steps.
-
Allow the bread machine to complete the dough cycle.
-
When the bread machine signals the end of the dough cycle, the dough should have risen nicely, although perhaps not as high as dough made with all-purpose flour. Do not be concerned.
-
Prepare your work surface by thoroughly cleaning and lightly oiling it. Lightly oil your hands as well to prevent sticking.
-
Turn the dough out onto the prepared surface. Gently fold the dough over itself a few times to de-gas it slightly.
-
Divide the dough in half.
-
Shape each half into a rectangle. Tightly roll each rectangle up to form a loaf shape.
-
Place each rolled loaf into a greased bread pan.
-
Cover the pans with a clean kitchen towel and allow the loaves to rise for another hour. You can expedite this process by placing the pans in a warm, draft-free location. A slightly warmed oven (turned off) is ideal. Important: Before placing the bread into the oven to bake, remove the towel!
-
Bake in a preheated oven at 350°F (175°C) for 25-30 minutes, or until golden brown and the internal temperature reaches 200-210°F (93-99°C).
Expert Tips & Tricks
- For an enhanced flavor profile, consider using a blend of hard red and hard white spring wheat berries.
- If you don’t have buttermilk on hand, simply add 2 teaspoons of apple cider vinegar to your measuring cup and then fill to the 16-ounce line with water. Let sit for a few minutes before using.
- Monitor the dough’s consistency during the kneading phase. If it appears too dry, add a tablespoon of water at a time until it reaches a smooth, slightly sticky texture. If it seems too wet, add a tablespoon of flour at a time.
- The internal temperature of the baked bread is a more reliable indicator of doneness than the baking time alone. Use a digital thermometer for accuracy.
Serving & Storage Suggestions
Allow the freshly baked whole wheat bread to cool completely on a wire rack before slicing. Serve warm or at room temperature with butter, jam, or your favorite spreads. The bread is delicious on its own or as an accompaniment to soups, salads, and sandwiches.
Store the bread in an airtight container at room temperature for up to 3 days. For longer storage, wrap tightly in plastic wrap and freeze for up to 2 months. To reheat, thaw completely and warm in a low oven or toaster oven until heated through.
Nutritional Information
| Nutrient | Amount per Serving | % Daily Value |
|---|---|---|
| Calories | 210 kcal | 11% |
| Total Fat | 3.1g | 4% |
| Saturated Fat | 1.3g | 6% |
| Cholesterol | 5.3mg | 1% |
| Sodium | 441.7mg | 18% |
| Total Carbohydrate | 40.8g | 13% |
| Dietary Fiber | 5.5g | 22% |
| Sugars | 4.9g | 10% |
| Protein | 8.1g | 16% |
Note: Nutritional information is an estimate and may vary based on specific ingredients and portion sizes.
Variations & Substitutions
- Spelt Flour Variation: Substitute up to half of the whole wheat flour with spelt flour for a slightly sweeter, nuttier flavor.
- Dairy-Free: Replace the buttermilk with a plant-based alternative such as almond milk or oat milk mixed with 2 teaspoons of apple cider vinegar. Use a vegan butter substitute.
- Seed Enrichment: Add 1/4 cup of sunflower seeds, pumpkin seeds, or flax seeds to the dough for added texture and nutritional benefits.
- Sweet Bread: Add 1/4 cup of raisins, cranberries, or chopped dates to the dough for a sweeter treat.
- Herbaceous Bread: Incorporate 2 tablespoons of chopped fresh rosemary, thyme, or oregano into the dough for a savory flavor.
FAQs (Frequently Asked Questions)
Q: Why is the soaking time so long?
A: The extended soaking period allows the whole wheat flour to fully hydrate, developing its gluten structure and breaking down phytic acid, which inhibits nutrient absorption. This results in a more digestible and flavorful loaf.
Q: Can I skip the vital wheat gluten?
A: While you can omit it, vital wheat gluten significantly improves the bread’s structure and rise, especially when using freshly milled whole wheat flour, which is lower in gluten than commercial bread flour. The gluten provides the elasticity and strength needed for a good crumb.
Q: My bread machine doesn’t have a separate yeast dispenser. Is there another way to keep the yeast separate?
A: Yes, creating a small well in the flour and carefully pouring the yeast into it is an effective way to keep the yeast separate until the bread machine begins mixing.
Q: The bread is browning too quickly. What should I do?
A: If the bread is browning excessively before the inside is fully cooked, tent the loaf with aluminum foil during the last 10-15 minutes of baking.
Q: Can I make this recipe without a bread machine?
A: Yes, you can adapt this recipe for a stand mixer. Mix the dough according to the instructions, then let it rise in a warm place for 1-2 hours before shaping and baking as directed.
Final Thoughts
I encourage you to embrace the process of crafting this Fresh Milled Grain Whole Wheat Bread. The journey from milling your own grains to savoring a warm, wholesome slice is a rewarding experience that connects you to the fundamentals of baking. Don’t be afraid to experiment with variations and substitutions to create a bread that truly reflects your taste. Share your baking adventures with friends and family, and let the comforting aroma of freshly baked bread fill your home.