
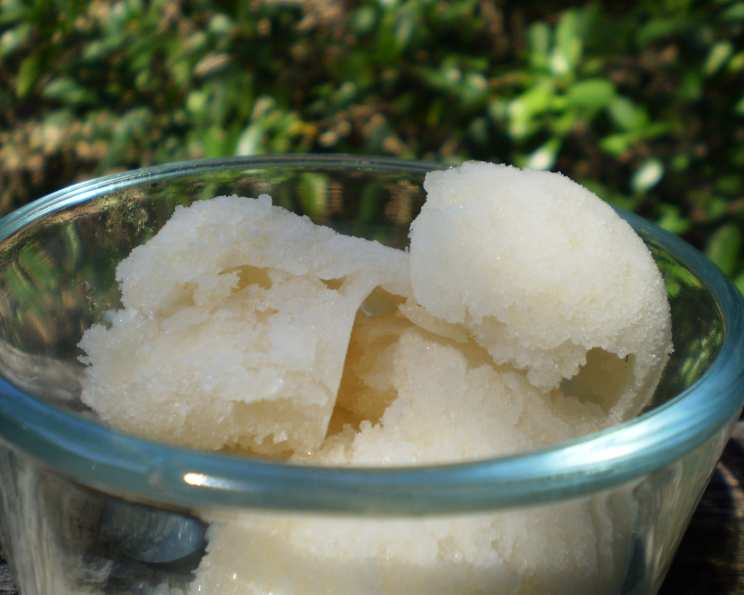
Fresh Pear Ice: A Symphony of Sweetness
Growing up, summers at my grandmother’s house always meant a freezer full of surprises. While the other grandkids clamored for the ice cream sandwiches and popsicles, I’d eagerly await the slightly mysterious, pale concoction she called “Pear Ice.” It wasn’t overly sweet, just subtly flavored with the comforting aroma of cinnamon and the bright tang of lemon. Each spoonful was a refreshing burst of pure, unadulterated pear, a taste of summer sunshine frozen in time. Now, years later, recreating this simple treat brings back a flood of those cherished memories, a testament to the power of food to transport us back to simpler, sweeter days.
Recipe Overview
- Prep Time: 20 minutes
- Cook Time: 20 minutes
- Total Time: 40 minutes (plus 6-8 hours freezing time)
- Servings: 6
- Yield: Approximately 4 cups
- Dietary Type: Vegan, Gluten-Free, Dairy-Free
Ingredients
- 1 cup granulated sugar
- 2 cups water
- ½ small lemon, zest cut into strips
- 1 inch cinnamon stick
- ½ teaspoon vanilla extract
- 5 medium fresh pears, peeled, cored, and chopped (about 5 cups)
- 2 tablespoons lemon juice
- Fresh mint sprigs, for garnish
Equipment Needed
- 2-quart saucepan
- Blender or food processor
- 9-inch square pan
- Electric mixer (optional)
- Freezer container
- Plastic wrap
Instructions
- In a 2-quart pan, combine the sugar, water, lemon zest strips, cinnamon stick, and vanilla extract.
- Bring the mixture to a boil over high heat, stirring constantly to help the sugar dissolve. Once the sugar is fully dissolved, continue boiling uncovered for 2 minutes. This step creates a simple syrup that will form the base of your pear ice.
- Add the chopped pears to the boiling syrup and bring the mixture back to a boil.
- Cover the pan, reduce the heat to low, and simmer until the pears are very tender, approximately 15 minutes. The pears should easily break apart when pressed with a spoon.
- Remove the pan from the heat. Carefully remove and discard the lemon zest strips and the cinnamon stick from the pear mixture. These have imparted their flavor and are no longer needed.
- Transfer the warm pear mixture to a blender or food processor. Add the lemon juice.
- Whirl the mixture until it is completely smooth. The consistency should be similar to a thick puree.
- Pour the pureed pear mixture into a 9-inch square pan.
- Freeze the mixture until the edges are frozen solid but the center is still slightly soft. This usually takes about 2-3 hours. This partial freezing helps to prevent large ice crystals from forming, resulting in a smoother final texture.
- Spoon the partially frozen mixture into a large bowl.
- Using an electric mixer on medium speed, beat the mixture until it is smooth and creamy. Alternatively, you can return the mixture to the food processor and whirl it until smooth. This step breaks up any ice crystals that have formed during the initial freezing process.
- Transfer the beaten mixture to a freezer container. Place a piece of plastic wrap directly on the surface of the pear ice to prevent ice crystals from forming during long-term freezing.
- Cover the container tightly and freeze until firm, approximately 6 to 8 hours at 0°F or colder. This final freezing period ensures that the pear ice is solid enough to scoop and serve.
- To serve, scoop the pear ice into individual dessert dishes and garnish with fresh mint sprigs.
Expert Tips & Tricks
- Pear Selection: Use ripe but firm pears for the best flavor and texture. Varieties like Bartlett, Anjou, or Bosc work well. Avoid pears that are overly soft or bruised.
- Lemon Zest: When zesting the lemon, be careful to avoid the white pith underneath the peel, as it can be bitter.
- Freezing Time: The freezing time may vary depending on your freezer. Check the consistency after 6 hours and continue freezing until firm enough to scoop.
- Smooth Texture: The key to a smooth pear ice is to break up ice crystals during the freezing process. The partial freezing and beating steps are crucial.
- Flavor Boost: For a more intense pear flavor, consider adding a teaspoon of pear extract along with the vanilla.
- Make Ahead: The pear ice can be made several days in advance and stored in the freezer until ready to serve.
Serving & Storage Suggestions
Serve the Fresh Pear Ice chilled, scooped into bowls or cones. The delicate sweetness and refreshing qualities make it a perfect palate cleanser after a rich meal or a light and satisfying dessert on a warm day.
Leftover pear ice should be stored in an airtight freezer container with plastic wrap pressed against the surface to prevent ice crystals from forming. Properly stored, it can last for up to 2 weeks in the freezer. It’s best enjoyed within this timeframe for optimal flavor and texture.
Avoid letting the pear ice sit out at room temperature for extended periods, as it will melt quickly. If it melts slightly, you can refreeze it, but the texture may be slightly less smooth.
Nutritional Information
| Nutrient | Amount per Serving | % Daily Value |
|---|---|---|
| Calories | 242 kcal | N/A |
| Calories from Fat | 2 g | 1% |
| Total Fat | 0.2 g | 0% |
| Saturated Fat | 0 g | 0% |
| Cholesterol | 0 mg | 0% |
| Sodium | 4.7 mg | 0% |
| Total Carbohydrate | 63.4 g | 21% |
| Dietary Fiber | 6 g | 23% |
| Sugars | 52.2 g | N/A |
| Protein | 0.8 g | 1% |
Note: Percent Daily Values are based on a 2,000 calorie diet. Sugar values are not provided as a percentage.
Variations & Substitutions
- Spice It Up: Add a pinch of ground ginger or cardamom to the syrup for a warming flavor.
- Citrus Twist: Instead of lemon zest, try using orange or lime zest for a different citrusy aroma. You can also substitute the lemon juice with the corresponding citrus juice.
- Berry Swirl: Swirl in a small amount of pureed raspberries or strawberries into the pear mixture before freezing for a beautiful color and flavor contrast.
- Wine Infusion: Add a splash of white wine (like a Riesling or Gewürztraminer) to the syrup for a more sophisticated flavor profile (ensure alcohol is appropriate for your audience).
- Pear Variety: Experiment with different pear varieties to discover your favorite flavor combination.
FAQs (Frequently Asked Questions)
Q: Can I use canned pears instead of fresh pears?
A: While fresh pears are recommended for the best flavor and texture, you can use canned pears in a pinch. Be sure to drain them well and reduce the amount of sugar in the recipe accordingly, as canned pears are often packed in syrup.
Q: Why is it important to partially freeze and then re-beat the mixture?
A: This process helps to break up large ice crystals that can form during freezing, resulting in a smoother, creamier texture in the final product.
Q: How can I prevent ice crystals from forming during long-term storage?
A: Placing a piece of plastic wrap directly on the surface of the pear ice before covering the container helps to minimize air exposure and prevent ice crystal formation.
Q: Can I make this recipe without an ice cream maker?
A: Yes! This recipe is specifically designed to be made without an ice cream maker, relying on the partial freezing and beating method to achieve a smooth texture.
Q: Is there a way to reduce the sugar content in this recipe?
A: You can reduce the sugar slightly, but be aware that sugar contributes to the texture and prevents it from becoming too icy. Start by reducing the sugar by ¼ cup and taste as you go. You can also substitute a portion of the sugar with a natural sweetener like honey or agave syrup.
Final Thoughts
The simplicity of Fresh Pear Ice is its greatest strength. It’s a humble recipe that allows the natural sweetness and delicate flavor of pears to shine through. I urge you to try this recipe and experience the pure, refreshing taste of summer. Feel free to adapt it to your liking, experimenting with different spices or citrus fruits. Share your creations with friends and family, and let the sweet memories begin! Perhaps you’ll even inspire the next generation with your own frozen treat traditions.