
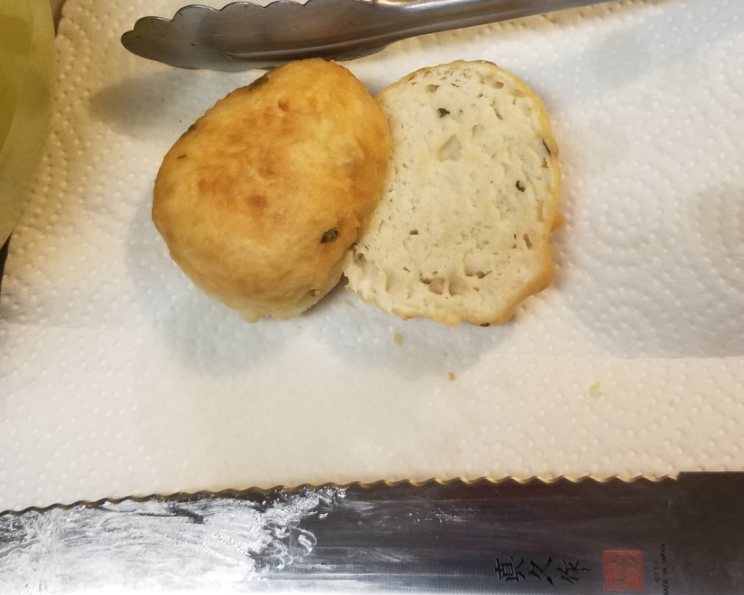
Fried Bread (I Call It Bannock)
The scent of frying dough and hot oil – it takes me right back to childhood. I remember standing on a stool next to my grandmother, her hands dusted with flour, patiently showing me how to pat out the dough. We’d fry it up in a well-worn cast iron skillet, the bannock puffing up into golden pillows. The best part? Slathering it with butter and my grandmother’s homemade wild berry jam. That simple pleasure, that warm, comforting taste, is a love language passed down through generations.
Recipe Overview
- Prep Time: 1 hour (minimum resting time)
- Cook Time: 10-15 minutes
- Total Time: 1 hour 15 minutes
- Servings: 3-4
- Yield: 3-4 pieces of Fried Bread
- Dietary Type: Vegetarian (easily made vegan)
Ingredients
- 1 cup flour
- 1 tablespoon sugar
- 1 teaspoon baking powder
- ¼ teaspoon salt
- ½ cup cold water
- Oil, for deep-frying (vegetable, canola, or peanut oil work well)
Equipment Needed
- Large mixing bowl
- Deep fryer or large skillet
- Tongs
- Paper towels
Instructions
- In a large mixing bowl, combine the flour, sugar, baking powder, and salt.
- Gradually add the cold water to the dry ingredients. Mix until just combined. Don’t overmix; it’s okay if there’s a little flour left and the dough is slightly sticky. This is the type of fried bread you will be picking up to shape.
- Cover the bowl and let the dough sit for at least 1 hour. The longer it sits, the fluffier the fried bread will be. You can even let it sit longer, up to several hours. This resting period allows the gluten to relax, resulting in a softer texture.
- Once the dough has rested, heat up some oil for deep-fat frying. You can use a deep-fryer, which is a safer option, or a skillet filled with about 1 inch of oil.
- Heat the oil to 375°F (190°C). If you don’t have a thermometer, test the oil by dropping in a small piece of dough. It should bubble and brown in a couple of minutes.
- Oil your hands and countertop lightly. This prevents the dough from sticking.
- Divide the dough into 3-4 equal pieces.
- With oiled hands, take one piece of dough, cupping your hands together, like you are holding something precious. Pat the dough out to be just a little bigger than your whole hand. Aim for a thickness of about ¼ to ½ inch.
- Carefully place the flattened dough into the hot oil.
- Fry on one side until nice and golden brown. This can take anywhere from a couple of minutes to 5 minutes, depending on your equipment. A frying pan will typically take less time than a deep fryer.
- Using tongs, carefully flip the fried bread and fry on the other side until it is also nice and golden brown.
- Remove the fried bread from the oil and drain on paper towels.
- Serve immediately and enjoy!
Expert Tips & Tricks
- Resting is Key: Don’t skimp on the resting time for the dough. It makes a world of difference in the final texture.
- Oil Temperature: Maintaining the correct oil temperature is crucial. If the oil is too cool, the bread will absorb too much oil and become greasy. If it’s too hot, the outside will burn before the inside is cooked.
- Don’t Overcrowd: Fry the bread in batches to avoid lowering the oil temperature.
- Use Oil to Shape: Using oil on your hands and counter not only prevents sticking but also keeps your frying oil cleaner because less flour will come off the fried bread and fall to the bottom of the pan.
Serving & Storage Suggestions
Serve your freshly fried bread warm with butter and jam for a classic treat. It’s also fantastic as a side bread with soups, stews, or chili. For a heartier meal, top it with chili, cheese, lettuce, and tomato for Indian Tacos.
Leftover fried bread is best enjoyed fresh, but it can be stored in an airtight container at room temperature for up to 2 days. To reheat, you can lightly toast it in a toaster oven or warm it in a skillet over low heat. It can become slightly chewier when reheated. Freezing is not recommended as it will affect the texture significantly.
Nutritional Information
(Note: These values are approximate and will vary depending on the specific oil used and serving size.)
| Nutrient | Amount per Serving | % Daily Value |
|---|---|---|
| Calories | 250 kcal | 13% |
| Total Fat | 10g | 15% |
| Saturated Fat | 2g | 10% |
| Cholesterol | 0mg | 0% |
| Sodium | 350mg | 15% |
| Total Carbohydrate | 35g | 12% |
| Dietary Fiber | 2g | 8% |
| Sugars | 5g | |
| Protein | 5g | 10% |
Variations & Substitutions
- Vegan: Substitute the sugar with maple syrup or agave for a refined sugar-free option. Ensure the oil used is plant-based.
- Sweet Bannock: Add a teaspoon of cinnamon or other warm spices to the dry ingredients.
- Savory Bannock: Incorporate herbs like rosemary, thyme, or garlic powder into the dough for a savory twist.
- Cheese Bannock: Add shredded cheddar or parmesan cheese to the dough before frying.
- Gluten-Free: Substitute the all-purpose flour with a gluten-free all-purpose flour blend. Be sure to check the label to see if you need to add any additional binders like xanthan gum.
FAQs (Frequently Asked Questions)
Q: Why is my fried bread greasy?
A: The oil temperature may have been too low. Ensure the oil is at 375°F (190°C) before frying to prevent the bread from absorbing too much oil. Also, be sure to drain the fried bread well on paper towels.
Q: My fried bread is browning too quickly on the outside but is still doughy inside. What can I do?
A: The oil is likely too hot. Reduce the heat slightly to allow the inside to cook through before the outside burns.
Q: Can I make the dough ahead of time and fry it later?
A: Yes, you can make the dough ahead of time and store it in the refrigerator for up to 24 hours. Allow it to come to room temperature for about 30 minutes before frying.
Q: What kind of oil is best for frying?
A: Oils with a high smoke point, such as vegetable, canola, or peanut oil, are ideal for deep-frying.
Q: Can I bake this instead of frying?
A: While frying is traditional, you can bake it at 375°F (190°C) for approximately 15-20 minutes, or until golden brown. The texture will be different – less puffy and more dense, but still delicious.
Final Thoughts
I hope you’ll give this recipe a try and experience the simple joy of homemade fried bread. It’s a taste of tradition, a warm hug on a plate. Don’t be afraid to experiment with different toppings and flavors to make it your own. Whether you serve it with sweet jam or savory chili, I’m sure this dish will become a cherished favorite in your household. Enjoy!