
Fried Chicken Drumsticks Southern Style: A Crispy, Golden Delight
The memory is etched in my mind: a sweltering summer afternoon, cicadas buzzing a relentless song outside, and the unmistakable, tantalizing aroma of fried chicken wafting from Grandma’s kitchen. She stood over her ancient, well-seasoned cast iron skillet, tongs in hand, carefully turning each golden-brown drumstick. That first bite, the shattering crispness of the skin giving way to juicy, tender meat, was pure magic. It wasn’t just food; it was love, tradition, and a taste of home. Today, I’m sharing a recipe inspired by those cherished memories, a classic Southern-style fried chicken drumstick that will transport you to a simpler, more flavorful time.
Recipe Overview
- Prep Time: 20 minutes
- Cook Time: 25 minutes
- Total Time: 45 minutes
- Servings: 6
- Yield: 6 drumsticks
- Dietary Type: None specified
Ingredients
- 6 chicken legs
- 2 eggs (beaten)
- 4 cups vegetable oil
- 1 cup flour
- 1 teaspoon cayenne pepper
- 1 teaspoon paprika
- 1 teaspoon salt
Equipment Needed
- Large pot
- Large saucepan
- Large plate
- Bowl
- Tongs
- Plate lined with double-folded paper towels
Instructions
- Begin by partially cooking the chicken legs. In a large pot, bring water to a boil. Carefully add the chicken legs to the boiling water and let them cook for 10 minutes. This step ensures that the chicken is cooked through and remains juicy during the frying process.
- While the chicken is boiling, prepare your frying station. Pour the vegetable oil into a large saucepan. Heat the oil over medium heat. A deep-fry thermometer is helpful to ensure the oil reaches the ideal temperature of around 325°F (160°C).
- Prepare the flour mixture. On a large plate, combine the flour, cayenne pepper, paprika, and salt. Mix well to ensure the spices are evenly distributed throughout the flour. This mixture will form the crispy coating for your chicken.
- In a separate bowl, keep the beaten eggs. These will act as a binder, helping the flour mixture adhere to the chicken.
- Once the chicken has boiled for 10 minutes, remove it from the pot and allow it to cool slightly. This will make it easier to handle without burning yourself.
- Now, it’s time to coat the chicken. Take one chicken leg and dredge it thoroughly in the flour mixture, ensuring it’s completely coated.
- Next, dip the floured chicken leg into the beaten eggs, making sure it’s fully covered.
- Return the chicken leg to the flour mixture and coat it again, pressing the flour onto the chicken to create a thick, even coating. This double coating is crucial for achieving that signature crispy texture.
- Repeat steps 5-8 for each chicken leg.
- Once the vegetable oil is hot and shimmering, carefully place the coated chicken legs into the oil. Do not overcrowd the saucepan; fry up to 3 legs at a time to maintain the oil temperature and ensure even cooking.
- Fry the chicken legs until they are a beautiful golden brown, about 6-8 minutes per side. Use tongs to turn the chicken occasionally, ensuring even browning on all sides. The internal temperature of the chicken should reach 165°F (74°C). If the chicken is browning too quickly, reduce the heat slightly to prevent burning.
- Once the chicken legs are fried to a golden brown and cooked through, remove them from the oil using tongs. Place them on a plate lined with a double layer of paper towels to drain any excess oil.
- Allow the fried chicken legs to cool slightly before serving. This will prevent you from burning your mouth and allow the flavors to meld together.
Expert Tips & Tricks
- Brining: For extra juicy and flavorful chicken, consider brining the chicken legs in a saltwater solution for a few hours before cooking. This will help the chicken retain moisture during frying.
- Spice it up: Feel free to adjust the amount of cayenne pepper to suit your spice preference. You can also add other spices like garlic powder, onion powder, or smoked paprika to the flour mixture for added flavor.
- Buttermilk bath: Soaking the chicken in buttermilk for a few hours before coating can also enhance its tenderness and flavor.
- Oil Temperature: Maintaining a consistent oil temperature is crucial for achieving crispy, evenly cooked chicken. Use a deep-fry thermometer to monitor the oil temperature and adjust the heat as needed.
- Don’t Overcrowd: Overcrowding the pan will lower the oil temperature and result in soggy chicken. Fry in batches to maintain the ideal temperature.
Serving & Storage Suggestions
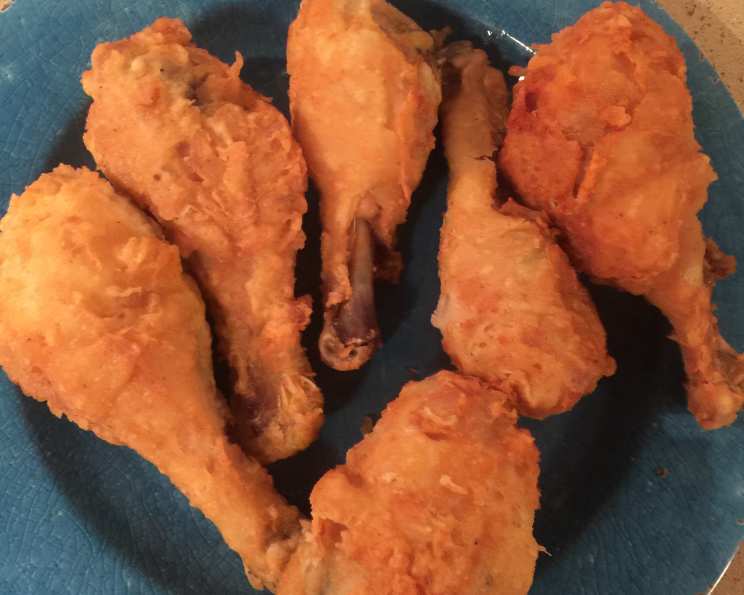
Serve these golden-brown fried chicken drumsticks hot, straight from the fryer, for the best flavor and crispness. They pair perfectly with classic Southern sides like mashed potatoes, coleslaw, corn on the cob, and biscuits. For a lighter meal, serve with a fresh salad and some grilled vegetables.
Leftover fried chicken can be stored in an airtight container in the refrigerator for up to 3-4 days. To reheat, preheat your oven to 350°F (175°C) and place the chicken on a baking sheet lined with parchment paper. Bake for 15-20 minutes, or until heated through and crispy. You can also reheat the chicken in an air fryer for a similar result. Avoid microwaving, as this will make the chicken soggy.
Fried chicken can also be frozen for longer storage. Wrap each drumstick individually in plastic wrap, then place them in a freezer-safe bag or container. Frozen fried chicken can be stored for up to 2-3 months. To reheat, thaw the chicken in the refrigerator overnight, then bake or air fry as described above.
Nutritional Information
| Nutrient | Amount per Serving | % Daily Value |
|---|---|---|
| Calories | 566 kcal | N/A |
| Total Fat | 94.2g | 145% |
| Saturated Fat | 8.3g | 42% |
| Cholesterol | 66.9mg | 22% |
| Sodium | 181.3mg | 8% |
| Total Carbohydrate | 5.5g | 2% |
| Dietary Fiber | 0.3g | 1% |
| Sugars | 0.1g | N/A |
| Protein | 11.6g | 23% |
Note: Nutritional information is an estimate and may vary based on specific ingredients and cooking methods.
Variations & Substitutions
- Gluten-Free: Substitute the all-purpose flour with a gluten-free flour blend for a gluten-free version. Add a teaspoon of xanthan gum to the flour mixture to help bind the ingredients.
- Spicy Kick: Add a pinch of cayenne pepper to the beaten eggs for an extra spicy kick. You can also use hot sauce in place of some of the eggs.
- Herb Infusion: Add dried herbs like thyme, rosemary, or oregano to the flour mixture for a more complex flavor.
- Cornstarch Coating: Replace half of the flour with cornstarch for an even crispier coating.
- Air Fryer Option: For a healthier alternative, try cooking the chicken in an air fryer. Preheat the air fryer to 400°F (200°C) and cook the chicken for 15-20 minutes, or until golden brown and cooked through, flipping halfway through.
FAQs (Frequently Asked Questions)
Q: Why do I need to boil the chicken before frying?
A: Boiling the chicken briefly helps to ensure that it is cooked through during the frying process, resulting in juicy and tender meat. It also reduces the frying time, which can prevent the coating from burning.
Q: Can I use a different type of oil for frying?
A: Yes, you can use other oils with a high smoke point, such as peanut oil, canola oil, or sunflower oil. Avoid using olive oil, as it has a lower smoke point and can burn easily.
Q: How do I know when the oil is hot enough?
A: The best way to determine if the oil is hot enough is to use a deep-fry thermometer. The ideal temperature is around 325°F (160°C). If you don’t have a thermometer, you can test the oil by dropping a small piece of flour into it. If the flour sizzles and turns golden brown in a few seconds, the oil is ready.
Q: My fried chicken is always soggy. What am I doing wrong?
A: Soggy fried chicken is usually caused by overcrowding the pan, using oil that isn’t hot enough, or not draining the chicken properly after frying. Make sure to fry in batches, maintain a consistent oil temperature, and place the chicken on a plate lined with paper towels to drain excess oil.
Q: Can I prepare the chicken ahead of time?
A: Yes, you can prepare the chicken up to the point of frying. Coat the chicken legs in the flour mixture and store them in the refrigerator for up to 24 hours. When you’re ready to fry, remove the chicken from the refrigerator 30 minutes before frying to allow it to come to room temperature.
Final Thoughts
This recipe for Southern-style fried chicken drumsticks is more than just a list of instructions; it’s a connection to tradition, a celebration of flavor, and a warm embrace from the past. I encourage you to try it, experiment with your favorite spices, and create your own family memories around this classic dish. Don’t be afraid to get a little messy, and most importantly, enjoy the process! Share your creations and feedback, and perhaps pair these crispy delights with a refreshing glass of iced tea for the ultimate Southern experience. Happy frying!