
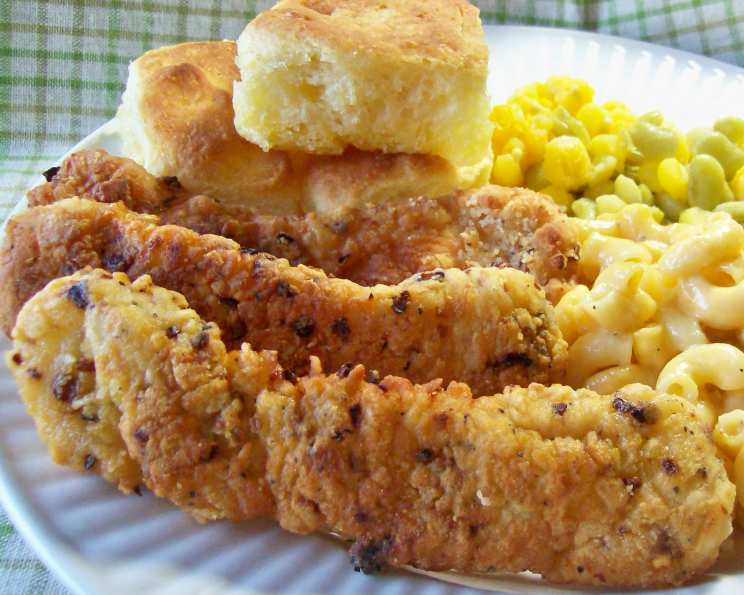
Golden-Fried Chicken Fingers: Restaurant-Style Perfection at Home
My grandmother, bless her heart, wasn’t much of a cook. Her repertoire consisted mainly of boiled vegetables and bland roasts. However, there was one dish that always earned a spot on the family table: her famous fried chicken fingers. They weren’t fancy – just crispy, golden strips of chicken that we devoured with reckless abandon. Every bite was an act of pure, unadulterated joy. Now, decades later, I’ve perfected my version of this classic, and I’m excited to share my secrets with you.
Recipe Overview
- Prep Time: 15 minutes
- Cook Time: 10 minutes
- Total Time: 25 minutes
- Servings: 4
- Dietary Type: None Specified
Ingredients
- 1 lb chicken tenders
- 1 cup all-purpose flour
- 3 eggs
- 1 tablespoon seasoned salt (or to taste)
- ½ tablespoon red pepper flakes (or to taste)
- ½ tablespoon black pepper (or to taste)
- ¼ cup milk
- 2 cups canola oil (or enough for pan frying)
Equipment Needed
- Frying pan
- Shallow dishes (3)
- Fork
- Tongs
- Paper towels
Instructions
-
Begin by heating the canola oil in a frying pan over medium-high heat. You’ll want enough oil to reach about ½ inch deep in the pan. The oil is ready when a small pinch of flour sizzles gently when dropped in. Ensure the oil is hot enough for the chicken to be fried and get a crisp texture.
-
In a shallow dish, combine the all-purpose flour, seasoned salt, red pepper flakes, and black pepper. Use a fork to mix the dry ingredients until they are thoroughly blended. This ensures even seasoning on the chicken.
-
In a separate shallow dish, whisk together the eggs and milk. This creates an egg wash that will help the flour mixture adhere to the chicken tenders.
-
Now it’s time to coat the chicken tenders. First, dredge each tender in the flour mixture, ensuring it’s completely coated. Shake off any excess flour.
-
Next, dip the flour-coated tender into the egg mixture, again making sure it’s fully covered. Allow any excess egg to drip off.
-
Finally, return the tender to the flour mixture for a second coating, pressing gently to ensure the flour adheres well. This double coating is what gives the chicken fingers their extra-crispy texture.
-
Carefully place the coated chicken tenders into the hot oil. Don’t overcrowd the pan; cook in batches if necessary to maintain the oil temperature.
-
Fry the chicken fingers until they are golden brown and cooked through, about 5-7 minutes per tender, flipping halfway through to ensure even cooking. The internal temperature should reach 165°F (74°C) for food safety.
-
Remove the fried chicken fingers from the pan and place them on a plate lined with paper towels to drain any excess oil.
-
Serve immediately and enjoy!
Expert Tips & Tricks
- Spice it up: Don’t be afraid to adjust the spices to your liking. A dash of garlic powder, onion powder, or paprika can add depth of flavor. You can also experiment with different types of peppers for varying levels of heat.
- Brining the Chicken: For extra juicy chicken, consider brining the tenders in a salt and sugar solution for 30 minutes before coating. This helps to tenderize the meat and add moisture.
- Temperature is Key: Maintaining the correct oil temperature is crucial for crispy, non-greasy chicken fingers. If the oil is too cool, the chicken will absorb too much oil and become soggy. If it’s too hot, the outside will burn before the inside is cooked through. Use a thermometer to monitor the oil temperature and adjust the heat as needed. Ideally, aim for around 325-350°F (160-175°C).
- Breading Consistency: Make sure your flour mixture is free of any lumps, as this can affect the texture and evenness of the breading.
- Make ahead: The chicken can be breaded in advance and stored in the refrigerator for up to 24 hours. This is a great time-saver when you’re preparing for a party.
- Avoiding Soggy Chicken: For extra crispy chicken ensure that the pan is not overcrowded. Add chicken in batches and allow to cook undisturbed.
Serving & Storage Suggestions
Serve your golden-fried chicken fingers immediately while they are still hot and crispy. They are delicious on their own or with your favorite dipping sauces, such as buffalo wing sauce, honey mustard, BBQ sauce, ranch dressing, or even a simple ketchup.
Storage: Leftover chicken fingers can be stored in an airtight container in the refrigerator for up to 3-4 days. They are best reheated in an oven or air fryer to retain their crispiness.
Reheating: To reheat, preheat your oven or air fryer to 350°F (175°C). Place the chicken fingers on a baking sheet and heat for about 10-15 minutes, or until warmed through and crispy. Avoid microwaving, as this will make them soggy.
Nutritional Information
| Nutrient | Amount per Serving | % Daily Value |
|---|---|---|
| Calories | 637 kcal | 32% |
| Total Fat | 142g | 218% |
| Saturated Fat | 3.4g | 17% |
| Cholesterol | 107mg | 36% |
| Sodium | 96mg | 4% |
| Total Carbohydrate | 12.9g | 4% |
| Dietary Fiber | 0.6g | 2% |
| Sugars | 0.1g | 0% |
| Protein | 16.3g | 33% |
Note: Nutritional information is an estimate and may vary based on specific ingredients and cooking methods.
Variations & Substitutions
- Gluten-Free: Use a gluten-free flour blend instead of all-purpose flour. Make sure your seasoned salt is also gluten-free.
- Spicy Chicken Fingers: Increase the amount of red pepper flakes or add a pinch of cayenne pepper to the flour mixture for a spicier kick.
- Buttermilk Chicken Fingers: Marinate the chicken tenders in buttermilk for at least 30 minutes before coating for extra tenderness and flavor.
- Herb-Infused: Add dried herbs like thyme, rosemary, or oregano to the flour mixture for a more complex flavor profile.
- Air Fryer Version: For a healthier alternative, you can cook these chicken fingers in an air fryer. Preheat your air fryer to 400°F (200°C) and cook for 12-15 minutes, flipping halfway through, until golden brown and cooked through. You may need to spray the chicken fingers with a little oil to help them crisp up.
FAQs (Frequently Asked Questions)
Q: Can I use chicken breasts instead of tenders?
A: Yes, you can use chicken breasts. Just cut them into strips that are about the same size as chicken tenders.
Q: How can I make sure the chicken is cooked through?
A: Use a meat thermometer to check the internal temperature of the chicken. It should reach 165°F (74°C) for safe consumption.
Q: Can I use a different type of oil for frying?
A: Yes, you can use other oils with a high smoke point, such as vegetable oil, peanut oil, or avocado oil.
Q: The breading keeps falling off the chicken. What am I doing wrong?
A: Make sure the chicken is dry before coating, and press the flour mixture firmly onto the chicken to help it adhere. Also, avoid overcrowding the pan, as this can lower the oil temperature and cause the breading to separate.
Q: Can I bake these instead of frying?
A: Yes, you can bake them. Place the breaded chicken fingers on a baking sheet lined with parchment paper and bake at 400°F (200°C) for about 20-25 minutes, flipping halfway through, until golden brown and cooked through. The texture will be different from fried chicken fingers, but they will still be delicious.
Final Thoughts
Now it’s your turn to create your own golden-fried chicken finger memories! This recipe is simple, satisfying, and endlessly customizable. Don’t be afraid to experiment with different spices and dipping sauces to create your perfect version. I guarantee these homemade chicken fingers will be a hit with your family and friends. So grab your ingredients, get in the kitchen, and let the frying begin. And as always, I’d love to hear about your experiences, so please share your feedback! These pair well with creamy coleslaw and potato wedges.