
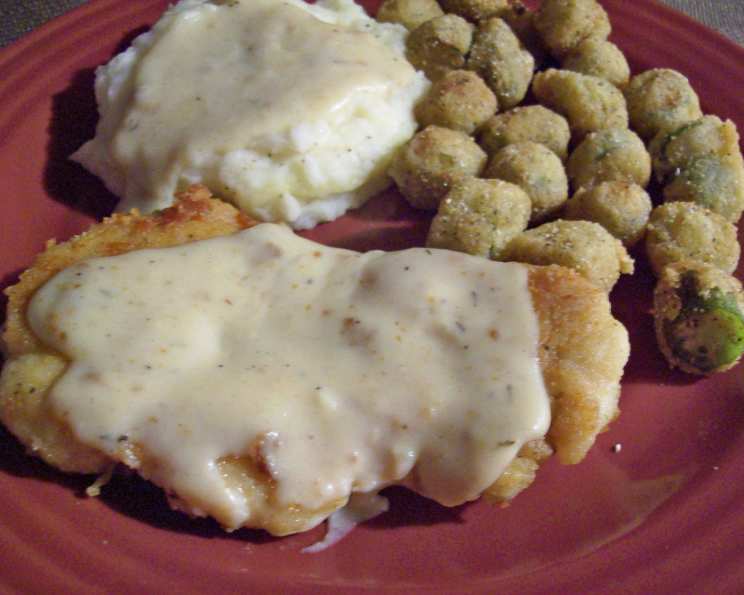
The Simple Comfort of Seasoned Flour Fried Chicken
Fried chicken. Just the words conjure up memories of Sunday suppers, family reunions, and that feeling of pure, unadulterated comfort. I remember being a kid, perched on a stool in my grandmother’s kitchen, mesmerized as she deftly dredged chicken pieces in a mysterious blend of flour and spices. The scent alone – a warm, savory promise – was enough to make my mouth water. It wasn’t just food; it was love, meticulously coated and perfectly fried. This recipe is an ode to those cherished moments, a streamlined version that delivers that same satisfying crunch and comforting flavor.
Recipe Overview
- Prep Time: 15 minutes
- Cook Time: 10-15 minutes
- Total Time: 25-30 minutes
- Servings: 6
- Dietary Type: Varies (see variations)
Ingredients
Seasoned Flour
- 1 cup white flour
- 2 teaspoons onion powder
- 1 teaspoon garlic powder
- 1 teaspoon poultry seasoning
- 1 teaspoon thyme
- 1⁄2 teaspoon curry powder
- 1⁄2 teaspoon salt
Fried Chicken
- 6 chicken pieces, skin and fat removed
- 1⁄4 cup olive oil or 1/4 cup canola oil
Equipment Needed
- Large bowl or shallow dish
- Paper bag
- Large skillet or frying pan
- Tongs
- Paper towels
Instructions
- Begin by preparing the seasoned flour. In a large bowl or shallow dish, thoroughly mix together the flour, onion powder, garlic powder, poultry seasoning, thyme, curry powder, and salt. Ensure all spices are evenly distributed throughout the flour. This is the key to a flavorful and evenly coated chicken.
- Wash the chicken pieces under cold water and then pat them completely dry with paper towels. Removing excess moisture is crucial for achieving a crispy coating; wet chicken will steam instead of fry.
- Place the seasoned flour mixture into a paper bag. Add the chicken pieces, one at a time, to the bag. Shake the bag vigorously to thoroughly coat each piece of chicken with the seasoned flour. Ensure every crevice is covered for maximum flavor and texture.
- Heat the olive oil or canola oil in a large skillet or frying pan over medium-high heat. The oil should be hot enough to sizzle gently when a small pinch of flour is dropped into it. Avoid overheating the oil, as it can burn the chicken before it cooks through.
- Carefully place the flour-coated chicken pieces into the heated oil, ensuring not to overcrowd the pan. Overcrowding will lower the oil temperature and result in soggy chicken. Work in batches if necessary.
- Fry the chicken for 10-15 minutes, turning once, until the meat is cooked through and the coating is golden brown and crispy. The internal temperature of the chicken should reach 165°F (74°C). Use a meat thermometer to ensure accurate doneness.
- Once cooked, remove the chicken pieces from the skillet and place them on a plate lined with paper towels to drain any excess oil. This will help maintain the crispiness of the coating.
- Serve immediately and enjoy!
Expert Tips & Tricks
- Double Dredge for Extra Crunch: For an even thicker and crispier coating, dredge the chicken in the seasoned flour, then dip it in a mixture of beaten egg and milk (or buttermilk!), and then dredge it again in the seasoned flour.
- Spice It Up: Adjust the spice levels to your preference. Add a pinch of cayenne pepper or a dash of hot sauce to the seasoned flour for a spicier kick.
- Oil Temperature is Key: Maintaining a consistent oil temperature is crucial for perfectly fried chicken. Use a thermometer to monitor the oil and adjust the heat as needed. If the chicken is browning too quickly, lower the heat. If it’s not browning enough, increase the heat slightly.
- Buttermilk Brine: Soak the chicken pieces in buttermilk for at least 30 minutes (or up to overnight) before dredging them in the flour. This will tenderize the meat and add a tangy flavor.
- Use a Cast Iron Skillet: If you have a cast iron skillet, use it! Cast iron retains heat exceptionally well, ensuring even cooking and a beautiful golden-brown crust.
- Consider using chicken thighs for extra flavour and juicy texture.
Serving & Storage Suggestions
Serve your freshly fried chicken hot and crispy. It pairs perfectly with classic sides like mashed potatoes, coleslaw, corn on the cob, and biscuits. For a lighter meal, try serving it with a fresh salad.
Storage: Leftover fried chicken can be stored in an airtight container in the refrigerator for up to 3-4 days.
Reheating: To reheat, preheat your oven to 350°F (175°C). Place the chicken on a baking sheet lined with parchment paper and bake for 10-15 minutes, or until heated through and crispy. Alternatively, you can reheat it in an air fryer for a similar result. Avoid microwaving, as it will make the chicken soggy.
Nutritional Information
Note: Nutritional information is an estimate and may vary based on specific ingredients and cooking methods.
| Nutrient | Amount per Serving | % Daily Value |
|---|---|---|
| Calories | 242 kcal | 12% |
| Fat | 14 g | 21% |
| Saturated Fat | 2 g | 9% |
| Cholesterol | 0 mg | 0% |
| Sodium | 293 mg | 12% |
| Carbohydrates | 26 g | 8% |
| Fiber | 1 g | 4% |
| Sugars | 1 g | 2% |
| Protein | 4 g | 7% |
Variations & Substitutions
- Gluten-Free: Use a gluten-free flour blend instead of all-purpose flour. Add a teaspoon of xanthan gum for better binding.
- Spicy Fried Chicken: Add 1-2 teaspoons of cayenne pepper or your favorite hot sauce to the seasoned flour.
- Herbed Chicken: Experiment with different herbs like rosemary, oregano, or basil in the seasoned flour.
- Baked “Fried” Chicken: For a healthier option, you can bake the chicken instead of frying it. Preheat your oven to 400°F (200°C). Place the dredged chicken on a baking sheet lined with parchment paper and bake for 30-40 minutes, or until cooked through and golden brown.
- Lemon Pepper Chicken: Add lemon zest and black pepper to the flour mixture for a zesty and flavorful twist.
FAQs (Frequently Asked Questions)
Q: Can I use bone-in chicken pieces for this recipe?
A: Yes, you can use bone-in chicken pieces. However, be sure to adjust the cooking time accordingly to ensure the chicken is cooked through. It may take a few minutes longer.
Q: Can I prepare the seasoned flour in advance?
A: Absolutely! The seasoned flour can be mixed ahead of time and stored in an airtight container for several weeks. This makes it a quick and easy meal to prepare.
Q: How do I know when the chicken is cooked through?
A: The best way to ensure the chicken is cooked through is to use a meat thermometer. Insert the thermometer into the thickest part of the chicken; it should register 165°F (74°C).
Q: Why is my fried chicken soggy?
A: Soggy fried chicken is often caused by overcrowding the pan or not using hot enough oil. Make sure the oil is at the right temperature, and fry the chicken in batches to avoid lowering the oil temperature. Also, ensure the chicken is patted dry before dredging it in flour.
Q: Can I use different types of oil for frying?
A: Yes, you can use other oils with a high smoke point, such as peanut oil, vegetable oil, or avocado oil.
Final Thoughts
This seasoned flour fried chicken is more than just a recipe; it’s an invitation to create your own memories in the kitchen. Don’t be afraid to experiment with different spices and herbs to create your signature flavor. Gather your loved ones, put on some music, and enjoy the process of creating something delicious together. I encourage you to try this recipe and share your own variations and feedback. Serve it with your favorite sides and a refreshing beverage for a truly satisfying meal. Happy frying!