
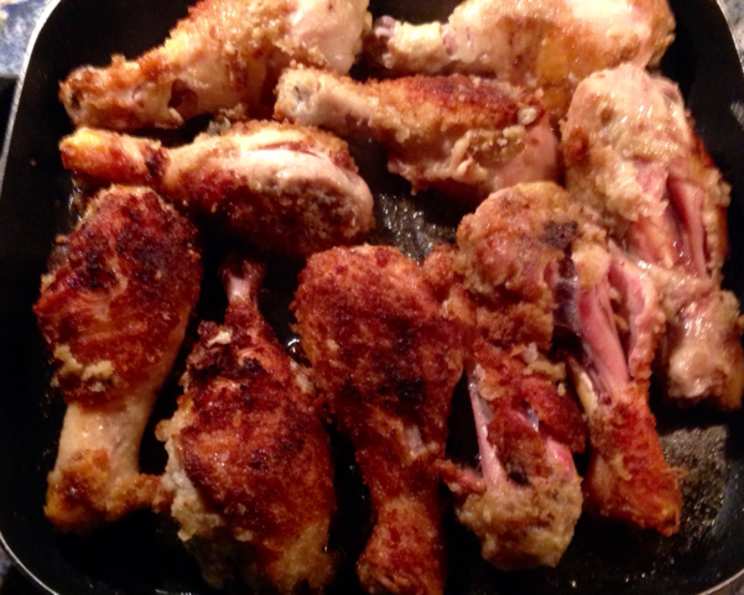
Fried Chicken Legs Done My Way!
There’s something about the satisfying crunch of perfectly fried chicken that just takes me back to my childhood. I remember summers spent at my grandma’s, the aroma of seasoned flour and sizzling oil filling the air as she worked her magic at the stove. Her fried chicken was legendary, a crispy, juicy masterpiece that everyone devoured. While I’ve experimented with countless variations over the years, this recipe for fried chicken legs, with my own special blend of spices, is my humble attempt to recreate that nostalgic taste of home.
Recipe Overview
- Prep Time: 15 minutes
- Cook Time: 40 minutes
- Total Time: 55 minutes
- Servings: 12
- Dietary Type: Comfort Food
Ingredients
- 12 chicken legs
- 2 cups self-rising flour
- 1 teaspoon salt
- 2 teaspoons fresh ground black pepper
- 1 teaspoon seasoning salt (I use Johnny’s)
- 2 chicken bouillon cubes, crushed
- ¼ teaspoon beau monde seasoning (Spice Island brand)
- 1 cup oil
- 2 teaspoons butter or 2 teaspoons Butter Flavor Crisco
Equipment Needed
- Large electric skillet
- Large plastic bag or bread bag
- Paper towels
Instructions
-
Begin by heating a large electric skillet to 375°F.
-
Add the oil and butter (or Butter Flavor Crisco) to the skillet and allow them to heat until hot. This mixture adds both flavor and helps to achieve a beautiful golden-brown crust.
-
While the oil is heating, prepare the flour mixture. In a large plastic baggie (a bread bag works well too!), combine the self-rising flour, salt, black pepper, seasoning salt, crushed chicken bouillon cubes, and beau monde seasoning. Seal the bag and shake vigorously to ensure all ingredients are thoroughly blended. This is where the magic happens – the combination of spices creates a truly unforgettable flavor.
-
Wash the chicken legs thoroughly and pat them dry with paper towels. Removing excess moisture is crucial for achieving crispy skin.
-
Place the dried chicken legs into the plastic bag with the flour mixture. Seal the bag tightly and shake well to coat each leg completely. Make sure every nook and cranny is covered for maximum flavor and crispness.
-
Carefully place the coated chicken legs into the hot oil in the skillet. Be sure not to overcrowd the pan, as this will lower the oil temperature and result in soggy chicken. You may need to fry the chicken in batches.
-
Fry the chicken legs, turning them every 10 minutes, until browned evenly on all sides. A deep, golden-brown color is what you’re aiming for.
-
Once browned, reduce the heat slightly and cover the skillet. Allow the chicken to cook, covered, for 10 minutes. This step helps to cook the chicken through without burning the outside.
-
Remove the cover and turn the chicken legs over. Cover the skillet again and cook for another 10 minutes.
-
Remove the lid. Increase the heat again and fry the chicken until crisp, turning every 5 minutes for a total of 15 minutes. Keep a close eye on the chicken during this final stage to prevent burning.
-
Once the chicken legs are beautifully crisp and cooked through, remove them from the oil and place them on paper towels to drain any excess oil.
-
Serve immediately and enjoy the crispy, flavorful goodness!
Expert Tips & Tricks
- For extra crispy skin, consider double-dredging the chicken legs. After the initial coating, dip them in an egg wash (1 egg beaten with 1 tablespoon of water) and then dredge them again in the flour mixture.
- Don’t be afraid to experiment with the seasoning blend! A pinch of garlic powder, onion powder, or smoked paprika can add a unique twist.
- If you don’t have an electric skillet, a large, heavy-bottomed pot will also work. Just be sure to monitor the oil temperature closely. Use a deep-fry thermometer to ensure accuracy.
- To prevent the chicken from sticking to the bottom of the skillet, make sure the oil is hot enough before adding the legs.
- If your chicken is browning too quickly, reduce the heat further and continue cooking until the internal temperature reaches 165°F. Use a meat thermometer to be sure.
Serving & Storage Suggestions
Serve these crispy fried chicken legs hot, straight from the skillet! They are delicious on their own, or paired with classic sides like mashed potatoes, coleslaw, corn on the cob, or green beans.
Leftover fried chicken legs can be stored in an airtight container in the refrigerator for up to 3 days. To reheat, preheat your oven to 350°F. Place the chicken legs on a baking sheet and bake for 10-15 minutes, or until heated through and crispy. Microwaving is not recommended as it can make the chicken soggy.
While freezing is possible, it can affect the texture of the skin. If you do freeze them, wrap them individually in plastic wrap and then place them in a freezer bag. They can be stored in the freezer for up to 2 months. Thaw them in the refrigerator overnight before reheating.
Nutritional Information
| Nutrient | Amount per Serving | % Daily Value |
|---|---|---|
| Calories | 832.5 kcal | N/A |
| Calories from Fat | 531 g | 64% |
| Total Fat | 59 g | 90% |
| Saturated Fat | 12.8 g | 63% |
| Cholesterol | 210.6 mg | 70% |
| Sodium | 1132.7 mg | 47% |
| Total Carbohydrate | 23.7 g | 7% |
| Dietary Fiber | 1 g | 3% |
| Sugars | 0.2 g | 1% |
| Protein | 48.8 g | 97% |
Note: Nutritional information is an estimate and may vary based on specific ingredients and cooking methods.
Variations & Substitutions
- Spice it up: Add a pinch of cayenne pepper or a dash of hot sauce to the flour mixture for a spicy kick.
- Buttermilk marinade: Soak the chicken legs in buttermilk for at least 30 minutes (or up to 24 hours) before dredging them in the flour mixture. This will tenderize the chicken and add a tangy flavor.
- Gluten-free: Use a gluten-free all-purpose flour blend instead of self-rising flour. You may also need to add a pinch of xanthan gum for better binding.
- Herb-infused: Add dried herbs like thyme, rosemary, or oregano to the flour mixture for a more complex flavor profile.
- Lemon pepper: Substitute the black pepper with lemon pepper for a bright, citrusy twist.
FAQs (Frequently Asked Questions)
Q: Why use self-rising flour?
A: Self-rising flour contains baking powder and salt, which helps to create a lighter and crispier crust. It also simplifies the recipe by eliminating the need to add these ingredients separately.
Q: Can I use other cuts of chicken with this recipe?
A: Yes, this recipe can be adapted for other cuts of chicken, such as thighs or drumsticks. However, cooking times may need to be adjusted accordingly. Breasts are not recommended, as they tend to dry out more easily when fried.
Q: How do I know when the chicken is done?
A: The best way to ensure the chicken is cooked through is to use a meat thermometer. Insert the thermometer into the thickest part of the leg, being careful not to touch the bone. The internal temperature should reach 165°F.
Q: Can I bake these chicken legs instead of frying them?
A: While frying is essential for the crispy texture, you can bake the chicken legs if you prefer a healthier option. Preheat your oven to 400°F. Place the coated chicken legs on a baking sheet lined with parchment paper and bake for 30-40 minutes, or until cooked through.
Q: What is beau monde seasoning?
A: Beau monde seasoning is a blend of celery, onion, and salt, commonly used to enhance the flavor of various dishes. If you can’t find it, you can substitute it with a pinch of celery salt and onion powder.
Final Thoughts
So, there you have it – my take on perfectly fried chicken legs. This recipe is more than just a list of ingredients and instructions; it’s a piece of my heart, a tribute to the flavors of my childhood. I encourage you to give it a try, add your own personal touch, and create your own memories around this classic dish. Whether you’re serving it at a backyard barbecue, a family dinner, or a simple weeknight meal, I hope it brings you as much joy as it brings me. Don’t hesitate to share your feedback – I’m always eager to hear how it turns out! Perhaps pair these legs with a refreshing glass of iced tea or a crisp, dry coleslaw for the ultimate comfort food experience. Happy cooking!