
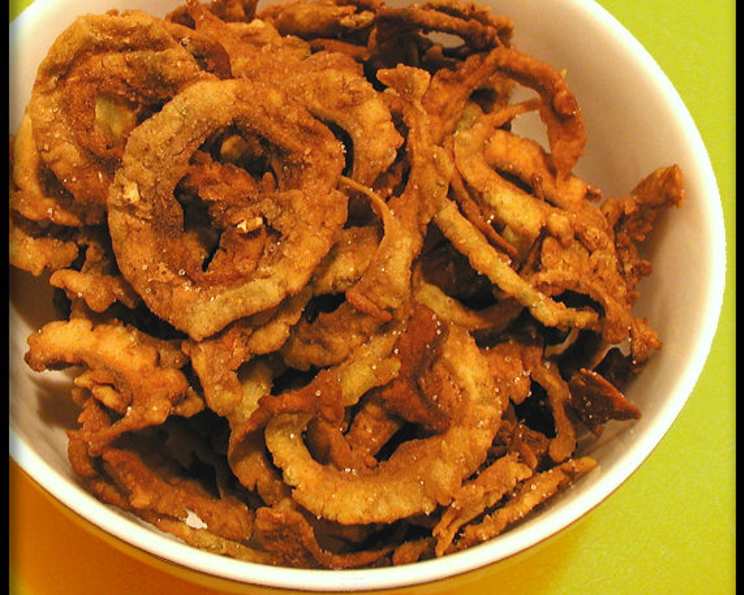
Crispy Fried Karela Chips: An Unexpected Delight
My earliest memories of karela, or bitter gourd, involve a comical battle of wills with my grandmother. She believed deeply in its health benefits, while I, a stubbornly picky child, was convinced it was the culinary equivalent of medicine. Each bite was a tiny, defiant act on my part, followed by a large gulp of water. It wasn’t until I started experimenting in the kitchen myself that I truly appreciated the complexity of this often-maligned vegetable, especially when transformed into these addictive, crispy chips. Now, I find myself craving the slight bitterness and satisfying crunch, a far cry from my childhood protests.
Recipe Overview
- Prep Time: 1 hour 5 minutes
- Cook Time: 5 minutes
- Total Time: 1 hour 10 minutes
- Servings: 6
- Yield: About 2 cups of chips
- Dietary Type: Vegan
Ingredients
- 3-4 karela (bitter gourds)
- 2 teaspoons salt
For the seasoning:
- 2 tablespoons rice flour
- 2 tablespoons besan flour (chickpea flour or gram flour)
- 1 teaspoon red chili powder (or more according to taste)
- Oil for deep frying (vegetable, canola, or peanut oil recommended)
Equipment Needed
- Colander
- Paper towels
- Ziploc bag or large bowl
- Wok or deep frying pan
Instructions
-
Begin by preparing the karela. Wash the bitter gourds thoroughly. Using a sharp knife or mandoline, slice each one into thin, half-moon shapes, approximately 1/8 inch thick. Uniformity in thickness is key for even cooking.
-
Transfer the sliced karela to a colander. Generously sprinkle the salt over the slices. Gently shake the colander to ensure the salt is distributed evenly. This crucial step helps to draw out the excess moisture and bitterness from the karela.
-
Let the salted karela rest in the colander for at least one hour. This allows the salt to work its magic, extracting the bitter juices. You’ll notice a significant amount of liquid collecting in the colander.
-
After an hour, squeeze out as much moisture as possible from the karela slices. Work in batches to ensure thorough removal of the salty water. The drier the karela, the crispier the final result.
-
Dry the squeezed karela slices on paper towels. Pat them dry to remove any remaining surface moisture. This step is essential for achieving that perfect crunch.
-
Transfer the dried karela slices to a Ziploc bag or a large bowl.
-
In a separate small bowl, mix together the rice flour, besan flour (chickpea flour), and red chili powder. This is your seasoning blend. Adjust the amount of red chili powder to your preference – more for a fiery kick, less for a milder flavor.
-
Sprinkle the seasoning mixture over the karela slices in the bag or bowl. Close the bag securely or cover the bowl and shake well to ensure that the seasoning is evenly distributed over all the pieces. Alternatively, you can toss the karela and seasoning in a bowl using your hands.
-
Heat the oil in a wok or deep frying pan over medium-high heat. The oil should be deep enough to fully submerge the karela slices. To test if the oil is hot enough, drop a single karela slice into the oil. It should sizzle immediately and start to brown within seconds.
-
Carefully fry the karela slices in batches. Avoid overcrowding the pan, as this will lower the oil temperature and result in soggy chips. Fry for approximately 2-3 minutes per batch, or until the karela slices are crisp and golden brown.
-
Using a slotted spoon or spider, remove the fried karela chips from the oil and place them on paper towels to drain excess oil.
-
Serve immediately and enjoy the crispy, slightly bitter, and utterly addictive Fried Karela Chips!
Expert Tips & Tricks
- Slicing Uniformly: Using a mandoline ensures even slices, which is critical for uniform cooking and crispness. If you don’t have a mandoline, take your time and aim for consistent thickness with a sharp knife.
- Moisture Removal is Key: Don’t skimp on the salting and squeezing process. The more moisture you remove, the less bitter and the crispier your chips will be.
- Oil Temperature Matters: Maintaining the correct oil temperature is essential. If the oil is not hot enough, the chips will absorb too much oil and become soggy. If it’s too hot, they’ll burn before they crisp up.
- Don’t Overcrowd the Pan: Fry in batches to prevent the oil temperature from dropping.
- Flavor Boost: Add a pinch of amchur powder (dried mango powder) to the seasoning for a tangy flavor. A dash of garam masala can also add warmth.
- Make Ahead: While best served immediately, you can prepare the karela slices up to a day in advance. Salt them, squeeze out the moisture, and store them in an airtight container in the refrigerator until ready to season and fry.
Serving & Storage Suggestions
Fried Karela Chips are best served immediately while they are still warm and crispy. They make an excellent accompaniment to Indian rice dishes, such as dal and curry, or can be enjoyed as a standalone snack. You can also use them as a crunchy topping for salads or soups.
To store leftover chips, let them cool completely and then transfer them to an airtight container. They will stay crispy for a few hours at room temperature. However, they tend to lose their crispness over time. You can try to revive them by briefly reheating them in a preheated oven at 300°F (150°C) for a few minutes, but they won’t be quite as good as freshly fried. Refrigeration is not recommended, as it will make them soggy. It is best to consume them within a day or two for optimal taste and texture.
Nutritional Information
| Nutrient | Amount per Serving | % Daily Value |
|---|---|---|
| Calories | 23.9 kcal | – |
| Calories from Fat | 1 g | 8% |
| Total Fat | 0.2 g | 0% |
| Saturated Fat | 0 g | 0% |
| Cholesterol | 0 mg | 0% |
| Sodium | 782.6 mg | 32% |
| Total Carbohydrate | 5.2 g | 1% |
| Dietary Fiber | 2 g | 7% |
| Sugars | 0 g | 0% |
| Protein | 0.9 g | 1% |
Note: Nutritional information is an estimate and may vary depending on the specific ingredients and portion sizes used.
Variations & Substitutions
- Gluten-Free: This recipe is naturally gluten-free, as it uses rice flour and besan flour.
- Spicy: Increase the amount of red chili powder or add a pinch of cayenne pepper for extra heat.
- Flavorful: Experiment with different spice blends. Try adding turmeric powder, cumin powder, or coriander powder to the seasoning.
- Flour Substitution: While rice flour and besan flour are traditional, you can substitute them with all-purpose flour or cornstarch if you don’t have them on hand. The texture may be slightly different.
- Air Fryer: For a healthier alternative, try cooking the karela chips in an air fryer. Preheat the air fryer to 375°F (190°C) and cook for 8-10 minutes, or until golden brown and crispy, flipping halfway through.
FAQs (Frequently Asked Questions)
Q: Why is the salting step so important?
A: Salting the karela draws out excess moisture and reduces its bitterness. This is crucial for achieving crispy chips with a more palatable flavor.
Q: Can I use any type of oil for frying?
A: Yes, you can use any neutral-flavored oil with a high smoke point, such as vegetable oil, canola oil, or peanut oil.
Q: How do I prevent the chips from becoming soggy?
A: Ensure the karela slices are thoroughly dried after salting and squeezing. Also, maintain the correct oil temperature and avoid overcrowding the pan.
Q: Can I bake these instead of frying them?
A: Baking will not achieve the same crispy texture as frying. However, you can try baking them at 350°F (175°C) for 20-25 minutes, flipping halfway through.
Q: What can I do if my chips are still too bitter?
A: Next time, try salting the karela for a longer period, up to 2 hours. You can also soak the sliced karela in water for 30 minutes after salting and squeezing to further reduce the bitterness.
Final Thoughts
Don’t let the name “bitter gourd” intimidate you! With a little preparation and the right technique, karela can be transformed into a surprisingly delicious and addictive snack. These crispy fried chips are a testament to the fact that even the most challenging ingredients can be transformed into culinary delights. So, venture out, find some karela, and give this recipe a try. I’m confident you’ll be pleasantly surprised! And, if you do make these, share your feedback – I’d love to hear how they turned out! These pair wonderfully with a cool glass of lassi or alongside your favorite Indian meal. Happy cooking!